Real Before and After Fixer Upper Renovations
Buying a fixer-upper home isn’t for everyone—but for many homeowners, it’s one of the most rewarding ways to create a home that truly reflects their style.
Instead of purchasing a house that someone else has already renovated, fixer-uppers allow you to choose your own materials, colors, and layout changes.
These before-and-after transformations show how older homes can become beautiful, functional spaces with the right updates and vision.
Considering purchasing a fixer-upper home? You’ll want to check out these before and after pictures first! Home improvement is a very popular activity. Get inspired to start your project after you see these before and after photos.
I’m including Before and After pictures of our both Florida home and our Virginia home. We purchased our Florida house in 2018 and took these pictures 4 years later. We purchased our Virginia house in 2014 and took the AFTER pictures 4 years later.
Why buy a home that needs work?
Maybe you like old homes with character, but for me, I prefer to add my personal touch and style to our home. I’d rather buy a home that needs work than one that has been flipped because I want to pick the countertops, the flooring, and the cabinets.
This is the second home that we’ve updated and sold within four years of owning. You can see pictures of our first home here.
The “after” pictures below were taken by a home-listing photographer and the rooms are staged to sell. It was not always this clean and minimal! But the staging, paint colors, and updates helped sell this home fast!
I hope you enjoy these pictures and the details that we added to make our house beautiful again!
In what order do you renovate a house?
In my opinion, the order that which you update or renovate a house depends on its current condition, your budget, and personal preference. I detail below which areas of the home we updated first and why.
Small home improvements that make a big difference
Sometimes it’s the little things that make the biggest impact when updating your home. Changing out the hardware on your kitchen cabinets, for example. Renovating a home can come with a high price tag if you’re not budgeting and deciding which small improvements bring the biggest return.
For more tips on small home updates that make the biggest difference, read 10 Cheap Home Hacks That’ll Make Your House Look So Much Better.
Floors
We updated the floors right away because the old floors in the kitchen area were linoleum and were peeling up everywhere. The floor in the rest of the living spaces was carpet and was also very worn so we replaced the entire main level with hardwood. We choose these 4″ hand-scraped (real) hickory hardwood floors and had them professionally installed before moving in. I love these hardwood floors and would happily install them in my next home. We get so many compliments on the color and the fact that they are hand-scraped so you can’t see scratches.
Lighting
To keep the lighting minimal effort, we choose to install recessed lights in the kitchen, entryway, and main level hallways. I chose this light for the kitchen breakfast table (the small), this chandelier for the stairwell, and this similar chandelier for the dining room.
Window Coverings
The kitchen window blinds were missing when we bought the house so I made some quick curtains until I decided on blinds. We ended up going with bamboo blinds from this store. We choose white wooden blinds for the upstairs windows and a standard pull-down blind for the main living level. The curtains for all windows except the kitchen are all white and this style.
Florida House Before and After Photos
We purchased our Florida house in 2018 and took the AFTER pictures 4 years later.
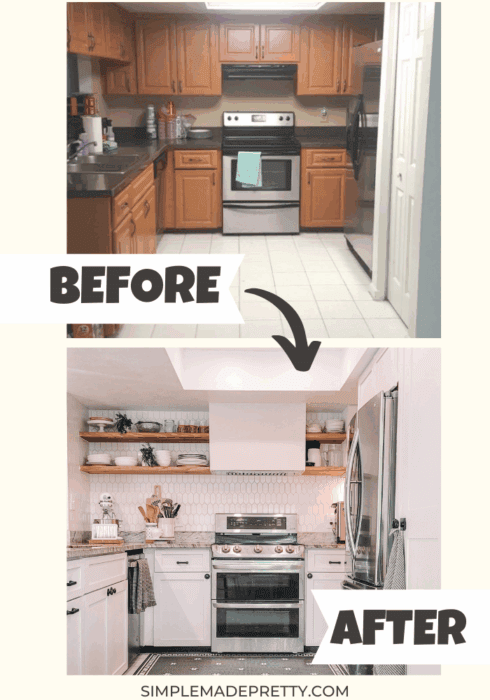
Before and After Kitchen Photos
If you are planning to purchase a home that needs work in the kitchen, this will probably bring the most return on investment. However, the cost to redo an entire kitchen can add up, that’s why we took our time with updates over a four-year period.
During the first year that we lived in this house, we replaced all of the appliances with high-end stainless steel LG appliances. The new appliances were installed over the next four years as we slowly updated the rest of the kitchen.
It wasn’t until three (3) years after owning this home that we had granite countertops installed. So you can see that each update was overtime so we didn’t have to spend a huge chunk of money at one time.
We painted the kitchen cabinets, then a bigger remodel with removing upper cabinets, replaced the doors and drawers, adding shelves, and hardware.
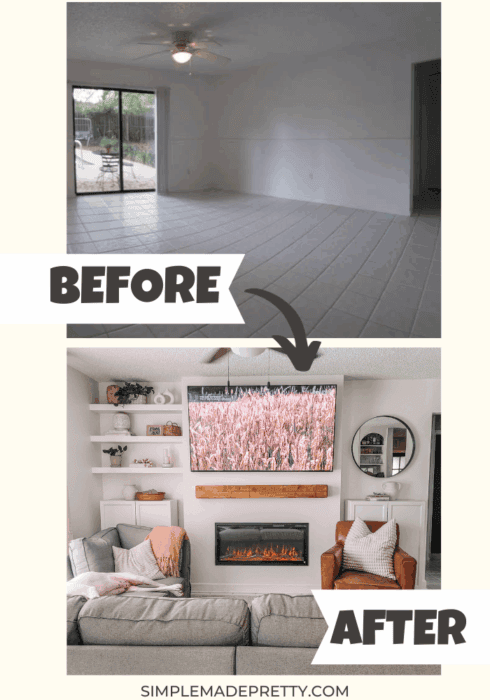
Living Room/Family Room Before and After
In the family room, we added an electric fireplace, painted the walls, and added curtains. What a difference that made!
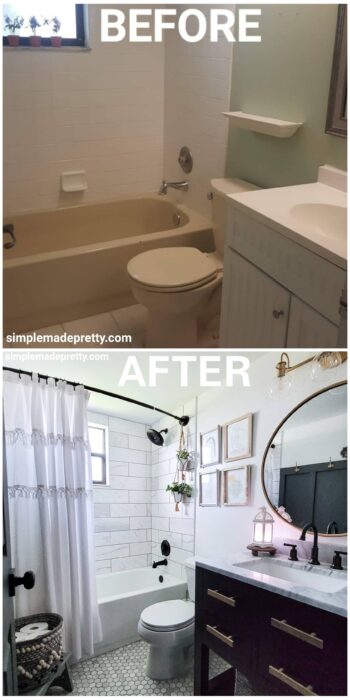
Before and After Bathrooms
We updated both bathrooms within one month of each other. You can see the info in the master bathroom in this post.
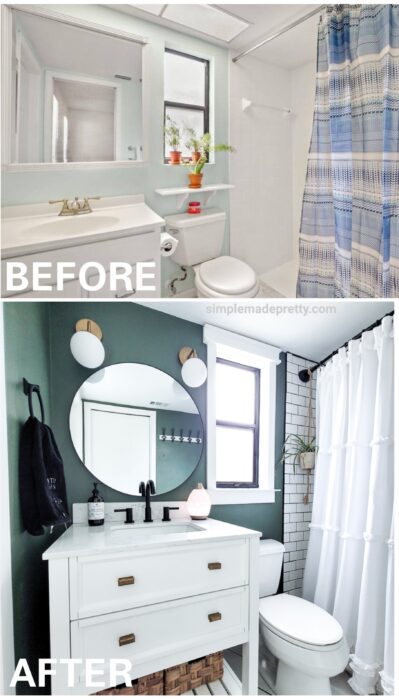
The hall bathroom (our kids use this bathroom) was updated about 2 years after purchasing the home. You can read how we updated the hall bathroom in this post.
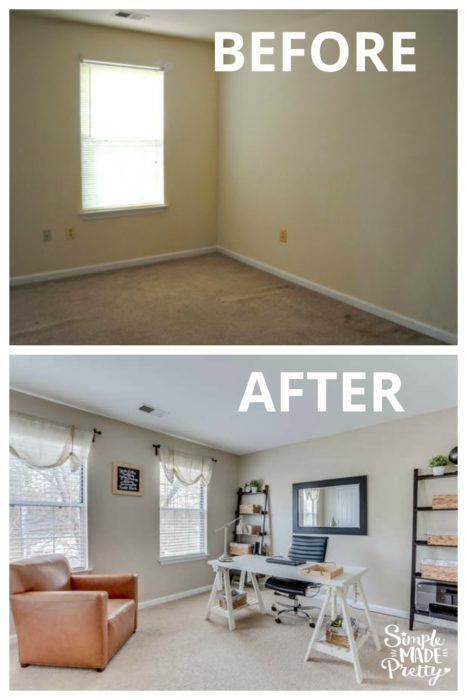
Home Office/Craft Room
You can see how we updated our home office below. We use the formal living room as our home office.
Mudroom/Closet Before and After
We converted our entryway closet into a mudroom 2 years after living in the house. The mudroom is in a hallway that connects the office and family room in the entryway from the garage. We only use the garage door when entering the house so it just made sense to turn the closet into an open-concept mudroom.
Entryway Before and After
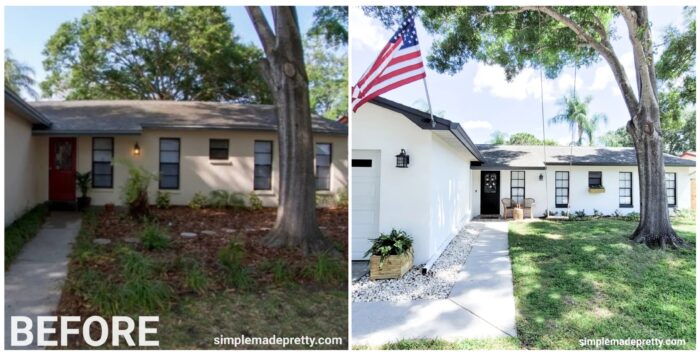
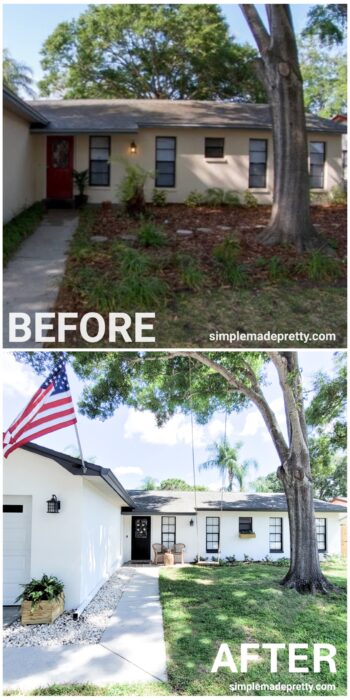
Exterior Before and After
We painted the entire house when we first moved in. I added window muntins (see how in this post) to make our windows look new. We had gutters installed, I painted the front door, and we remodeled the front porch (you can see how we updated the porch in this post).

We also built a DIY window box and matching planter boxes. We dug up the mulch and weeds in the front yard and laid down fresh sod to give our yard an update and curb appeal.
Backyard Before and After
We had a lot of work completed in our backyard, including pavers and resurfacing the pool. We had the huge tree removed, the backyard leveled, and a shed installed. We also removed the chain-link fence and installed a wood fence painted Gray.
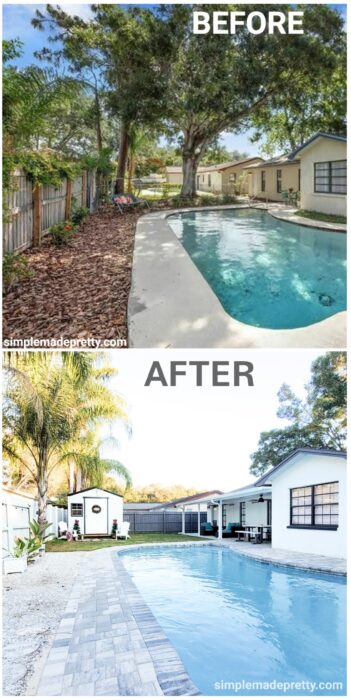
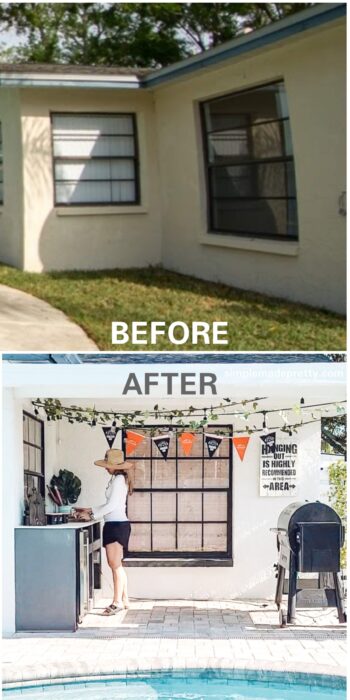
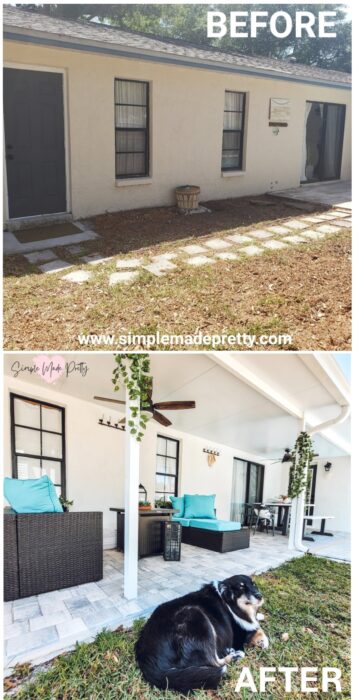
We also had a patio roof added on both sides of the house, which made a huge difference to extend our outdoor living space. We built an outdoor kitchen on one side of the house and you can see how we built the outdoor kitchen in this post.
We replaced the fence behind the pool and painted it white. We also added lots of tropical plants that will grow tall and provide privacy in the coming years.

My hubby did a lot of the work himself. He ran electricity to the shed and the patio roof and installed ceiling fans with lights. You can see more of our outdoor patio and links in this post.
Virginia House Before and After Photos
We purchased our Virginia house in 2014 and took the AFTER pictures 4 years later.
Before and After Kitchen Photos
If you are planning to purchase a home that needs work in the kitchen, this will probably bring the most return on investment. However, the cost to redo an entire kitchen can add up, that’s why we took our time with updates over a four-year period.
![]()
During the first year that we lived in this house, we replaced all of the appliances with high-end stainless steel GE Cafe-edition appliances. The new appliances were installed right away and over the next four years, we slowly updated the rest of the kitchen.
![]()
We painted the kitchen cabinets (you can see what color in this post) and added hardware two years after we bought the house.

It wasn’t until three (3) years after owning this home that we had granite countertops installed. So you can see that each update was overtime so we didn’t have to spend a huge chunk of money at one time.
Living Room/Family Room Before and After
In the family room, I whitewashed the fireplace, painted the walls, and added curtains. What a difference that made!
![]()
The wood floors in the formal living room make it look more formal.
![]()
Before and After Bathrooms
We updated the half bath right away because the toilet was in bad condition and I dislike pedestal sinks. We bought and returned two different vanities before finding one that would actually fit in the space so the door would close! Although we took measurements, we didn’t take the floor molding behind the vanity into consideration, lol. You can see the paint color in this bathroom in this post. We updated the mirror with a thrift store find and the lighting is from here.
![]()
The hall bathroom (our kids use this bathroom) was updated about a year after purchasing the home. You can read how we updated the hall bathroom in this post.
![]()
We updated our master bathroom about three years after owning the home. We painted the cabinets Sherwin Williams Repose Gray, added hardware, new faucets, new lighting, new tile floors, and a new shower door.
![]()
Master Bedroom Before and After
We painted one wall a different color in the master bedroom and you can read more about the paint colors in this post.
![]()
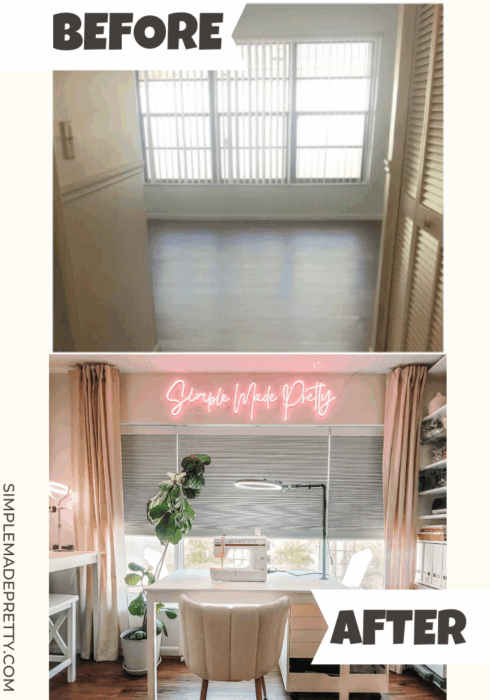
Office/Craft Room
You can see how we updated the Office over the years in this post and the Craft room updates in this post.
The craft room is actually a closet! It has a window, an HVAC vent, and an electrical outlet but it’s still considered a closet, go figure!
![]()
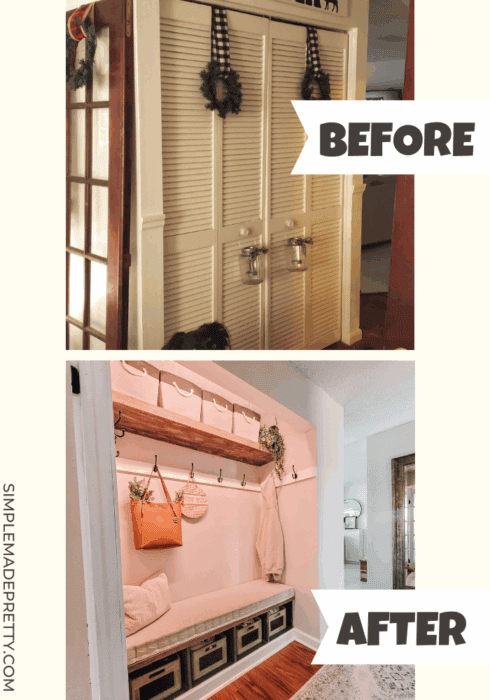
Mudroom/Closet Before and After
We converted a second pantry closet into a mudroom when we first bought the house. The mudroom is in a hallway that connects the kitchen and dining room and in the entryway from the garage. We only use the garage door when entering the house so it just made sense to turn the closet into an open-concept mudroom.
We built a floating shelf, and added hooks and a bench with storage baskets. The closet is much more functional since we live in an area with all 4-seasons of weather and during WInter have boots, coats, hats, and gloves that need to be stored away in the mudroom.
These large galvanized bins are very durable for shoe storage! I added handmade chalkboard labels to the large bins and these small bins for smaller items.
![]()
Stairwell
The chandelier in the stairwell was updated with this light fixture and we painted the walls with Sherwin Williams Perfect Greige.
![]()
Wrap up about Updating a Fixer Upper
Fixer-upper homes require vision, patience, and hard work—but the results can be incredibly rewarding. Seeing the transformation from outdated spaces to beautiful, functional rooms is one of the most satisfying parts of home improvement.
Whether you’re planning your own renovation or simply love before-and-after inspiration, these transformations prove that with the right updates, almost any house can become a dream home.
How to pick the right paint colors
Have you ever had trouble picking the right paint colors for your home? Choosing the right paint colors for your home can be overwhelming. There are so many different “whites” and “grays” these days, how can anyone know they are making the right paint color choice?
That’s why I put together the best tips on How to Choose Interior Paint Colors in this post.
Cheap Home Hacks that’ll Increase Value
If you enjoy updating your home, want to increase your home value, or just want your home to look better, you should check out the 10 Cheap Home Hacks That’ll Make Your House Look So Much Better.
Tour Our Homes
–>Tour our First Home here
–>Tour our Second Home here
–>Tour our Third Home here
I hope these before and after pictures inspired you to update your home 🙂

Psssssttt… Want more inspiration delivered directly to your inbox? Subscribe to our FREE weekly newsletter! We provide simple ideas for Organizing, Time Management, Handmade Projects, Crafts, Home Decor and more! Hurry up and sign up here!
Disclaimer: This post may contain affiliate links or a sponsored post. All opinions are always 100% mine and I don’t partner with any product or company that I don’t use and love. Please see our Full Disclosure for more information.
 Easy DIY Outdoor Kitchen
[…] –>>You can read more about our kitchen remodel with before and after pictures HERE. […]