DIY Mudroom Closet
In our second home in Virginia with 2 young kids, having a functional entryway mudroom was a must-have space in our home. We needed a place to put all the gear we used in a 4-season climate (snow boots, summer hats, and more!). So I shared How to Turn a Closet into a Mudroom in this post, originally published in January 2015. When we moved to Florida, there wasn’t a need for all the Winter gear and we drastically reduced our coats and boots. In fact, a coat closet wasn’t needed at all in Florida! So we turned the coat closet into a mini mudroom using the same method as the DIY closet mudroom in our second house. Keep reading to see our entryway closet makeover in both our second and third homes!

This tutorial was originally posted on January 23, 2015.
I posted a tutorial in January 2015 with the DIY Mudroom in our Second House and updated this post to reflect the DIY mudroom in our Third House 🙂
That said, keep reading through the end to see how we updated the mudroom in our Second house because we went through stages with the update to make it more affordable.
Want to see my latest DIY videos in Real-Time? Follow me on Instagram and YouTube!
–>>You can follow me on Instagram here
How Much Does it Cost to Turn a Closet into a Mudroom?
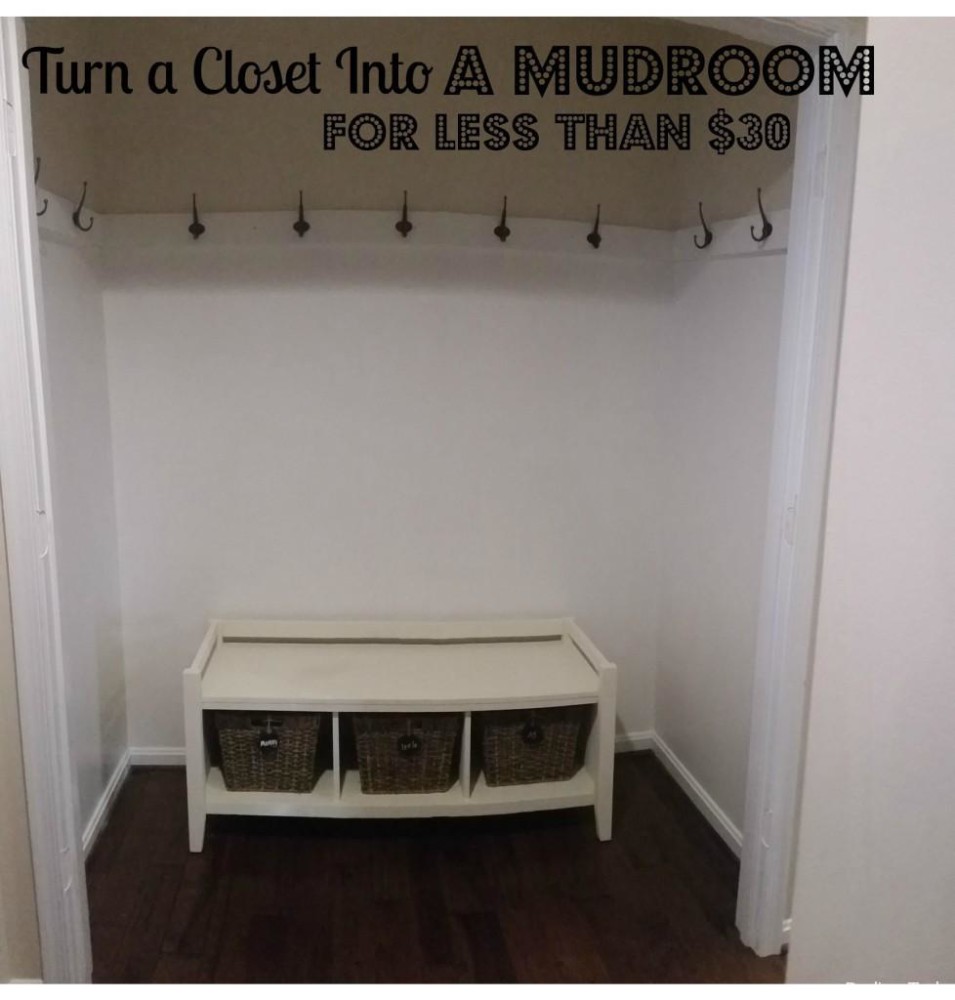
The first mudroom closet conversion that we did was under $30 to DIY. The cost went toward the wood and coat hooks. We had paint leftover from another project and used an existing bench.
When we updated the mudroom with built-ins, the cost for the wood ($40) and metal storage bins ($ 150) totaled over $200. Those galvanized storage bins were indestructible though and totally worth the extra cost!
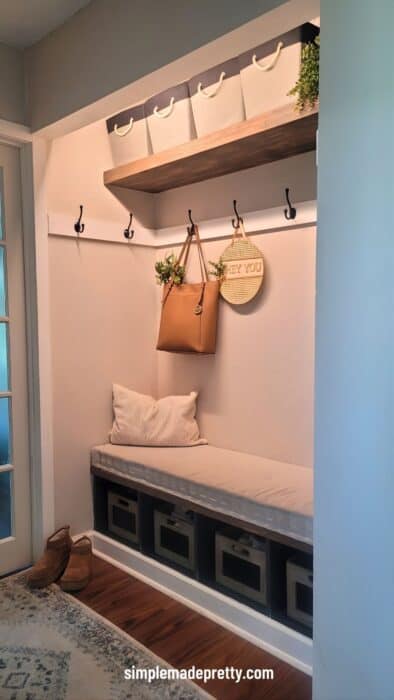
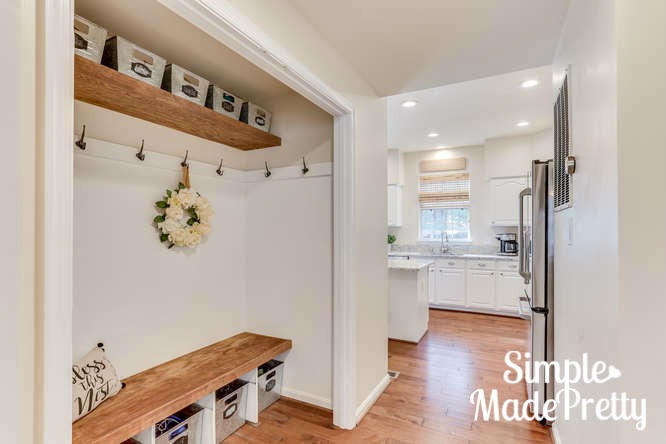
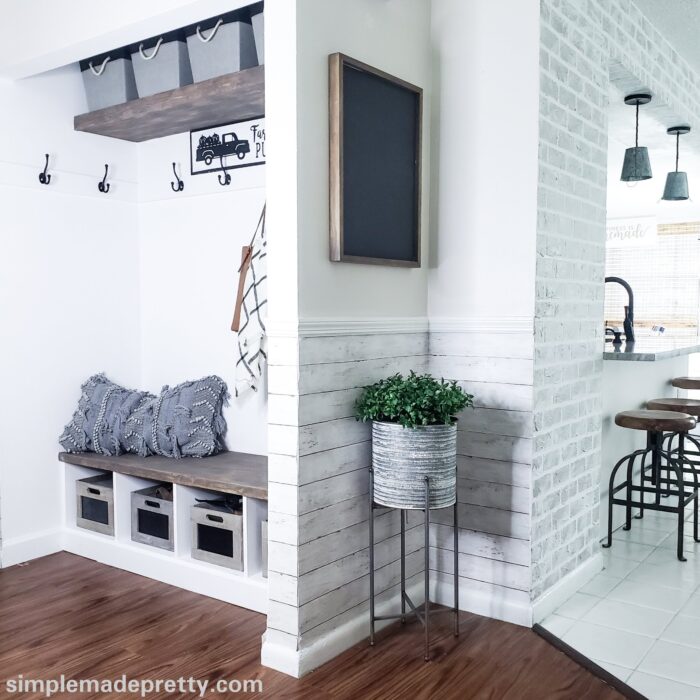
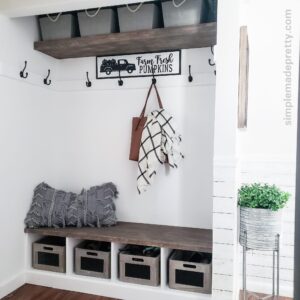
In our third house, the DIY mudroom cost was $165. The cost would’ve been less if we used existing paint and didn’t change the baseboard. However, I want to work our way around this house replacing the baseboard since the previous owners had a cat or dog that destroyed the baseboard in some areas.
Here’s the break down of the total cost:
- Wood – $75
- Paint – $20
- Hooks – $40
- Baseboard – $10
- Fabric bins for shelves – $20
- Shoe Bins (old) – $0
How Do You Convert a Closet into a Mudroom?
There are many ways to convert a closet into a mudroom. You should consider removing all the existing shelves and add and bench with hooks in your mudroom.
What Do You Put in a Mudroom?
We use our mudroom to organize items that we take in and out of the house. We use the mudroom hooks to hang jackets, purses, backpacks, hats, keys, and more.
The bench is the perfect place to sit and put shoes on before you head out and take off shoes when you arrive home.
The bins under the bench are perfect to store shoes. We don’t wear boots in Florida but I’d suggest sitting the boots in a garage or covered outdoor space if they are wet or muddy. The shelf in the mudroom is the perfect place to store small items such as hats, scarves, gloves, sunglasses, small purses, and more.
Entryway Closet Makeover
In this tutorial, I share How to Turn a Closet into a Mudroom. You should have some basic woodworking skills, education, and tools to complete this project.
Small Closet Turned Mudroom
Keep in mind to measure your closet and base the measurements you need on your closet design. Our closet measures 29 inches in depth x 5 feet wide x 8 feet in height. Our bench is 18.5 inches deep and the shelf is 13.5 deep.
Supplies:
- Wood
- (2 sheets) 4 x 4 Underlayment
- (1 sheet) 4 x 8 Plywood (.75 inch)
- (2) 2 x 4 pine (frame for the bench)
- (1) 1 x 2 x 8 pine (bench front trim and inside the floating shelf)
- (1) 1 x 3 pine (shelf front trim)
- (2) 1 x 4 pine (wood for hooks)
- Nails/Nail Gun
- Screws/Drill
- Circular Saw (we love this one)
- Miter Saw
- Paint
- Stain
- Wood Filler/Putty
- Coat/Hat Hooks
- Baseboard (optional)
- Bins/Baskets for storage items
Directions:
- Remove the doors from the closet frame.
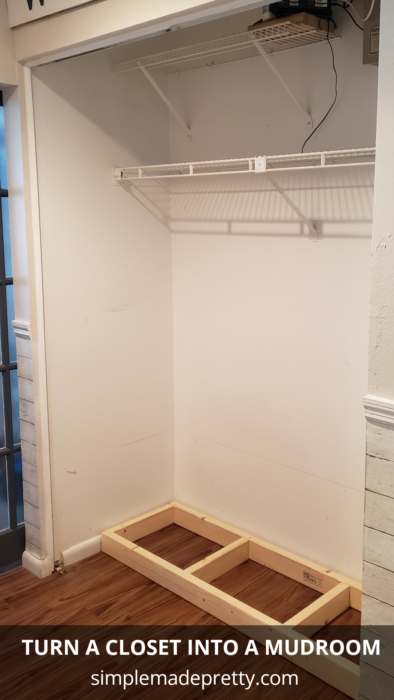
- Remove everything from the closet so you are left with an empty space.
- Patch any holes in the wall left by previous fixtures and the door frame. Let the wall repair dry before sanding (and if needed, patch again, then sand again).
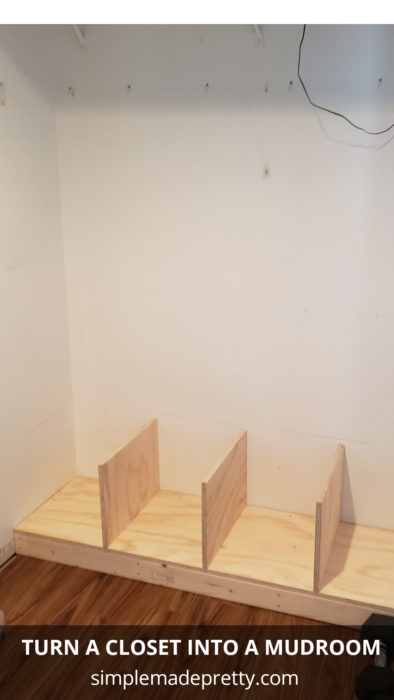
- Cut the wood for the bench. Cut a frame to place on the floor.

- Cut the plywood to fit the space in the closet for the bench and place it on top of the frame so you have a platform.
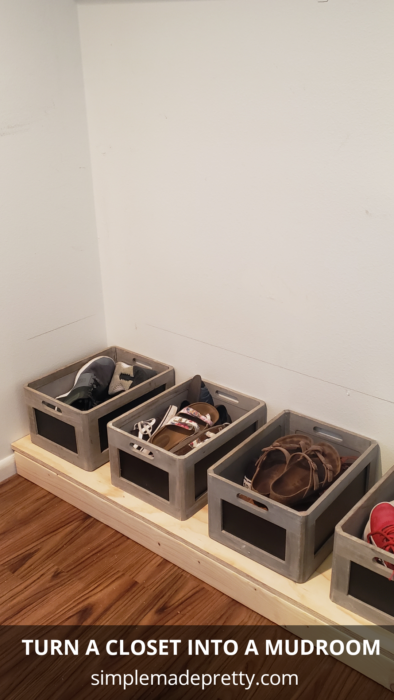
- Use the bins you intend to use as a reference to create the legs. Our second house was big enough for 5 bins but the third house could only fit 4 bins. These bins are 12″ x 16″.
- Cut the legs and attach them with screws to the plywood before attaching the plywood to the frame.
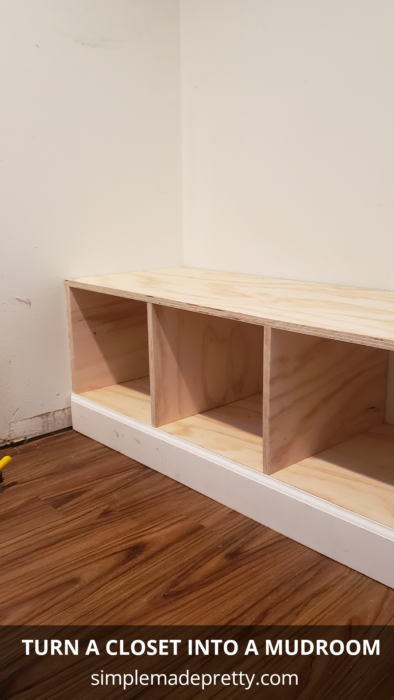
- Attach the plywood with legs to the frame using crews.
- Cut a second piece of plywood and attach it to the top of the legs as your bench using screws.
- Cut the Baseboard to fit the front of the bottom of the bench and the sides of the wall.
- Use the 1 x 2 x 8 pine as trim on the front of the bench to give it a finished look. Attach the trim using a nail gun so you don’t see the nails.
- Use the 1 x 4 pine cut to size to create a border on the wall to attach the hooks. Attach the wood with screws. Our hooks are 45 inches above the bench. In our second house, I made the kids stand on the bench and reach up and I placed the hooks at a height where I knew they could reach them.
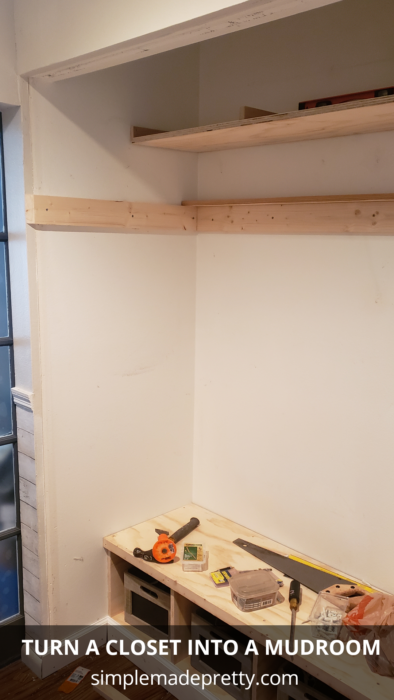
- Build the frame for the shelf using the underlayment and the remaining 1 x 2 x 8 pine for the inside of the floating shelf.
- Attach the shelf frame to the wall using screws. Our shelf is 8″ above the wood for the hooks.
- Use the 1 x 3 pine for the front of the shelf and attach it with a nail gun.
- Cut and attach the remaining underlayment for the top of the shelf (attach with a nail gun)
- Use Wood Putty to fill the screw holes and let dry before painting.
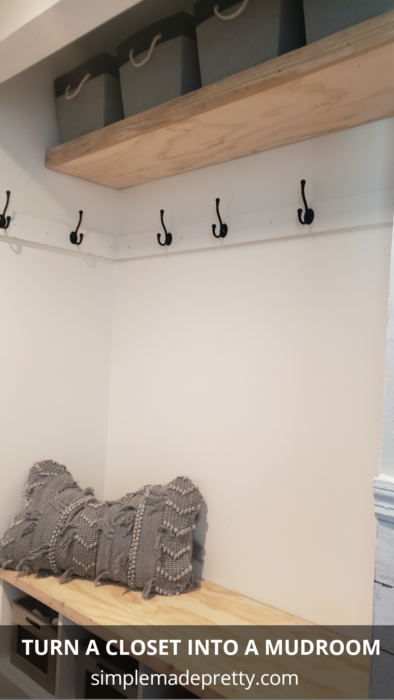
- Paint the wall and the built-ins. I used Glidden Premium Paint + Primer in off-the-shelf Pure White with an Eggshell finish and I stained the bench and shelf with Briarsmoke wood stain.
- Attach the Coat/Hat Hooks.
- Place the bins on the shelf and in the bench cubbies once the paint and stain are dry.


The $30 DIY Mudroom in Our Second House…
As mentioned above, this tutorial was originally posted in January 2015 and has been updated to reflect the DIY mudroom in our Third House. We went through stages in this mudroom until we reached the end result.
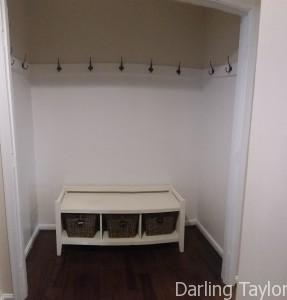
The first stage was a simple mudroom using a wood bench and some hooks on the wall… this is the easiest and cheapest option to convert a closet into a mudroom!
Winter months in D.C. means heavy coats, hat, gloves, boots (on top of everything else that you normally need day-to-day) which leads to bulky items that need extra storage space. In our second house, we had a huge double-door coat closet in the hall foyer. It’s more room than our tiny closet in our first house. Since we had kids under 5 years old who could not reach the hooks to hang their jackets, we decided to make our own mudroom.
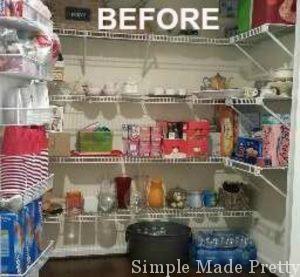
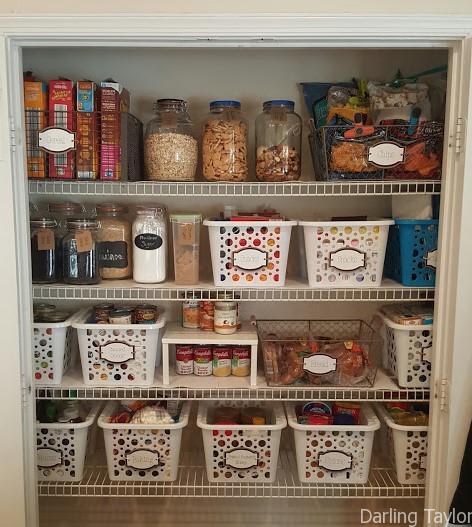
Former Pantry Closet Turned Mudroom
This room used to be a huge pantry where we stored miscellaneous items. We had another huge pantry in the kitchen so it only made sense to turn this second walk-in pantry into a mudroom and create a space that is functional.

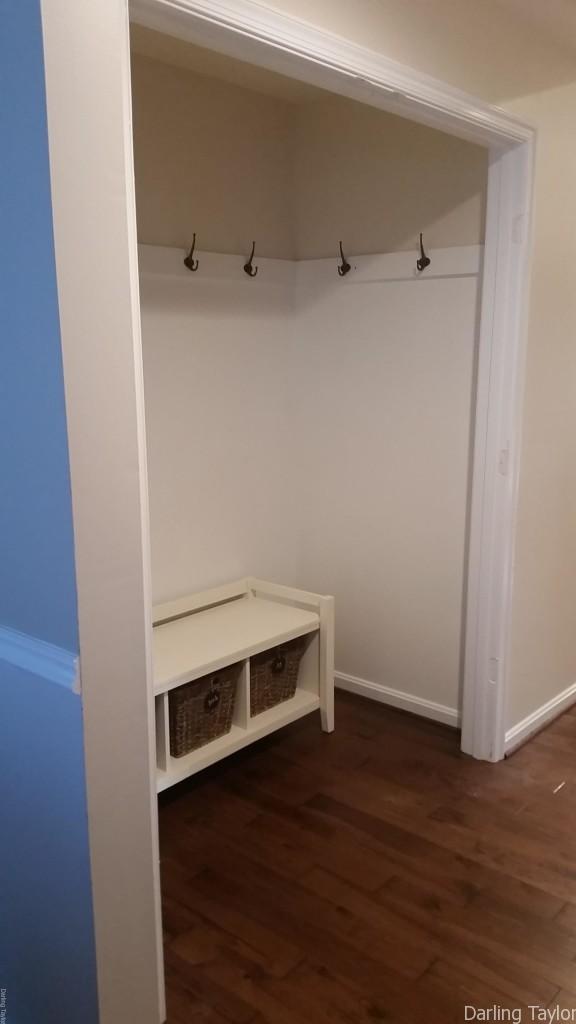
Above is a view from the dining room. This was just the start of a much bigger project to turn this closet into a mudroom. We eventually added a built-in bench, a shelf above the hooks, and patched the door frame. We just needed something functional and cost-effective since we are in the winter months.
This is not the best picture but I took with my phone and my android had issues when I took this photo and I was lucky enough to back up my photos before they were all deleted so this is what the backup file left me. We took the doors off, took the shelves out, patched, and painted the walls (we used leftover paint that we had on-hand). The hubby really did all the work, I just gave him instructions.
Small Closet into Mudroom Supplies
My hubby picked up some wood (in the wood trim section) from Lowe’s for around $4 and attached to the wall to create a wainscoting look. Those black hooks are from Ikea and are $9.99 for a rack with 5 hooks (which was a steal compared to the cost of hooks the same size at home improvement stores that were around $4.99/hook). We purchased 2 Ikea racks but only used the hooks. The bench pictured is from Target and used to be brown. I painted it with Annie Sloan chalk paint in Old White to update the entire space. The bench has a cushion on it which is pictured below.
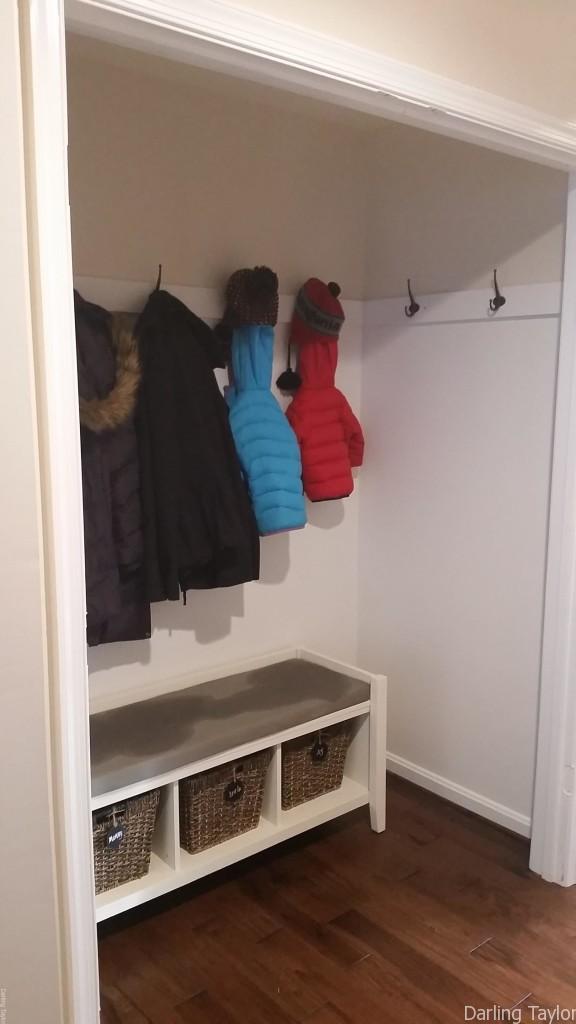
Above is a picture of our coats. The bins at the bottom hold our shoes (for now). So this project cost us around $25 and less than one weekend to complete and our house feels so much more functional.
Updates to the $30 Mudroom Makeover
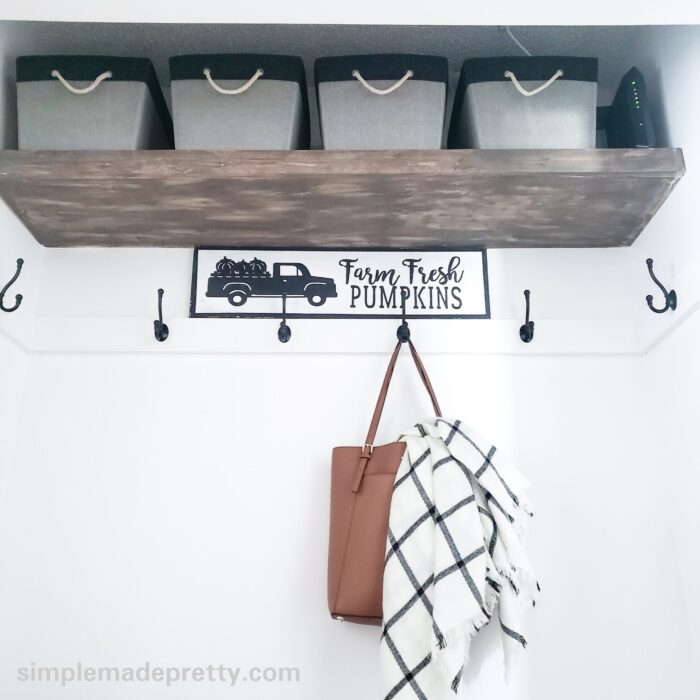
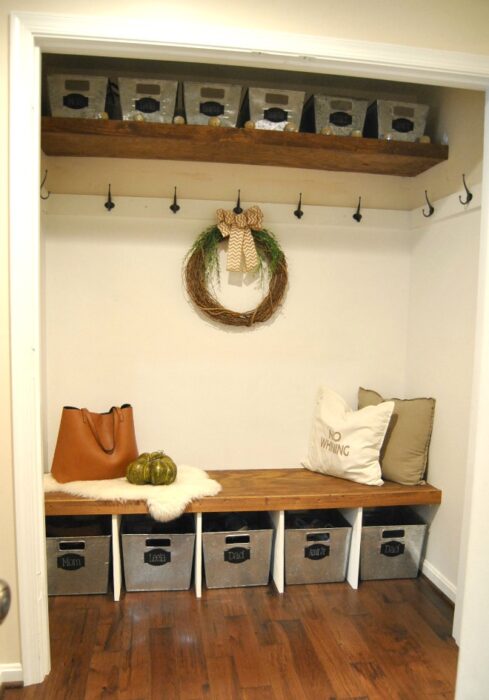
After living with the quick-fix and budget-friendly DIY mudroom, we decided to make the closet mudroom permanent by adding a built-in bench and a built-in shelf.
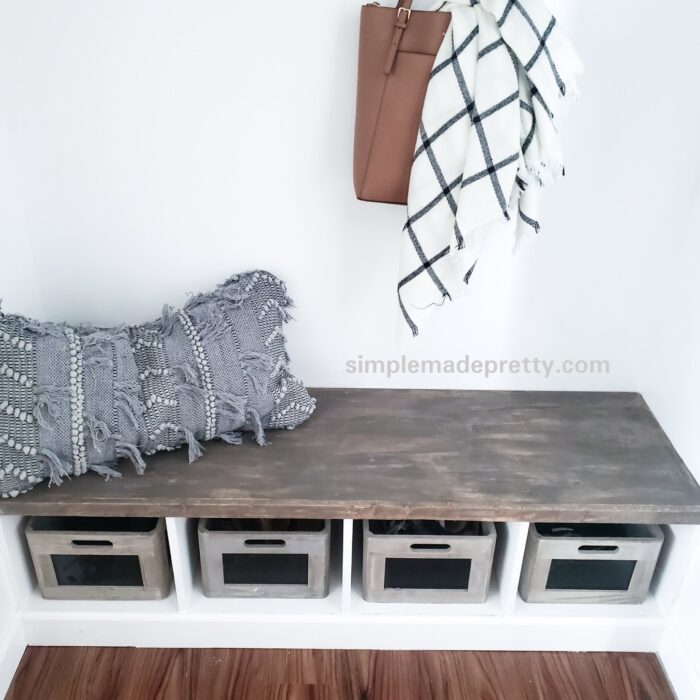
My hubby built a floating shelf (follow the instructions above) and a bench with cubbies.
![]()
This bench is slightly different than our third house mudroom because the cubbies sat right on the floor. In our third house, we built up the cubby shelf. You can save some money by making this version of the bench or DIY a floating bench.
Coat Closet Makeover Wrap Up
I hope you were inspired by our entryway closet makeover! Turning a coat closet into a mudroom can be done with minimal tools if you have an existing bench like the one used in our second home mudroom. If you have wood-working skills and tools, you can DIY a small closet mudroom by following the tutorial in this post.
This Closet Makeover into a Mudroom was exactly what our house was missing! We lived in this house for 2 years before creating the mudroom and it makes the entire house seem bigger 🙂
–>> To see how we updated the rest of our Entryway, check out this post!
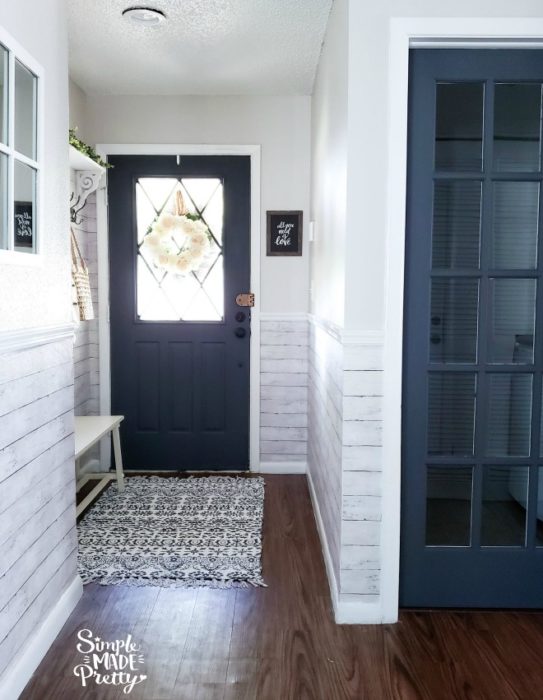
Our Small Entryway Update on a Budget
SEE HOW WE USED WALLPAPER TO UPDATE OUR ENTRYWAY
Print the Instructions for the DIY Mudroom
Turn a Coat Closet into a Mudroom
Supplies
- 2 sheets 4 x 4 Underlayment
- 1 sheet 4 x 8 Plywood (.75 inch)
- 2 pieces 2 x 4 pine (frame for the bench)
- 1 piece 1 x 2 x 8 pine (bench front trim and inside the floating shelf)
- 1 piece 1 x 3 pine (shelf front trim)
- 2 pieces 1 x 4 pine (wood for hooks)
- Nails/Nail Gun
- Screws/DrillCircular Saw (we love this one)
- Miter Saw
- Paint
- Wood Stain
- Wood Filler/Putty
- Coat/Hat Hooks
- Baseboard (optional)
- Bins/Baskets for storage items
Instructions
- Remove the doors from the closet frame.
- Remove everything from the closet so you are left with an empty space. Patch any holes in the wall left by previous fixtures and the door frame. Let the wall repair dry before sanding (and if needed, patch again, then sand again).
- Cut the wood for the bench. Cut a frame to place on the floor.
- Cut the plywood to fit the space in the closet for the bench and place it on top of the frame so you have a platform. Use the bins you intend to use as a reference to create the legs. Our second house was big enough for 5 bins but the third house could only fit 4 bins. These bins are 12" x 16".
- Cut the legs and attach them with screws to the plywood before attaching the plywood to the frame. Attach the plywood with legs to the frame using crews.
- Cut a second piece of plywood and attach it to the top of the legs as your bench using screws.
- Cut the Baseboard to fit the front of the bottom of the bench and the sides of the wall.
- Use the 1 x 2 x 8 pine as trim on the front of the bench to give it a finished look. Attach the trim using a nail gun so you don't see the nails.
- Use the 1 x 4 pine cut to size to create a border on the wall to attach the hooks. Attach the wood with screws. Our hooks are 45 inches above the bench. In our second house, I made the kids stand on the bench and reach up and I placed the hooks at a height where I knew they could reach them.
- Build the frame for the shelf using the underlayment and the remaining 1 x 2 x 8 pine for the inside of the floating shelf.
- Attach the shelf frame to the wall using screws. Our shelf is 8" above the wood for the hooks.
- Use the 1 x 3 pine for the front of the shelf and attach it with a nail gun.
- Cut and attach the remaining underlayment for the top of the shelf (attach with a nail gun)
- Use Wood Putty to fill the screw holes and let dry before painting.
- Paint the wall and the built-ins. I used Glidden Premium Paint + Primer in off-the-shelf Pure White with an Eggshell finish and I stained the bench and shelf with Briarsmoke wood stain.
- Attach the Coat/Hat Hooks.
- Place the bins on the shelf and in the bench cubbies once the paint and stain is dry.
Psssssttt… Want more inspiration delivered directly to your inbox? Subscribe to our FREE weekly newsletter! We provide simple ideas for Organizing, Handmade Projects, Crafts, Home Decor, and more! Hurry up and sign up here!
Disclaimer: This post may contain affiliate links or a sponsored post. All opinions are always 100% mine and I don’t partner with any product or company that I don’t use and love. Please see our Full Disclosure for more information.
 DIY Dollar Tree Windmill Welcome Sign
[…] home is different… the entryway in our first home was much different than the entryway in our second home, and both of those were very different from the entryway in our third home! So I chose a different […]