How to Build a Window Box
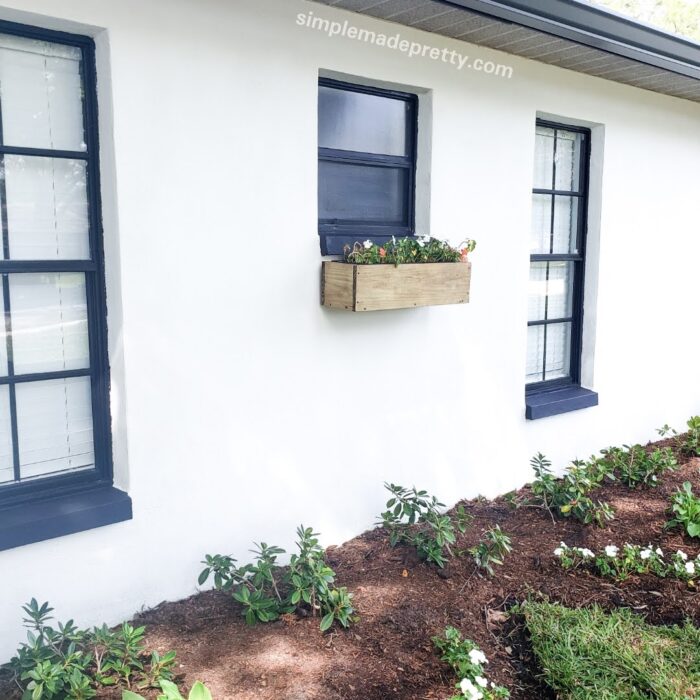
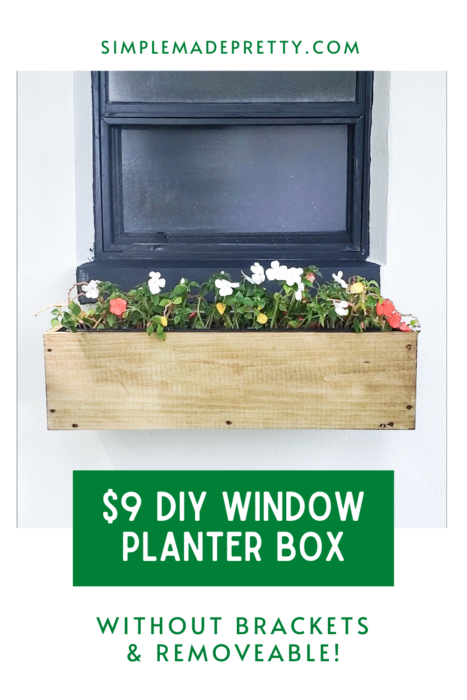
Building a box to use as a window flower box is simple, the hard part is trying to figure out how to hang a window box! My hubby and I built this window box template with DIY window box brackets and allows you to remove the box from the window! Keep reading and watch the video to see how to make this simple Window Planter Box DIY!
How do you make a window flower box?
There are several ways to build a window box. You can add trim and decorative elements to a wood window planter box but we chose to keep our wooden window box simple and it turned out beautiful!

How deep should a window flower box be?
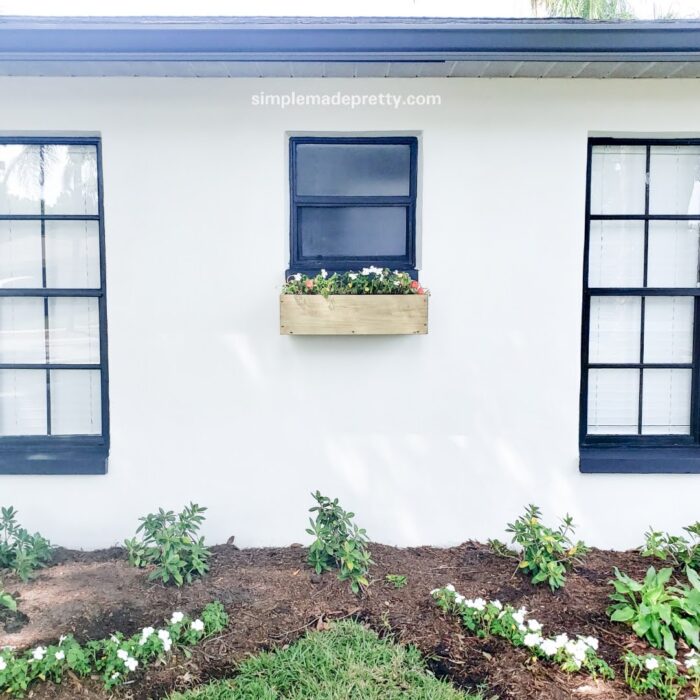
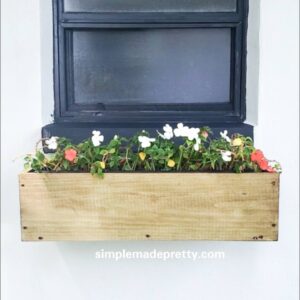
I’m including the measurements below with the depth of our window box. We can fit a plastic window box from Home Depot inside our wood window box to give you an idea of size and depth. The window that we attached the window box to is a small bathroom window so the length is just over 28 inches.
How do you make a window sill planter box?
Watch the video after reading the instructions below with how to make a window sill planter box. This DIY window planter box was simple to DIY and cost less than $10! It’s also removable, although I don’t have a reason to remove it right now, it makes it easier to add flowers.
Do window boxes damage your house?
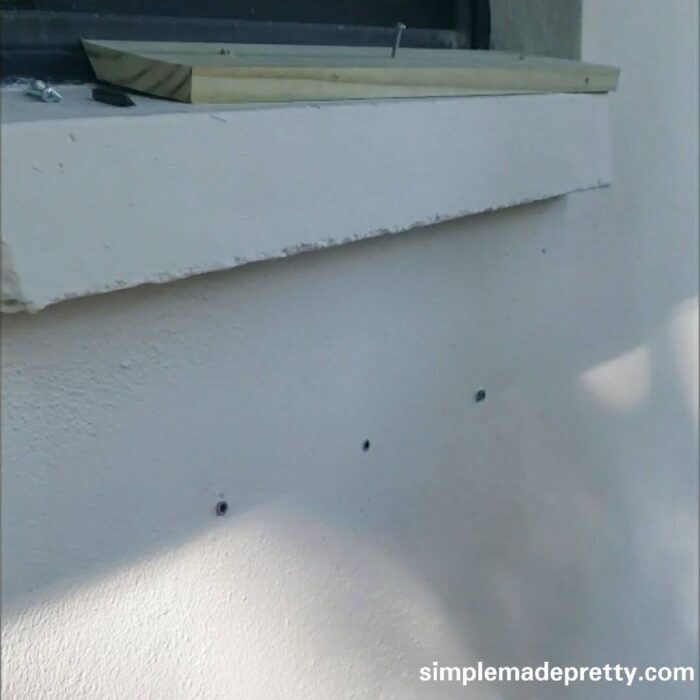
Most window boxes use brackets that require you to drill into the side of your house. You can drill screws into the side of your house with minimum damage if you are careful. We used 3 screws to attach the DIY wood bracket to our stucco/block home. Those holes are permanent now but we can always refill them later.
Please consider the permanent nature of a window box before you attach one to your home. Think of them like shutters (which are also attached to your home a similar way).
Also, consider adding proper drainage to your window box and the type of plants you plant in it so it does not stain or discolor the side of your home.
How to Hang a Window Box
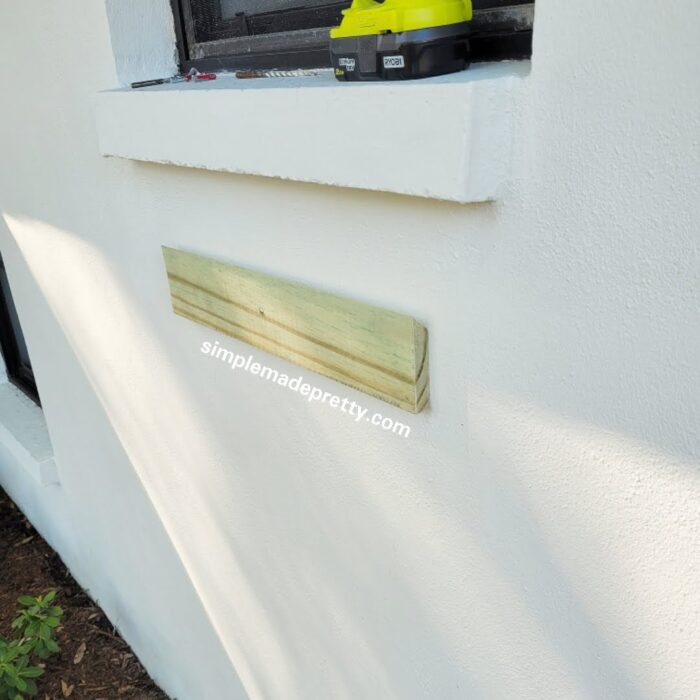
As I mentioned above, the tricky part about a DIY window box was figuring out the best way to hang it. We purchased some metal brackets from Lowe’s but they didn’t work with our window ledge so we decided to build our own bracket.
How to Build a Window Box with a DIY Window Box Bracket
Supplies:
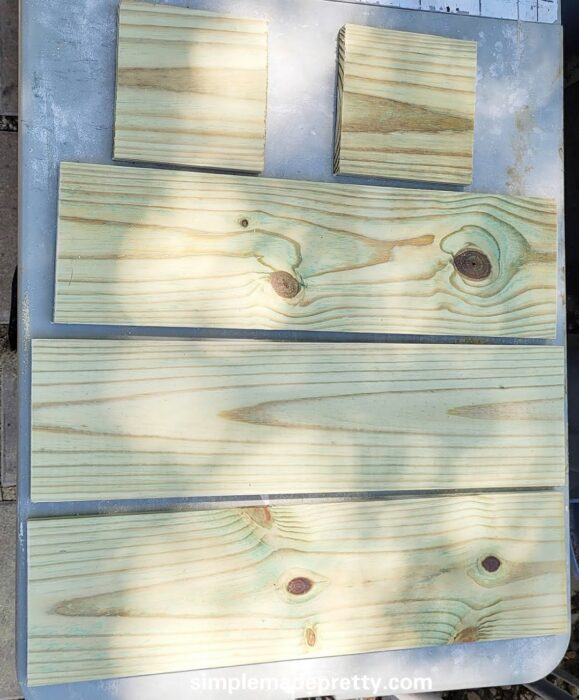
- Pressure Treated Wood (we used a 1″ x 8″ x 8′ piece)
- Power Drill
- Screws
- Anchors
- Table Saw or Circular Saw
- Wood Stain
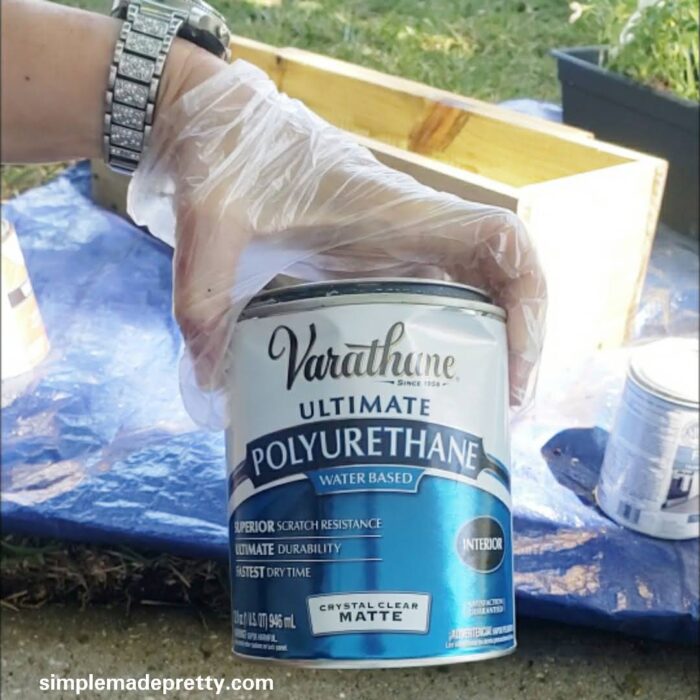
- Water-Based Polyurethane
- Brushes/Sponges/Rags
- Dropcloth
Directions:
- Gather supplies listed above.
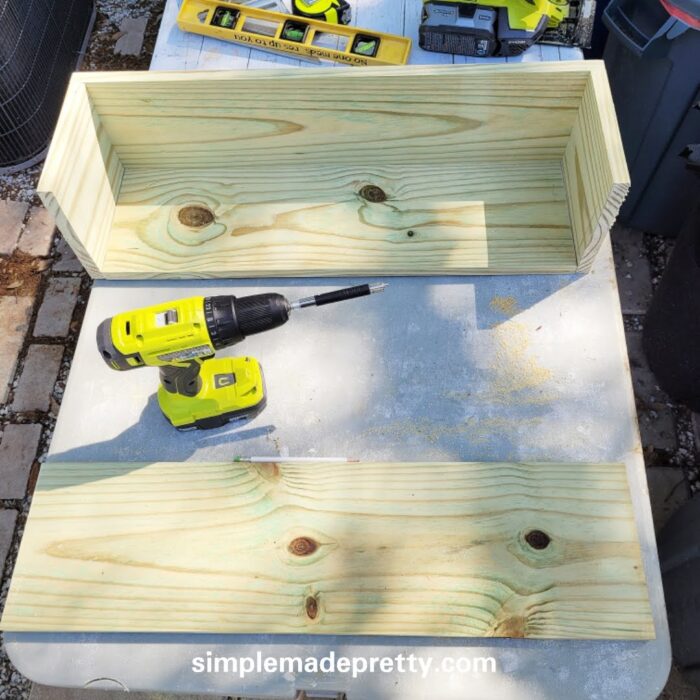
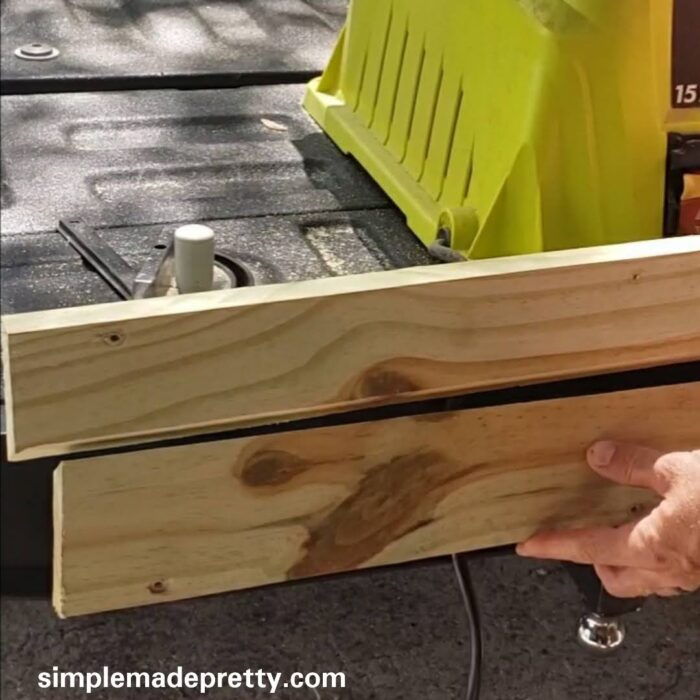
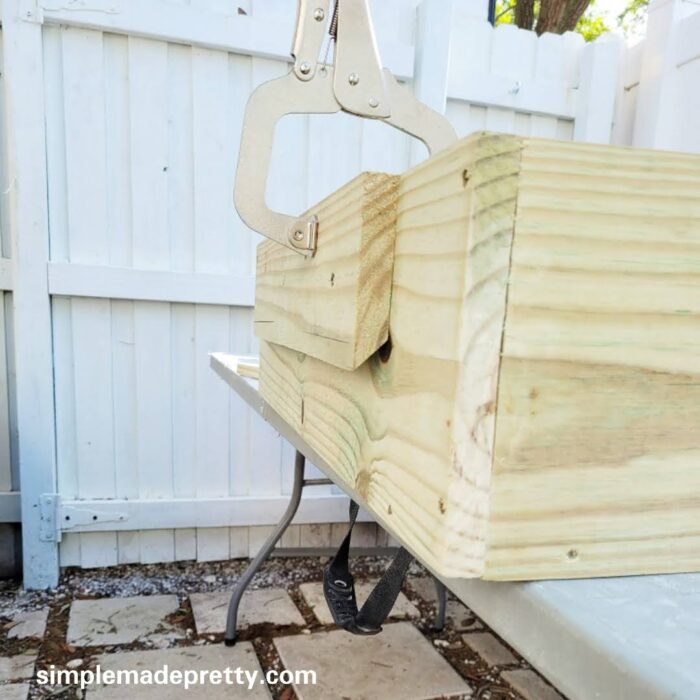
- Cut the wood to size for your window. Our window box measures (28″L x 9″D x 7.5H”) so we cut (2) 7.5″ pieces and (2) 28″ pieces for the box. We cut (1) 19″ piece in half at an angle to create 2 smaller pieces for the bracket (I’ll explain more about the angle cut in the steps below).

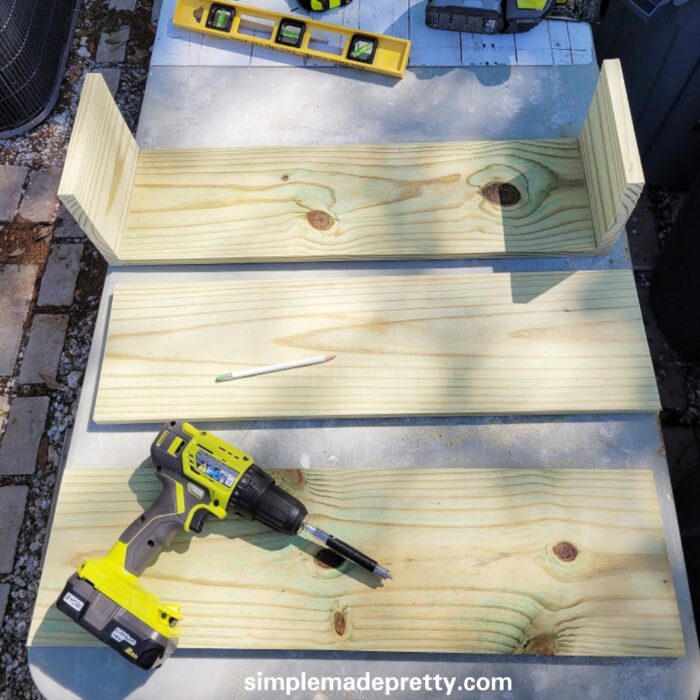
- Build the box by attaching all the sides together with screws.

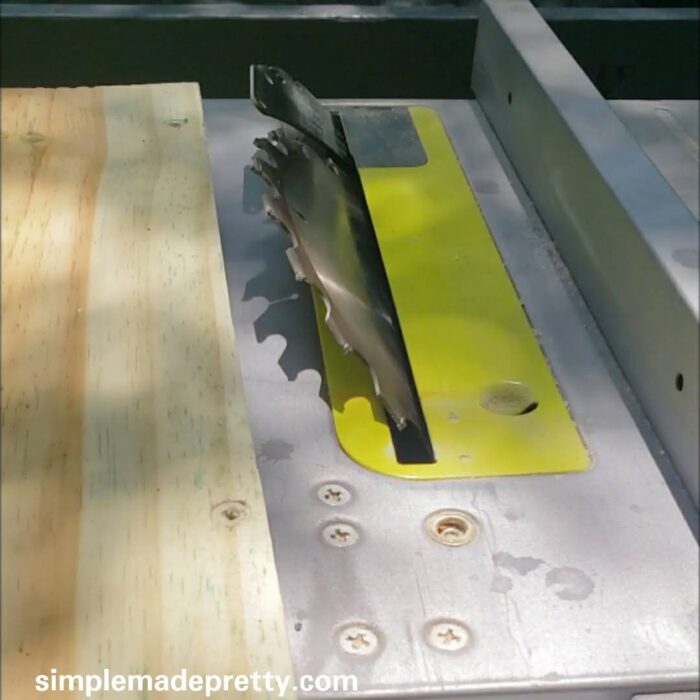
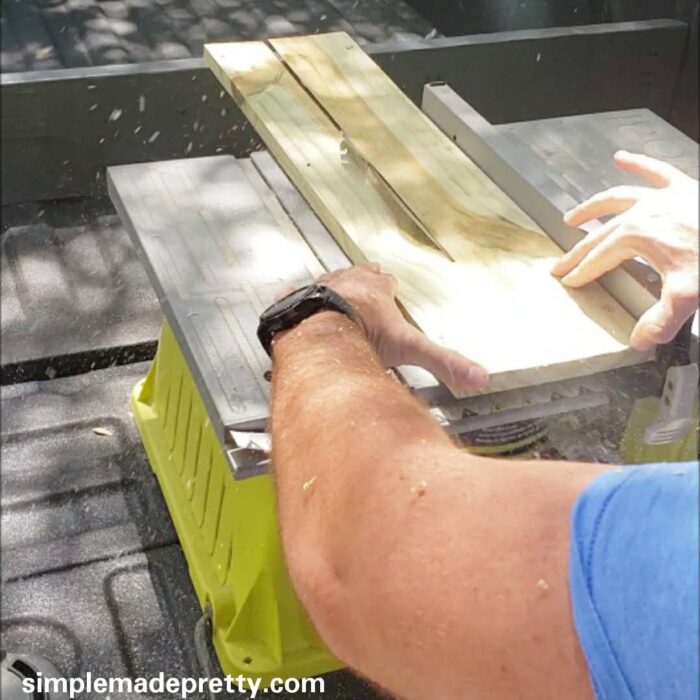
- Cut the brackets for the back at an angle using a table saw or circular saw.
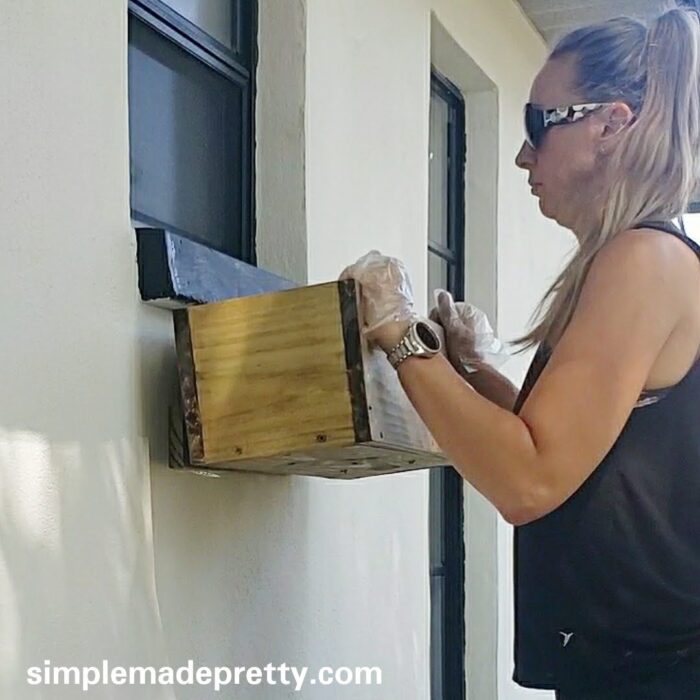
- Attach the bracket to the back of the box with the angled side down using screws.
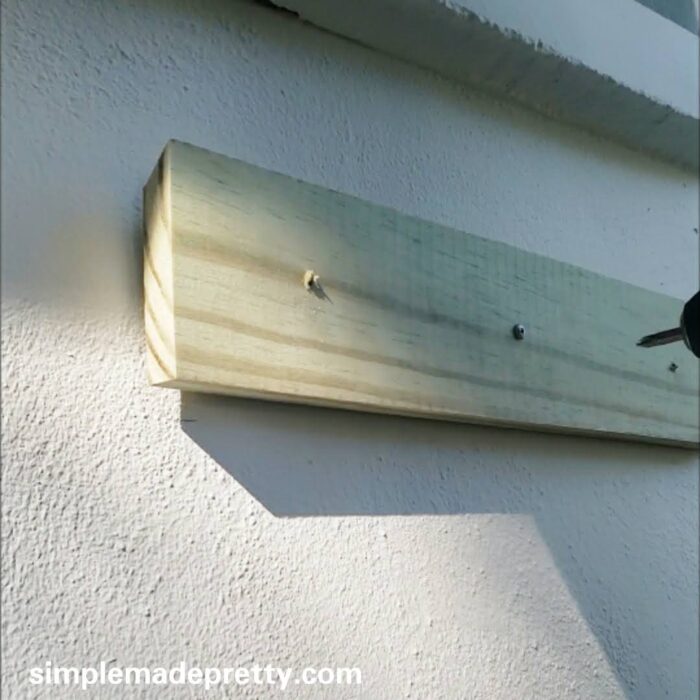
- Attach the other bracket to the house where you will be hanging it with the angled side up to slide into the window box bracket. We used screws and anchors to attach the wood bracket (3 screws total) to make sure it had enough support for heavy flowers.
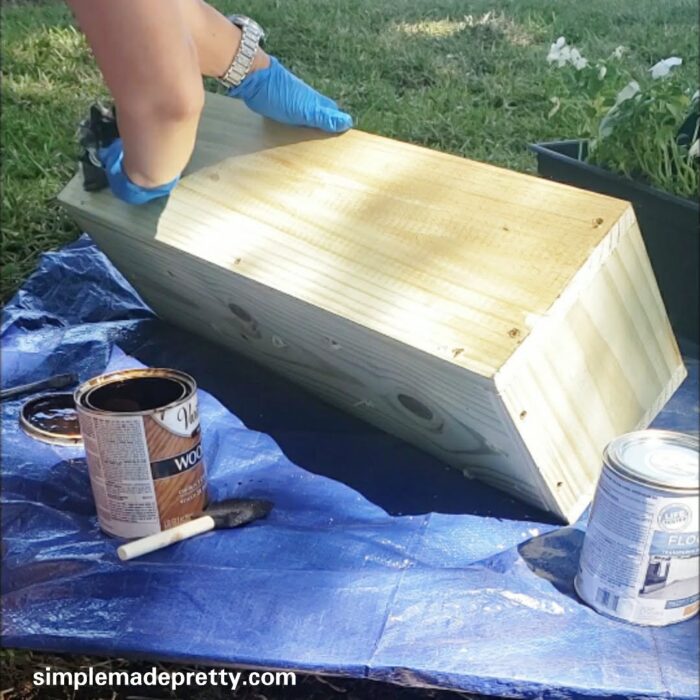
- Stain or paint the window box and the bracket on the house.
- Although we used pressure-treated wood, I wanted to give our wood more protection from elements so I used water-based polyurethane on it as well.
- Drill holes in the bottom of the box so water can drain out (you don’t want water to sit inside your box! Hang your new window box, add some flowers, and enjoy the compliments from neighbors! 🙂
- We used a plastic flowerbox inside our wood box and added styrofoam peanuts in the plastic box before adding soil).


Wrap up for How to Build a Window Box
I hope you enjoyed learning this Simple Window Box tutorial and are inspired to build a DIY Window Planter Box! This DIY wood planter window box is an easy beginner project for those learning wood-working skills. We didn’t add trim or decor to our window box project and it still looks beautiful and adds curb appeal to our home.
Print the Instructions and Watch the Video to Make a Window Box
DIY Window Planter Box
Supplies
- Pressure Treated Wood (we used a 1" x 8" x 8' piece)
- Power Drill
- Screws
- Anchors
- Table Saw or Circular Saw
- Wood Stain
- Water-Based Polyurethane
- Brushes/Sponges/Rags
- Dropcloth
Instructions
- Gather supplies listed above.
- Cut the wood to size for your window. Our window box measures (28"L x 9"D x 7.5H") so we cut (2) 7.5" pieces and (2) 28" pieces for the box. We cut (1) 19" piece in half at an angle to create 2 smaller pieces for the bracket (I'll explain more about the angle cut in the steps below).
- Build the box by attaching all the sides together with screws.
- Cut the brackets for the back at an angle using a table saw or circular saw.
- Attach the bracket to the back of the box with the angled side down using screws.
- Attach the other bracket to the house where you will be hanging it with the angled side up to slide into the window box bracket. We used screws and anchors to attach the wood bracket (3 screws total) to make sure it had enough support for heavy flowers.
- Drill holes in the bottom of the box so water can drain out (you don't want water to sit inside your box! Make sure you properly drain the flowers too. We used a plastic flowerbox inside our wood box and added styrofoam peanuts in the plastic box before adding soil).
- Stain or paint the window box and the bracket on the house.
- Although we used pressure-treated wood, I wanted to give our wood more protection from elements so I used water-based polyurethane on it as well.
- Hang your new window box, add some flowers, and enjoy the compliments from neighbors!
Video
Pin this Window Box tutorial for later…
Here are More Home Improvement Tips You Might Like…
How to pick the right paint colors
Have you ever had trouble picking the right paint colors for your home? Choosing the right paint colors for your home can be overwhelming. There are so many different “whites” and “grays” these days, how can anyone know they are making the right paint color choice?
That’s why I put together the best tips on How to Choose Interior Paint Colors in this post.
Every home is different… the entryway in our first home was much different than the entryway in our second home, and both of those were very different from the entryway in our third home! So I chose a different paint color for each entryway in all three of our homes. Not to mention, from the time that we bought our first home, to the time that we bought our third home, home paint color trends changed drastically. The colors that I used back then are no longer a trendy color and well, I just didn’t like the brown-ish tan that was in our first home, haha.
So if you need help choosing paint colors for the rest of your home, head on over to this post to see my paint-picking tips and what has worked for me in all three of our homes 🙂 My post with how to choose paint colors for your home is one of my most popular posts and readers have benefited from reading it before heading to the store to buy paint that ends up not working out.
I also have some ideas for choosing paint color combinations for bedrooms (with themes!)
Paint Versus Peel & Stick Wallpaper
Peel and stick wallpaper has become very popular recently since not everyone has access to tools to build their own Shiplap walls (thanks Chip and Joanna) or wants to tile an entire wall with subway tile. I love tiling but if I could slap up some wallpaper and call it a day, that would make me, the hubby, and my wallet happy!
You can find peel and stick wallpaper online at Target, Amazon, Home Depot, and more! I’ve linked my favorite peel and stick wallpaper and the ones I’ve used personally below.
How To Paint Kitchen Cabinets Without Sanding
If you love white farmhouse kitchens and want to paint your kitchen white, then you will love this post that teaches you How To Paint Kitchen Cabinets White Without Sanding! I’ll show you how to paint old kitchen cabinets and answer how much does it cost to paint kitchen cabinets (it’s much cheaper than you think!). I also have lots of pictures of painting kitchen cabinets before and after!
You don’t have to worry about how to paint kitchen cabinets without brush strokes because I have a secret in this post that reveals a step-by-step DIY tutorial with how to paint kitchen cabinets like a pro.
–>> Learn how to Paint Kitchen Cabinets without Sanding here!
Cheap Home Hacks that’ll Increase Value
Renovating a home can come with a high price tag if you’re not budgeting and deciding which updates bring the best return on investment. After selling our updated first home in just 4 years, we bought an even bigger house that needed a lot of updating. We sold our second home after 4 years while doing the much-needed work to produce a profit by following the same strategies we did in our first home.
If you enjoy updating your home, want to increase your home value or just want your home to look better, you should check out thee 10 Cheap Home Hacks That’ll Make Your House Look So Much Better.
Tour Our Homes
Take a Tour of our Second Home here
Psssssttt…Right now I’m offering FREE access to our Digital Resource Library to all of our newsletter subscribers. Your private access includes dozens of free printable crafts, home decor and organization guides. Hurry up and grab your freebies here! (Access instructions are sent after subscribing).
Disclaimer: This post may contain affiliate links or a sponsored post. All opinions are always 100% mine and I don’t partner with any product or company that I don’t use and love. Please see our Full Disclosure for more information.
 Inexpensive Laundry Room Update