Small Pantry Remodel Ideas
Our small pantry with ugly wire shelves was begging to get remodeled. We are limited on space in our small kitchen but luckily enough, we have a dedicated pantry closet. We decided to remodel the pantry after revamping the pantry barn door (see my DIY post for the tutorial) with a plan to renovate our pantry over a long weekend. Keep reading and watch the video to see our Pantry Remodel Before and After!
There’s a lot you can do to reorganize a pantry. And you don’t even have to tackle it all at once. Here’s a before and after look at our pantry that was remodeled.
How do you modernize the pantry?
We modernized our pantry by removing the dated wire shelves and giving everything a clean/refreshed look. We also updated the pantry door to a shaker-style door.
How much does it cost to redo a pantry?
The cost to redo a pantry depends on the supplies you already have. The cost for wood and hardware was around $150 but we also purchased new food storage containers which can cost $100-$300 depending on what you need. I reused wicker baskets, purchased premade labels, and a few other things that are linked below under sources.
How do you decorate an open pantry?
You can decorate an open pantry by using matching containers and pretty labels.
How do I expand my kitchen pantry?
You can expand your kitchen pantry by using the back of the pantry door for storage. This handy back-of-the-door organizer helped us organize more items in our pantry without an expansion.
Shop Our Pantry

Our Pantry BEFORE
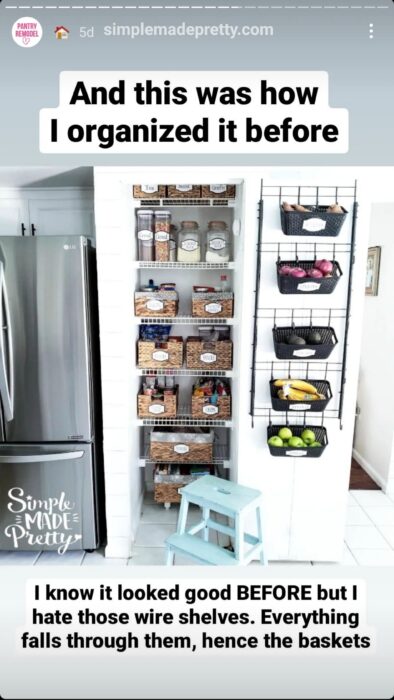
The pantry was organized before we began this remodel, however, I never liked the wire shelves and hated the area under the lowest shelf that always ended up with dust under it.
The Back-of the-Door Organizer pictured below is a Dollar Tree DIY that I made and served its purpose, however, we needed something with more organization space.
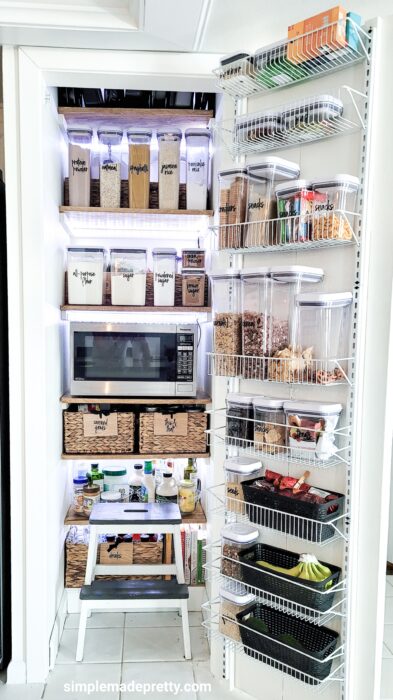
Small Pantry Remodel Before and After
I documented the entire process to update our small pantry in my Instagram stories. Be sure to follow me on Instagram to see more ideas like this!
Our pantry remodel was unplanned… I asked the hubby to help redo our DIY Pantry Barn Door (we turned a bifold door into a single door in this tutorial). I wanted to remove the chalkboard paint and the X design on the door so it looked more modern and not farmhouse style.
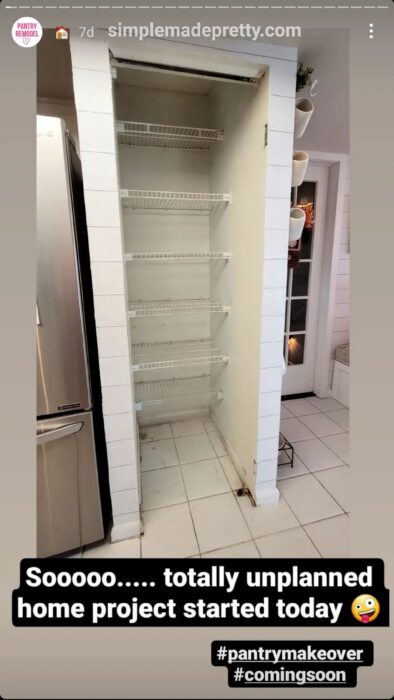
We started by removing everything. This is when things get messy. Our pantry food was all over the kitchen counters and kitchen table. We ate family meals from our kitchen counter/bar during the 4 days it took for this pantry remodel.
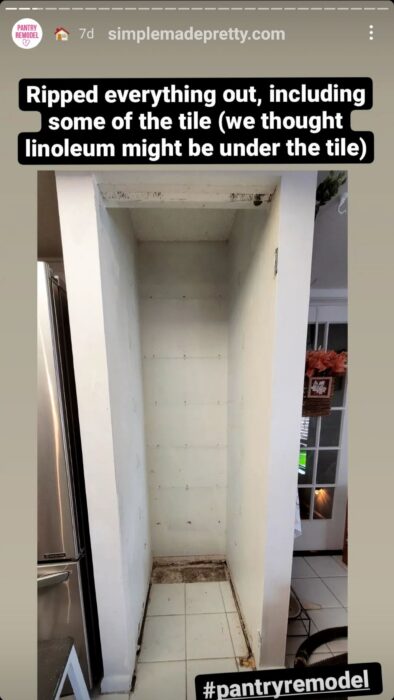
Once everything was removed (shelves, base boards, etc.), we started building a platform for the bottom shelf. This way, dist doesn’t get under a shelf!
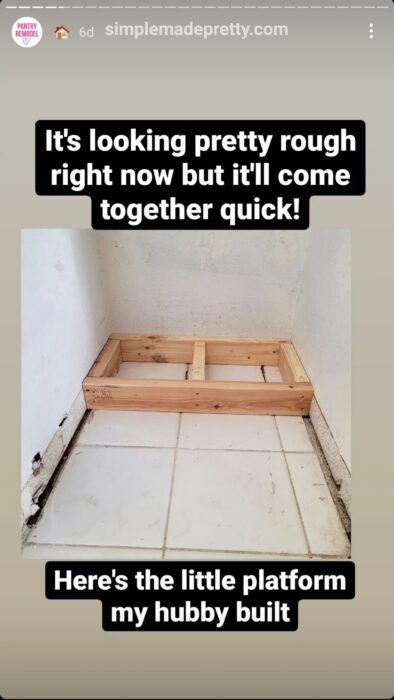
The platform allows me to set things on the ground but they are not literally on the ground.

We patched all the holes, sanded the walls, and added a texture (since our walls are textured).
We installed 1″ x 2″ wood frames for the shelves. We have 7 shelves before the remodel and we ended up with 7 shelves after the remodel. I spaced the shelves so I could fit the containers I bought for the remodel, the microwave, and my baking pans at the top.
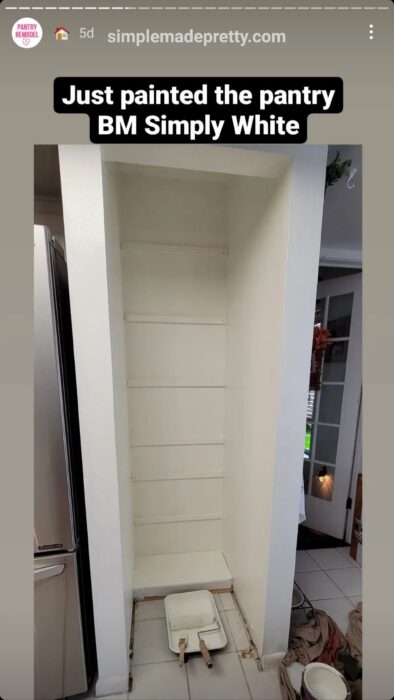
I painted the entire inside Benjamin Moore Simply White.
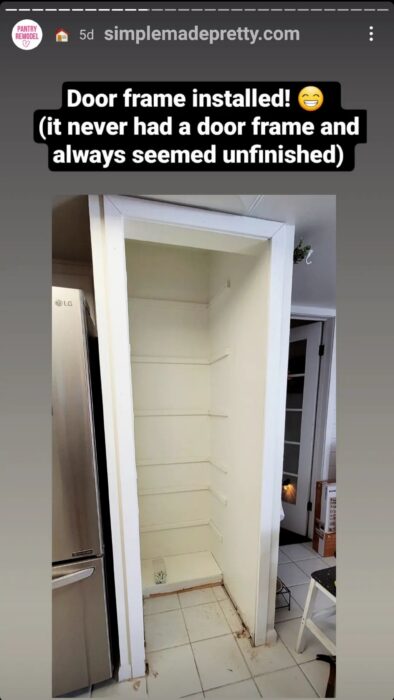
We installed a door frame on the exterior. I’m not sure why a frame was never on this pantry door but I always felt like it was missing something until now.
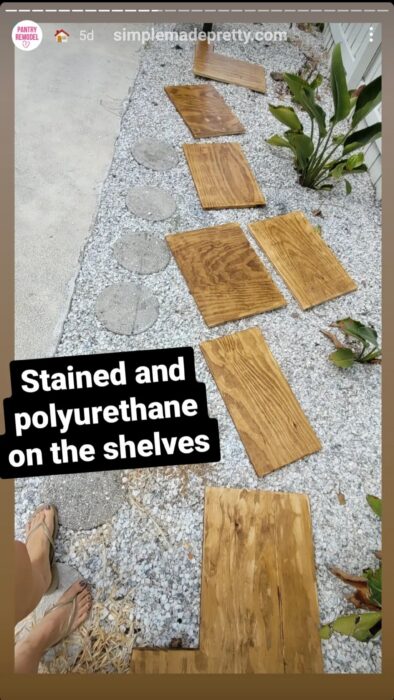
I stained the shelves Golden Oak with an oil-based polyurethane. Many of my followers voted that I should paint the shelves white but I decided to stain them first and if I hated them, I could always paint them later.
After the shelves were installed, I convinced the hubby to install an electrical outlet inside the pantry so we could move the microwave inside the pantry and I could use it under the cabinet lights. We didn’t plan to have the microwave inside the pantry until this point… it was all very spontaneous!
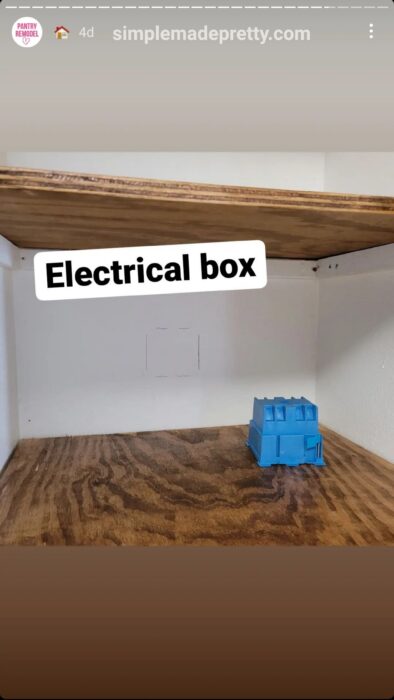
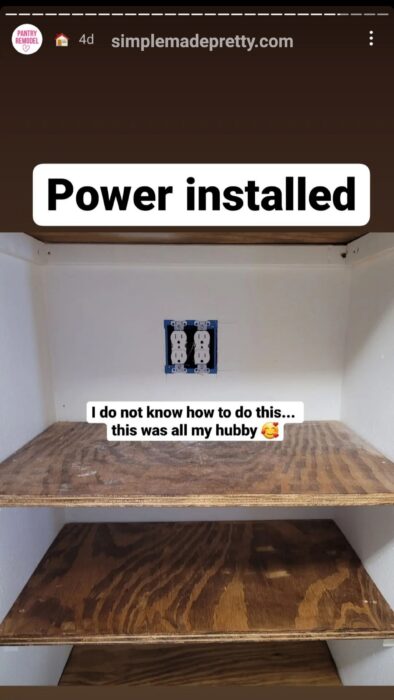
My hubby went into the attic and started the wiring process (we had an electrician finish the work). Our electrician said that the outlet for the microwave should be it’s own dedicated outlet (you shouldn’t plug anything else in the microwave outlet). However, we’ve always had our toaster share the same outlet as the microwave so I knew if I plugged in a few LED strip lights, it would be okay. Just something to keep in mind since the below picture shows 4 outlets when we only used 2… my hubby got ahead of himself!
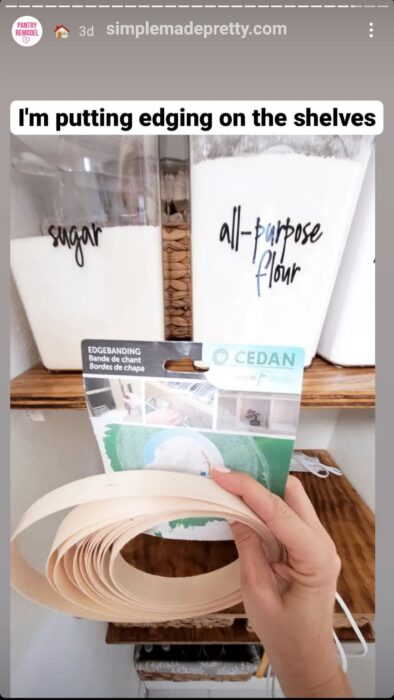
I finished the plywood shelves by adding some birch edge tape and staining it to match.
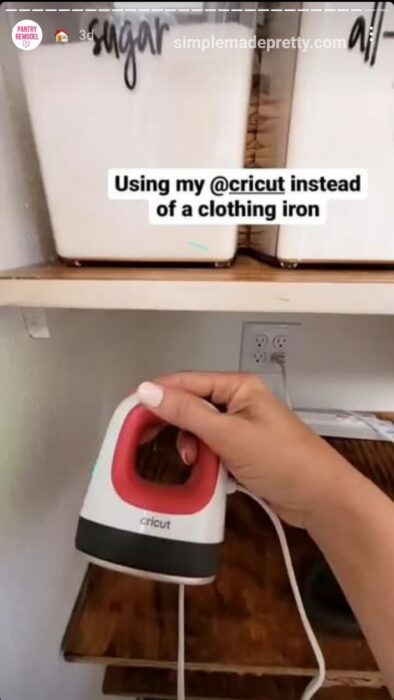
I used my Cricut Mini Easy Press to attach it 😉
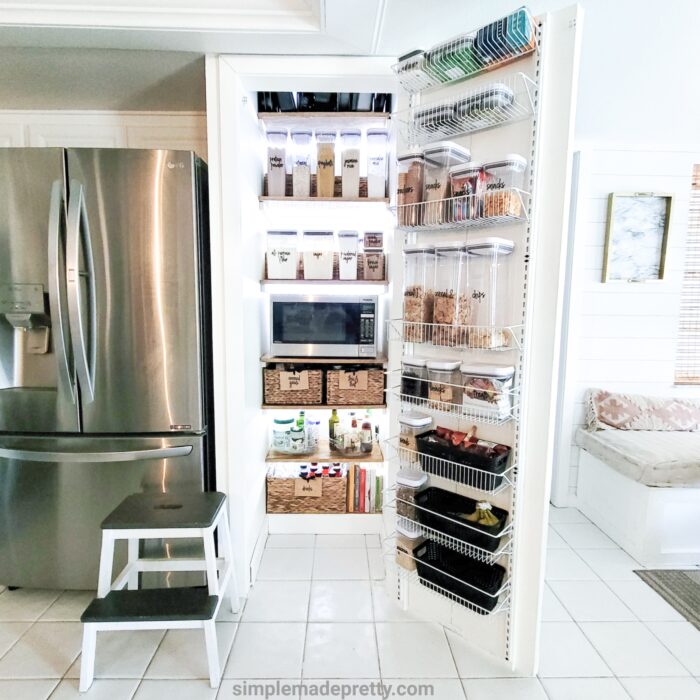
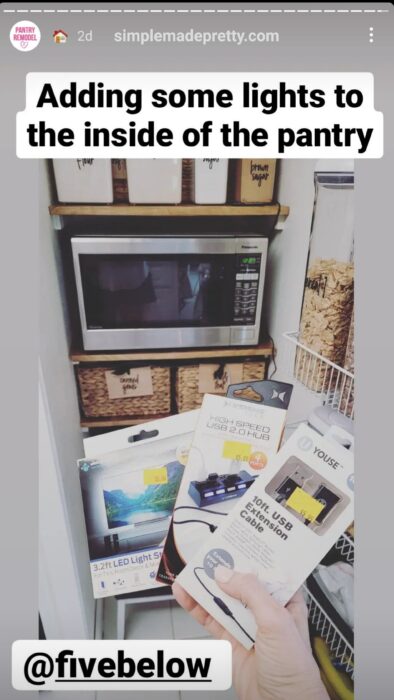
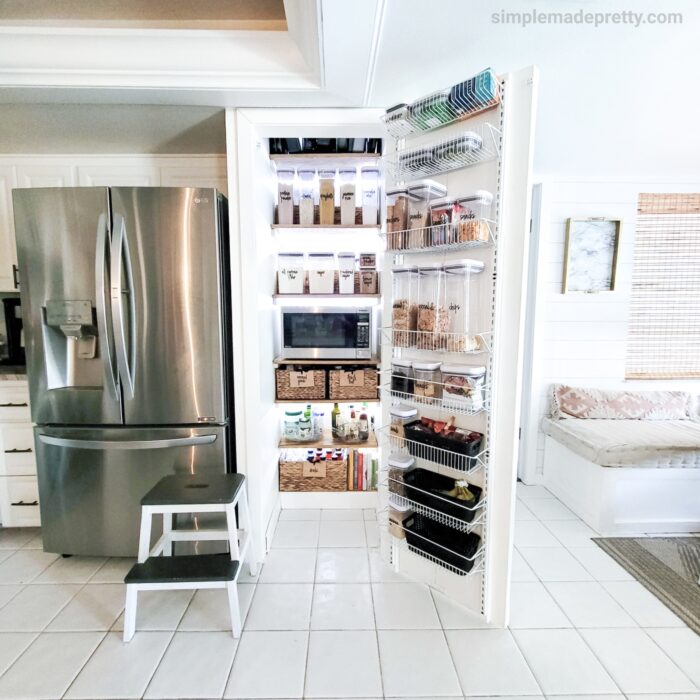
The final step to our pantry remodel was adding some lighting. I used some USB-powered light strips found at my local Five Below store. They were quick and easy to install using a USB hub and extension to connect all the shelves and the strips stick right to the surface. The lights are also remote-controlled!
I forgot to mention the door organizer! This is the best Pantry door organizer I’ve had in any of our houses! You can hang it over the door or attach it right to the door. Since our door is hollow, my hubby attached 1″ x 2″ pieces of wood on each side, then attached the metal brackets to the wood. The shelves can be moved around to suit your needs. I arranged the shelves so we can close the door and have a large stool sit right inside the door.
I used Lazy Susans on a lower shelf to organize oils, vinegar, sauces, and jars of butter. The bottom shelf holds recipe books and a wicker basket with bottled drinks.
Shop Our Pantry
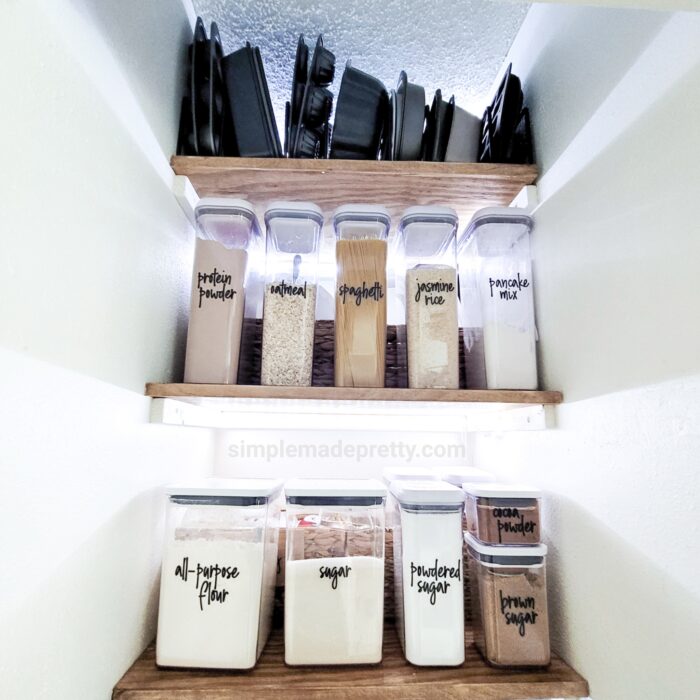
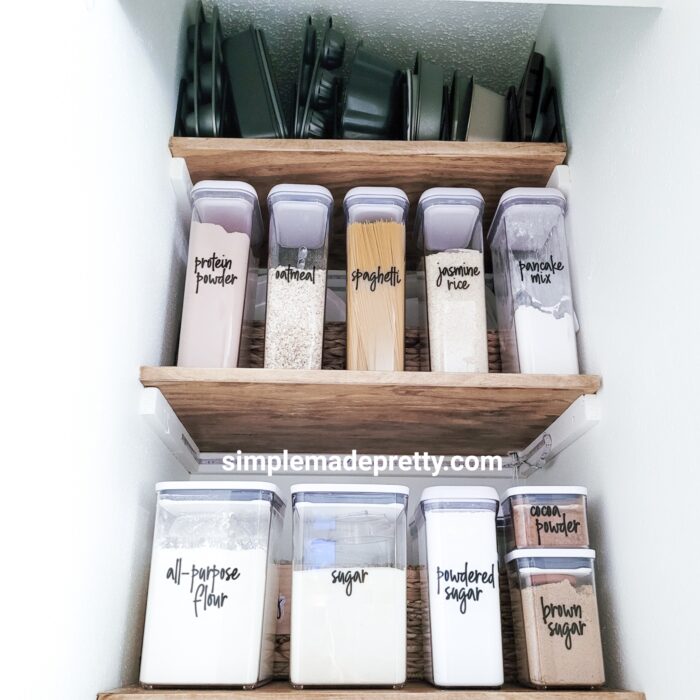
I’m most excited about the top shelf in the pantry! I used an organization rack to store all of my various baking trays and baking pans in our pantry! I used to store these pans on top of each other in the cabinet above the refrigerator and they were always such a hassle to get to. Now I can reach up and grab what I need! This also makes it easier for my daughter who loves to bake.
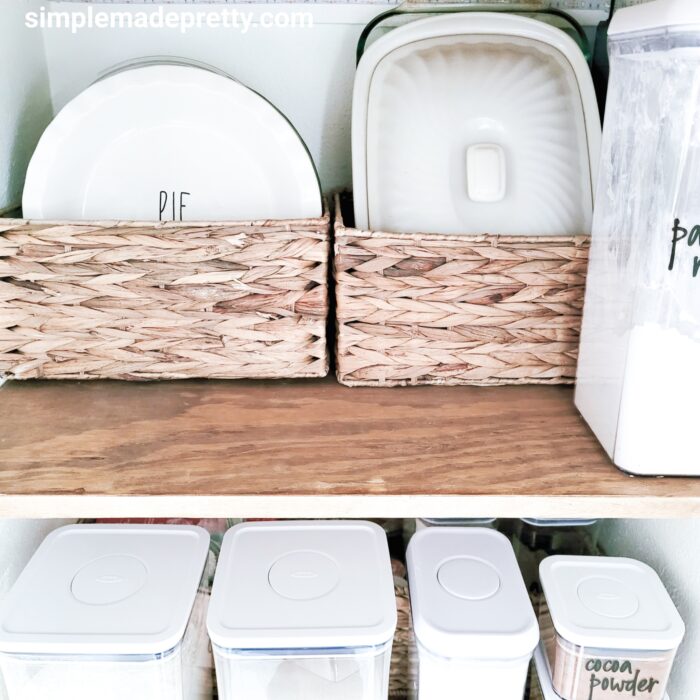
Another storage hack I did was using smaller wicker baskets to hold all of my pie pans (I like to bake pies!) and casserole dishes behind food storage containers.
I changed our Flour and Sugar canisters from big, heavy glass jars, to these lightweight and ergonomic OXO containers. Now my daughter won’t have an issue lifting these from the pantry to the countertop when she’s baking!
I also hid some small wicker baskets behind the Baking Containers to store small baking items (cookie cutters, food coloring, cupcake liners, cake decorating, sprinkles, etc.). I used some DIY wood pieces to create hanging labels on the baskets.
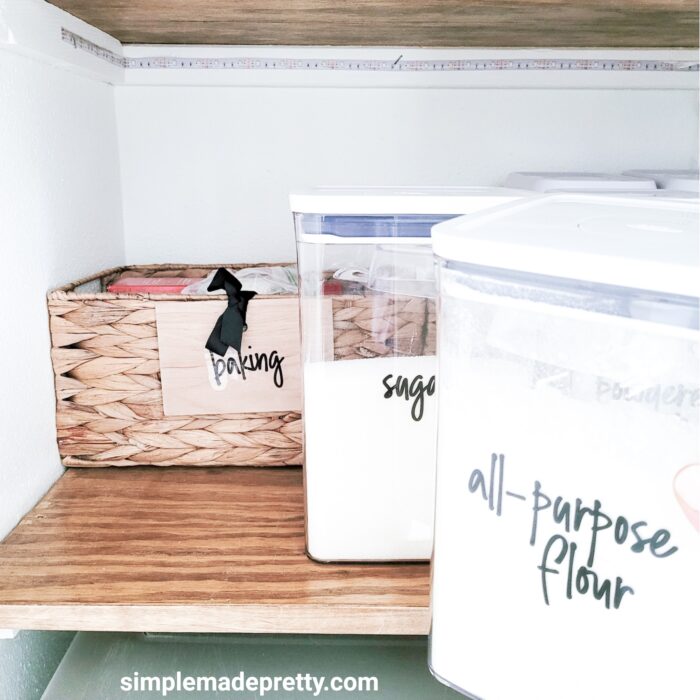
Here is what the cabinet looks like with the lights off. I just love how everything came together at the end of this pantry remodel project. The Pantry labels from Talented Kitchen really helped me complete the organization process without adding extra work of making my own labels with a Cricut machine.
Wrap Up About Small Pantry Remodel Ideas
So long — and good riddance — to orphaned and unlabeled cans and jars. Here’s how to replace them with a pretty new system. Take a few simple steps to get your pantry ready for kitchen entertaining!
–>> Find more tips to Organize your Pantry in this post!
Supplies and Sources:
- OXO Baking Set
- Pantry labels
- Spice Risers
- Lazy Susan
- OXO containers
- OXO containers
- Pan Organizers (similar)
- Microwave (not ours but this one is on my wish list!)
- Back of the door organizer
- LED lights
- USB extension
- USB hub
- Hyacinth Wicker Baskets
- Wood Plank Labels
- Birch Edge Tape
- How to Turn a Bifold Door into a Single Door
- How to Organize a Pantry
- Dollar Tree DIY Over-the-Door Organizer
Watch the video and print the supply list for this Pantry Remodel

Pantry Remodel DIY
Supplies
Video
Shop Our Pantry
Pin this post with this Small Pantry Remodel to your Favorite Pinterest Board!

Here are More Home Improvement Tips You Might Like…
How to pick the right paint colors
Have you ever had trouble picking the right paint colors for your home? Choosing the right paint colors for your home can be overwhelming. There are so many different “whites” and “grays” these days, how can anyone know they are making the right paint color choice?
That’s why I put together the best tips on How to Choose Interior Paint Colors in this post.
Every home is different… the entryway in our first home was much different than the entryway in our second home, and both of those were very different from the entryway in our third home! So I chose a different paint color for each entryway in all three of our homes. Not to mention, from the time that we bought our first home, to the time that we bought our third home, home paint color trends changed drastically. The colors that I used back then are no longer a trendy color and well, I just didn’t like the brown-ish tan that was in our first home, haha.
So if you need help choosing paint colors for the rest of your home, head on over to this post to see my paint-picking tips and what has worked for me in all three of our homes 🙂 My post with how to choose paint colors for your home is one of my most popular posts and readers have benefited from reading it before heading to the store to buy paint that ends up not working out.
I also have some ideas for choosing paint color combinations for bedrooms (with themes!)
Paint Versus Peel & Stick Wallpaper
Peel and stick wallpaper has become very popular recently since not everyone has access to tools to build their own Shiplap walls (thanks Chip and Joanna) or wants to tile an entire wall with subway tile. I love tiling but if I could slap up some wallpaper and call it a day, that would make me, the hubby, and my wallet happy!
You can find peel and stick wallpaper online at Target, Amazon, Home Depot, and more! I’ve linked my favorite peel and stick wallpaper and the ones I’ve used personally below.
How To Paint Kitchen Cabinets Without Sanding
If you love white farmhouse kitchens and want to paint your kitchen white, then you will love this post that teaches you How To Paint Kitchen Cabinets White Without Sanding! I’ll show you how to paint old kitchen cabinets and answer how much does it cost to paint kitchen cabinets (it’s much cheaper than you think!). I also have lots of pictures of painting kitchen cabinets before and after!
You don’t have to worry about how to paint kitchen cabinets without brush strokes because I have a secret in this post that reveals a step-by-step DIY tutorial with how to paint kitchen cabinets like a pro.
–>> Learn how to Paint Kitchen Cabinets without Sanding here!
Cheap Home Hacks that’ll Increase Value
Renovating a home can come with a high price tag if you’re not budgeting and deciding which updates bring the best return on investment. After selling our updated first home in just 4 years, we bought an even bigger house that needed a lot of updating. We sold our second home after 4 years while doing the much-needed work to produce a profit by following the same strategies we did in our first home.
If you enjoy updating your home, want to increase your home value or just want your home to look better, you should check out thee 10 Cheap Home Hacks That’ll Make Your House Look So Much Better.
Tour Our Homes
Take a Tour of our Second Home here
Psssssttt…Right now I’m offering FREE access to our Digital Resource Library to all of our newsletter subscribers. Your private access includes dozens of free printable crafts, home decor and organization guides. Hurry up and grab your freebies here! (Access instructions are sent after subscribing).
Disclaimer: This post may contain affiliate links or a sponsored post. All opinions are always 100% mine and I don’t partner with any product or company that I don’t use and love. Please see our Full Disclosure for more information.
 DIY Halloween Boo Basket Flags