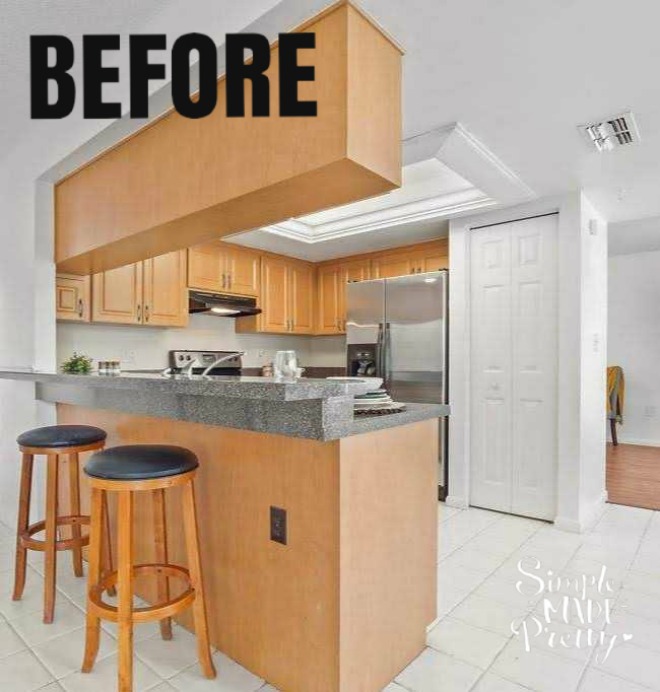
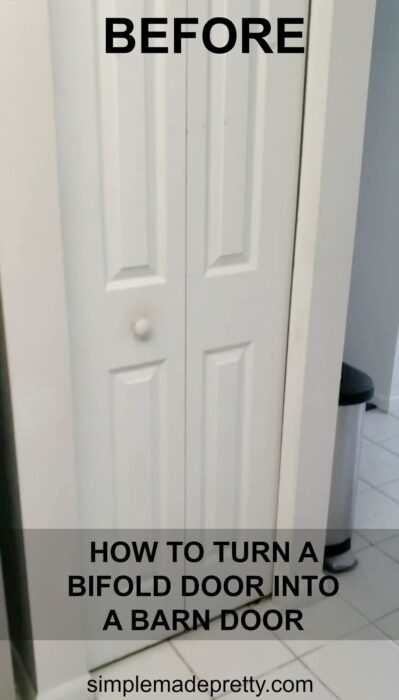
Bi-fold Door into a Single Door
I’m frequently asked how we updated our bifold doors into single doors so I put together this tutorial. Our bifold pantry door was the most asked about since we created a DIY faux barn door look. Watch the video below for more tips to turn a bifold closet door into a single door. This update is so easy, you will be wondering why you waited to so long to update to single doors Instead of bifold doors.
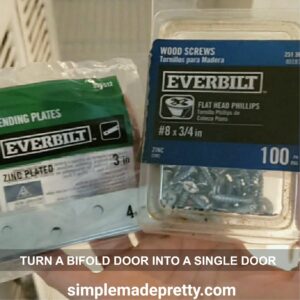
If you’re curious (or in a hurry)…
These 3 things and basic tools are the only things you need to convert a bifold door into a single door.
Why change a bi-fold door to a single door?
Our reason for updating our bifold doors was to reduce accidents (I’ve pinched my fingertips off in those doors before!) and to provide more options for back-of-the-door storage. A single door allows you to open the door open all the way so you can utilize the back of the door to hang other items.
We live in a small home with limited storage options so having a single door created more storage. Plus we liked the look and function of a single door more than a bi-fold door.
How to Hang Bifold Doors Using Hinges
In this tutorial, I share how we kept the original bi-fold door and turned it into a single door by using hinges and brackets. The reason why we kept the exact same door was that our home is older, we knew it would be difficult to find a perfect match door to fit in the door frame. It was also more cost-effective to use the same door since it was in good condition.
Bi-fold Doors Open Flat
In order to transform your bifold doors to stay open as a single door, you will need to right brackets. It’s really as simple as that! Once you have a single door, you will be able to use the backside of the door for additional storage, hooks, and over-the-door racks.
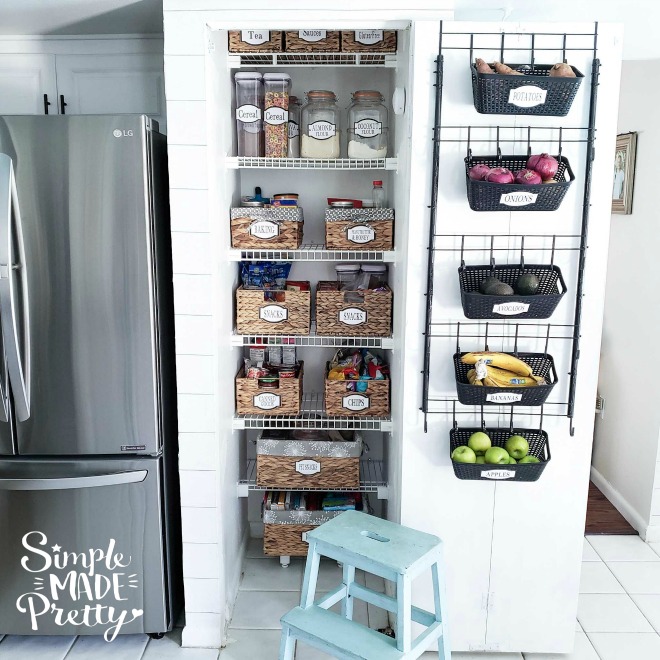
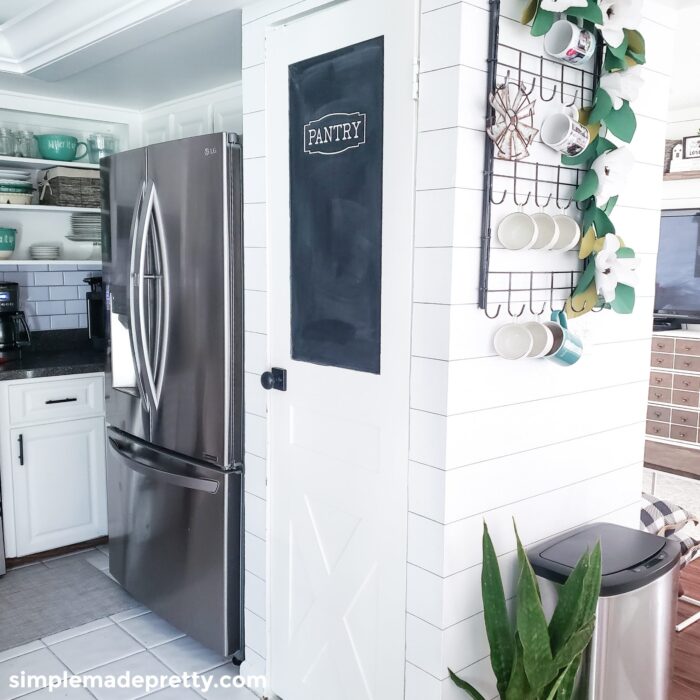
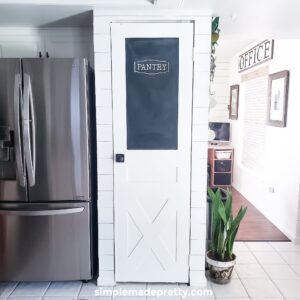
Inside Our Converted Pantry Door
Learn How to Make this Dollar Tree Over the Door Organizer:
WATCH THE VIDEO HERE
Replace Bi-Fold Doors with Barndoor
In this tutorial, I share how we updated our linen closet bi-fold door into a single door but I also share how we updated our pantry closet bi-fold door into a single BARN door. We used the same door and modified the bi-fold door to look like a barn door!
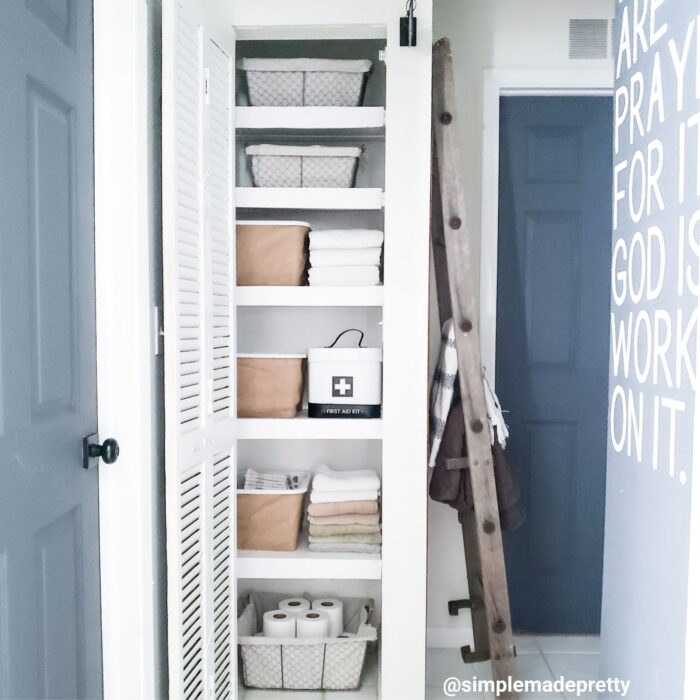
Inside Our Converted Linen Closet Door
See the Rest of these Linen Closet DIY Ideas:
SEE THE TUTORIALS HERE
How to Turn Bifold Doors into Barn Doors
For the purpose of this tutorial, I’m sharing pictures and a video of our Linen Closet bifold door update. Scroll further to see more images of our Pantry Door bifold door update.
First, we update the bifold doors into single doors, then, if you’d like to add a farmhouse design to the front of your door like our Pantry Door, I will show you how to turn a bifold door into a barn door.
Supplies:
- Crowbar
- Screwdriver or drill
- Razor Blade
- Door hinges
- Metal Plates
- Screws
- Magnetic Door Catch
- Metal Anchors (optional)
Directions:
- Gather supplies.

- Remove any molding outside the door.
- Our closet door had shoe molding around the outer inside frame and we used a razor blade, then crowbar and hammer to remove the molding.
- Push down the top roller guide to remove the door from the track. Then remove the roller guide from the door using either a screwdriver or a crowbar.
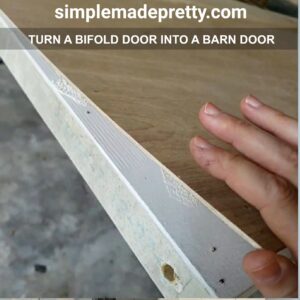
- We attached the metal plates to the inside fold while the door was still hanging from the track (which was easier than removing the entire door and trying to find a level surface to work on).
- Attach a metal plate to the top, bottom, and middle to connect to the bi-folds together.
- Remove the door from the top track and bottom pivot.
- You can remove the track and the hardware at the bottom if you choose to, however, we left ours in place in case we wanted to change it back to a bi-fold door later on.
- Attach the hinges to the side of the door.
- Before reinstalling the door, check to make sure you don’t have any floorboards sticking out that would cause an issue for your door to open/close. Cut the floorboards so they are flush with the wall if needed.
- Attach the door with hinges to the inside of the door frame. You may need assistance to hold the door in place while you do this.
- Attach the magnetic latch to the inside of the upper corner of the door frame.
- Attach the connecting magnetic piece to the top of the door and make sure it’s in position to work properly.
- That’s it! You should have a working single door now!


How to Add a Barn Door Design to a Single Door
Now that you have a single (or regular) door, you can use it as-is or you can add a fun design to make the bifold door look like a barn door!
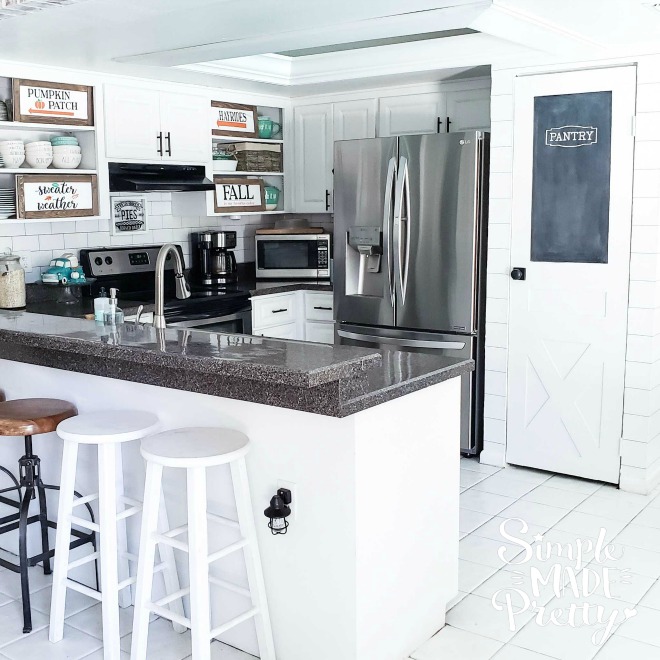
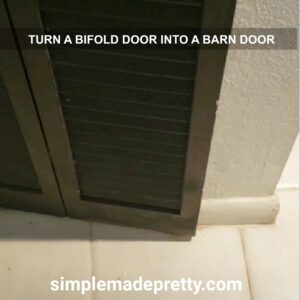
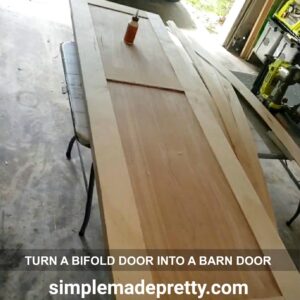
We turned our pantry bi-fold door into a barn door by adding a thin piece of plywood cut to size to the front to cover the seam and to give our door a wood appearance.
We used Gorilla Wood Glue to glue the wood to the front of the door. Our door is hallowed and we tried using a nail gun to attach the wood but the nails went right through. You should use some clamps to hold the wood in place while the glue dries.
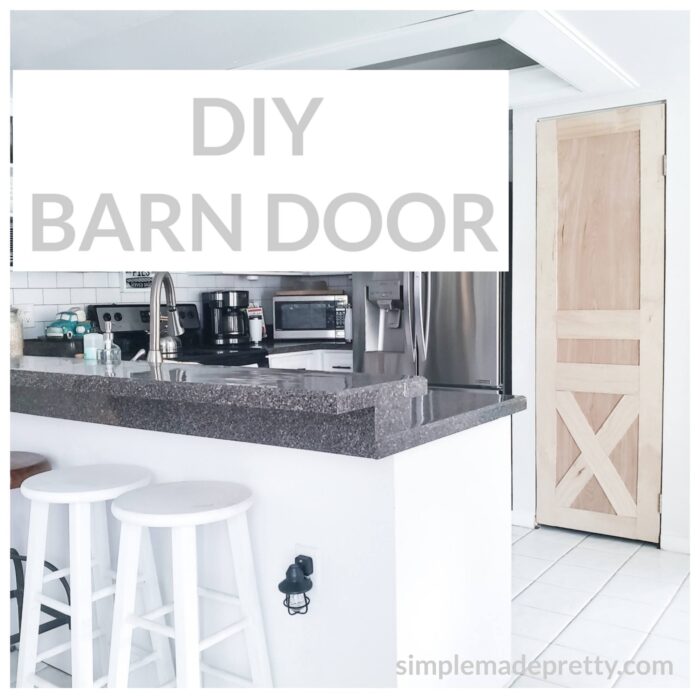
While the glue is drying, you can cut some smaller pieces of wood strips using the same plywood to create a design for your door. We did strips around the sides and an “X” at the bottom for a farmhouse look.
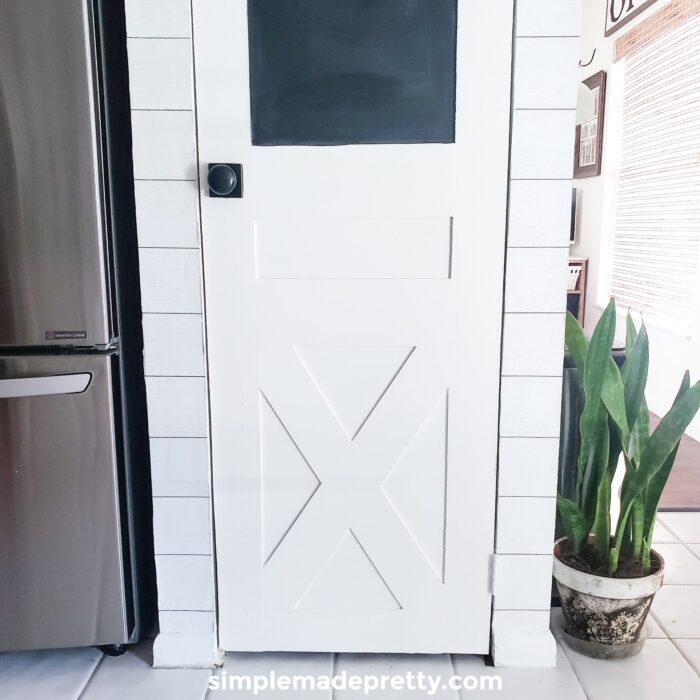
I painted our pantry barn door with white paint and black chalkboard paint in the top center. I also used my Cricut machine to make a PANTRY decal for the door.
Updating the pantry door provided more storage options too!
I was able to make an over-the-door organizer using Dollar Tree supplies and hung it on the back of our new pantry barn door.
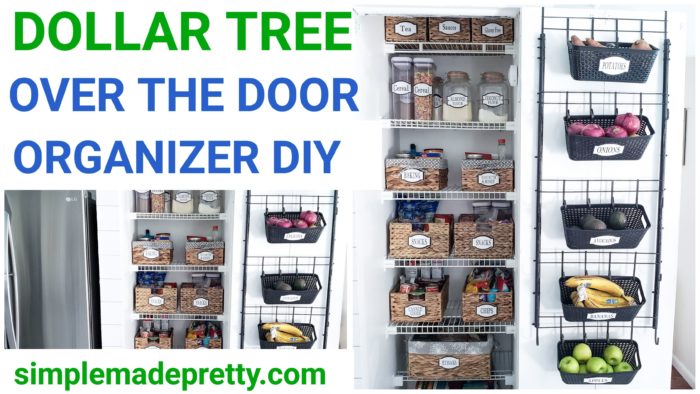
Just be careful if you are placing a lot of weight on your door as we did because the extra weight from heavy products in the baskets eventually pulled our hinges out (since they were in drywall and not an actual door frame. *** My hubby fixed this though by using metal anchors!
Final Thoughts on Converting a Bifold Door into a Single Door
I hope this tutorial helped you see how easy it is to change bifold doors into single doors. The cost is under $20 and takes less than an hour if you have all the supplies. Updating your bifold doors provides storage on the back of the door and will give you the function of a regular door.
If you’d like to see more DIY ideas, be sure to follow me on Instagram and subscribe to my YouTube channel.
–>>You can follow me on Instagram here
Did you make this DIY or a similar one? I would love to see it! Send me a picture on Facebook, Instagram, or email and I’ll share with my followers 🙂
Print the Tutorial & Watch the Video for the Bifold Door turned into a Single Door
DIY Bifold Doors into Single Doors
Supplies
- Crowbar
- Screwdriver or drill
- Razor Blade
- Door hinges
- Metal Plates
- Screws
- Magnetic Door Catch
- Metal Anchors (optional)
Instructions
- Gather supplies.
- Remove any molding outside the door. Our closet door had shoe molding around the outer inside frame and we used a razor blade, then crowbar and hammer to remove the molding.
- Push down the top roller guide to remove the door from the track. Then remove the roller guide from the door using either a screwdriver or a crowbar.
- We attached the metal plates to the inside fold while the door was still hanging from the track (which was easier than removing the entire door and trying to find a level surface to work on).
- Attach a metal plate to the top, bottom, and middle to connect to the bi-folds together.
- Remove the door from the top track and bottom pivot. You can remove the track and the hardware at the bottom if you choose to, however, we left ours in place in case we wanted to change it back to a bi-fold door later on.
- Attach the hinges to the side of the door.
- Before reinstalling the door, check to make sure you don’t have any floorboards sticking out that would cause an issue for your door to open/close. Cut the floorboards so they are flush with the wall if needed.
- Attach the door with hinges to the inside of the door frame. You may need assistance to hold the door in place while you do this.
- Attach the magnetic latch to the inside of the upper corner of the door frame.
- Attach the connecting magnetic piece to the top of the door and make sure it’s in position to work properly.
- That’s it! You should have a working single door now!
Video
Don’t forget!
Here are More Home Improvement Tips You Might Like…
How to pick the right paint colors
Have you ever had trouble picking the right paint colors for your home? Choosing the right paint colors for your home can be overwhelming. There are so many different “whites” and “grays” these days, how can anyone know they are making the right paint color choice?
That’s why I put together the best tips on How to Choose Interior Paint Colors in this post.
Every home is different… the entryway in our first home was much different than the entryway in our second home, and both of those were very different from the entryway in our third home! So I chose a different paint color for each entryway in all three of our homes. Not to mention, from the time that we bought our first home, to the time that we bought our third home, home paint color trends changed drastically. The colors that I used back then are no longer a trendy color and well, I just didn’t like the brown-ish tan that was in our first home, haha.
So if you need help choosing paint colors for the rest of your home, head on over to this post to see my paint-picking tips and what has worked for me in all three of our homes 🙂 My post with how to choose paint colors for your home is one of my most popular posts and readers have benefited from reading it before heading to the store to buy paint that ends up not working out.
I also have some ideas for choosing paint color combinations for bedrooms (with themes!)
Paint Versus Peel & Stick Wallpaper
Peel and stick wallpaper has become very popular recently since not everyone has access to tools to build their own Shiplap walls (thanks Chip and Joanna) or wants to tile an entire wall with subway tile. I love tiling but if I could slap up some wallpaper and call it a day, that would make me, the hubby, and my wallet happy!
You can find peel and stick wallpaper online at Target, Amazon, Home Depot, and more! I’ve linked my favorite peel and stick wallpaper and the ones I’ve used personally below.
How To Paint Kitchen Cabinets Without Sanding
If you love white farmhouse kitchens and want to paint your kitchen white, then you will love this post that teaches you How To Paint Kitchen Cabinets White Without Sanding! I’ll show you how to paint old kitchen cabinets and answer how much does it cost to paint kitchen cabinets (it’s much cheaper than you think!). I also have lots of pictures of painting kitchen cabinets before and after!
You don’t have to worry about how to paint kitchen cabinets without brush strokes because I have a secret in this post that reveals a step-by-step DIY tutorial with how to paint kitchen cabinets like a pro.
–>> Learn how to Paint Kitchen Cabinets without Sanding here!
Cheap Home Hacks that’ll Increase Value
Renovating a home can come with a high price tag if you’re not budgeting and deciding which updates bring the best return on investment. After selling our updated first home in just 4 years, we bought an even bigger house that needed a lot of updating. We sold our second home after 4 years while doing the much-needed work to produce a profit by following the same strategies we did in our first home.
If you enjoy updating your home, want to increase your home value or just want your home to look better, you should check out thee 10 Cheap Home Hacks That’ll Make Your House Look So Much Better.
Tour Our Homes
Take a Tour of our Second Home here
Psssssttt… Want more inspiration delivered directly to your inbox? Subscribe to our FREE weekly newsletter! We provide simple ideas for Organizing, Handmade Projects, Crafts, Home Decor, and more! Hurry up and sign up here!
Disclaimer: This post may contain affiliate links or a sponsored post. All opinions are always 100% mine and I don’t partner with any product or company that I don’t use and love. Please see our Full Disclosure for more information.
 DIY Mini Rolling Pins