DIY Workshop Shed Makeover
Embarking on a DIY workshop shed makeover is an exhilarating venture that not only revitalizes your creative space but also injects a fresh dose of inspiration into your projects. Whether you’re a woodworking enthusiast, a passionate crafter, or someone who enjoys tinkering with gadgets, transforming your workshop shed can significantly enhance your productivity and enjoyment. This blog post will guide you through the steps that we took to achieve a functional and aesthetically pleasing workshop shed makeover. Keep reading to see this DIY Shed Makeover!

In case you’re in a hurry…
Why Makeover a Shed?
Turning a storage shed into a functional workshop is a creative and efficient way to maximize the utility of outdoor space while fostering personal hobbies or even supporting a small business. This transformation encompasses a range of benefits that cater to both practical and personal growth aspects.
Firstly, converting a storage shed into a workshop offers a dedicated space for projects, which is essential for anyone passionate about woodworking, crafting, or any form of hands-on work. Having a specific area that is organized and equipped with tools and materials can significantly boost productivity and creativity.
It eliminates the need to clear a spot in the garage or kitchen table every time you want to work on a project, thus allowing for a more spontaneous and immersive engagement with your craft. Moreover, a workshop provides the opportunity to set up equipment that may be too large or noisy for the house, like table saws or welding machines, enabling more ambitious projects.
Secondly, this transformation can add significant value to a property. A well-constructed, functional workshop is an attractive feature for potential buyers, should you ever decide to sell your home. It showcases the property’s versatility and appeal to those who appreciate having a personal space for hobbies or DIY projects. Additionally, for entrepreneurs, a backyard workshop can serve as the birthplace of a small business, offering a low-cost venue for production without the need for leasing commercial space.
Lastly, there’s a profound sense of satisfaction and well-being that comes from creating a personalized workspace. It’s not just about the physical transformation of the shed but also about carving out a personal haven that reflects one’s interests and aspirations. This personalization can foster a deeper connection to one’s hobbies or work, providing a therapeutic escape from the daily grind. In essence, a functional workshop is more than just a place—it’s a sanctuary for creativity, innovation, and passion.
Decluttering My Craft Room with a DIY Workshop Shed
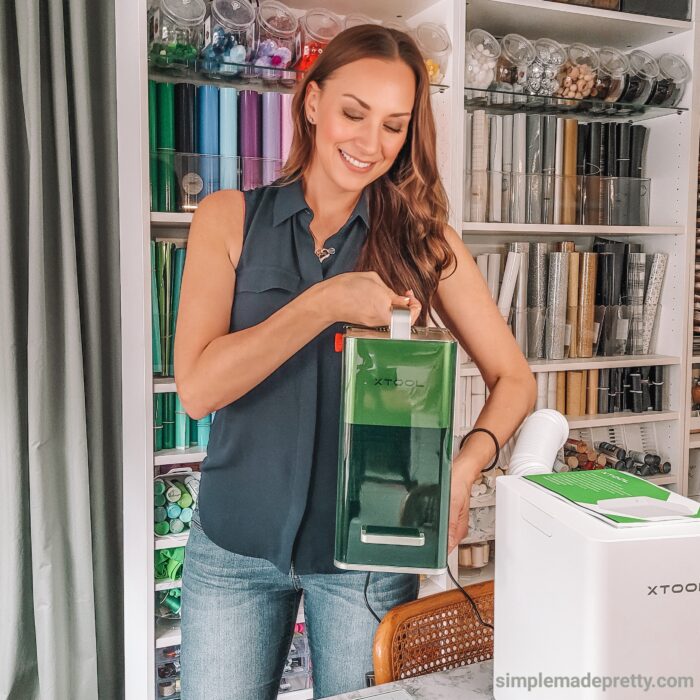
I was running out of space in my Craft Room and desperately needed a space for my laser-cutting machines and all the laser cutting supplies. I hated using my laser cutting machines inside our house (even though I have air purifier machines, fans, and hoses to clean the fumes) so I moved my xTool M1 Machine and my xTool F1 Machine into our shed. I also wanted to streamline our home improvement tools and equipment. We have a lot of tools since my husband and I are both DIYers!
Shop Our Shed Workshop

Where is Our Shed From?
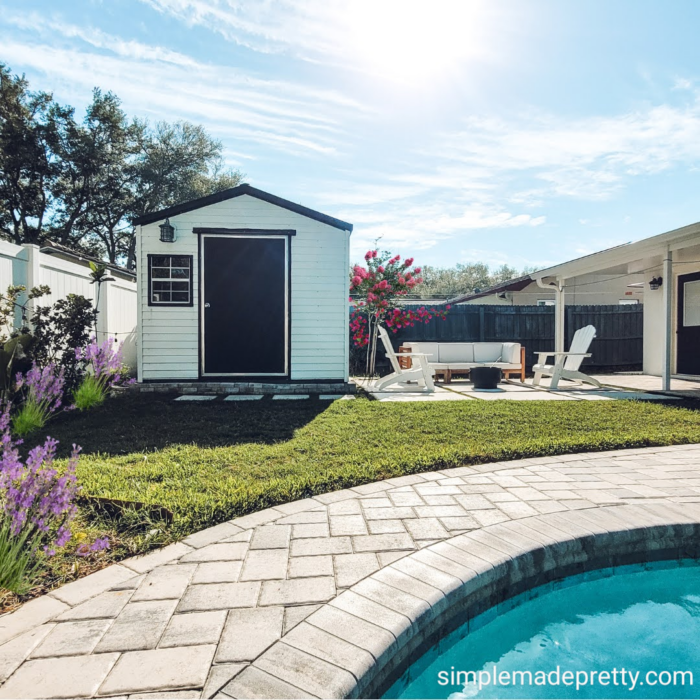
We purchased our shed pre-built 4 years ago from Wally Walt, a local shed dealer in the Tampa area. Our shed is 10 x 10 feet with an elevated ceiling with an aluminum frame. There is some wood but we chose aluminum to increase the lifespan in the Florida temps and humidity.
How To Turn a Shed into a Craft Room Workshop
Here are 10 steps to turn a cluttered storage shed into a functional and beautiful workspace!
Declutter
The first step in your makeover journey is to declutter and organize. A well-organized workshop can drastically improve your efficiency and creativity. Start by sorting through your tools, materials, and equipment. Keep what’s necessary, donate what you don’t need, and dispose of the rest responsibly. This was VERY time-consuming for us because we collected a lot of tools over the years and had multiple of one tool. Consider keeping tools with multi-functions and downsizing to only one of each tool (keep the quality tools over ones that might break easily).

Update the Floor
If you have a standard shed, you probably have a plywood floor, which can be worn over time. Updating the floor in a shed can significantly enhance the functionality, durability, and overall value of the structure. Firstly, a well-maintained floor can prevent various issues that might otherwise compromise the integrity of the shed and the items stored within it. For instance, a robust, updated floor can better resist moisture and deter pests, which are common problems that can lead to damage over time. Moisture, in particular, can cause wooden floors to rot, and updating the floor with treated wood or waterproof coatings can prolong its life and protect your belongings.
We updated our floor with vinyl sheet flooring. It was easy to install and we had it cut to size at the store. We have this white oak vinyl floor in our shed.

Add Cabinets
Having cabinets in a workshop is not just about keeping tools and materials out of sight; it’s about creating an environment that fosters efficiency, safety, and creativity. These storage solutions not only help in keeping your tools accessible but also in creating a more spacious and welcoming environment.
I used Ikea Besta cabinets in our shed which turned out perfect! We had these cabinets in our office at one point in time and needed a place to put them so I used them in the shed. The Ikea Besta cabinets are functional because you can arrange them to fit most spaces.

Include a Work Table
A table in a workshop serves as a fundamental piece of infrastructure that significantly enhances the functionality and efficiency of the space. It provides a stable, flat surface essential for various tasks, ranging from simple projects to complex assemblies. The importance of a table in a workshop can be appreciated by considering its multifaceted utility. The Work Table in our shed is high-quality and the height can be adjusted.
Add Pegboards or Shelves
Consider installing wall-mounted racks, pegboards, and shelves to maximize vertical space. We installed a large pegboard above the workshop table and used hooks to organize tools that we use often.
My husband added a loft to our shed a few years ago so we use it as storage for items we don’t use often. He also built a shelf above the doorway which is not pictured but is very handy for everyday tools. I also built a wood crate table using leftover wood crates from the shed clean out. I used wood glue to attach them together and glued a piece of scrap wood to the top.

Label Containers
Integrating clear labeling systems and zones dedicated to specific activities can further streamline your workflow. I used my Munbyn Label Printer to create clear labels for the bins and baskets on the shelves. Labels make it easier for multiple people using the workshop to find what they’re looking for with little effort. My husband, myself, and kids all use this shed for various DIY projects!
Paint or Add Wall Panels
Focus on enhancing the aesthetics and comfort of your shed. A fresh coat of paint can do wonders in transforming the space. I skipped painting since the interior walls of our shed were white metal. Instead, I chose to add some wall panels in the corners to create a finished look. I used Beadboard and Faux White Brick Wall Panels that my hubby cut to fit the space. These are not finished to perfection but no one sees those details but us!

Add Lighting
Good lighting is crucial in a workshop. Opt for LED lights that mimic natural daylight, and consider adding task lighting over workbenches to reduce eye strain. Our shed has 2 windows and a large door that I can prop open for natural light but we also have electricity in our shed with a spotlight inside and a hanging work light.
Include a Chair or Stools
Don’t overlook the importance of comfort; invest in a durable, ergonomic chair and anti-fatigue mats to make those long hours in the workshop more bearable. I plan to add a swinging egg chair in the corner of the shed very soon! The workshop table is set at a comfortable height to use as a standing desk. I also have a small stool to use as a side table or seating next to the cabinets if I’m working on an laser project.
Add Personal Decor
Lastly, personalize your space with decor that reflects your interests and achievements – be it framed photos, awards, or handmade items. I added a sign that I made my husband several years ago for Father’s Day… Daddy’s Workshop, Toys Fixed for Free. You can find the tutorial and the Free SVG here.

Wrap Up About Turning a Storage Shed into a Functional Workshop
A DIY workshop shed makeover is more than just a project; it’s a rejuvenation of your creative space that can lead to a surge in productivity and joy. By decluttering and organizing, enhancing aesthetics, and prioritizing comfort, you can transform your workshop shed into a sanctuary that not only meets your practical needs but also reflects your unique personality and style. Remember, the most important aspect of this makeover is to create a space that inspires and motivates you. So roll up your sleeves, let your creativity flow, and embark on this fulfilling journey to revamp your workshop shed.
In case you’re in a hurry…
Here are more articles you might like…
Cricut Craft Room Organization Ideas: Cheap And Space Saving
Psssssttt…Right now I’m offering FREE access to our Digital Resource Library to all of our newsletter subscribers. Your private access includes dozens of free printable crafts, home decor and organization guides. Hurry up and grab your freebies here! (Access instructions are sent after subscribing).
Disclaimer: This post may contain affiliate links or a sponsored post. All opinions are always 100% mine and I don’t partner with any product or company that I don’t use and love. Please see our Full Disclosure for more information.
 How to Paint a Pop Up Camper Exterior