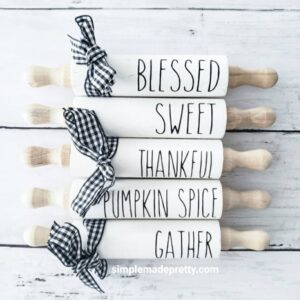
Farmhouse Mini Rolling Pins
These mini rolling pins are one of the most popular items in my shop and on Instagram. I created a video sharing how to make farmhouse mini rolling pins and they are been so popular that I put together this post sharing how to DIY Mini Rolling Pins. You will find a video and printable instructions to make wood mini rolling pins and the best place to buy mini wood rolling pins in this article.
I use my Cricut machine to make decals for mini rolling pins and I sell the decals in my shop. If you don’t have a Cricut or Silhouette machine, you can still make these mini rolling pins by using stickers from Dollar Tree or purchasing the decals from my shop.
If you’re curious (or in a hurry)…
They are an excellent brand and yet, you’ll also find that it is one of the cheapest options you’ll find online.
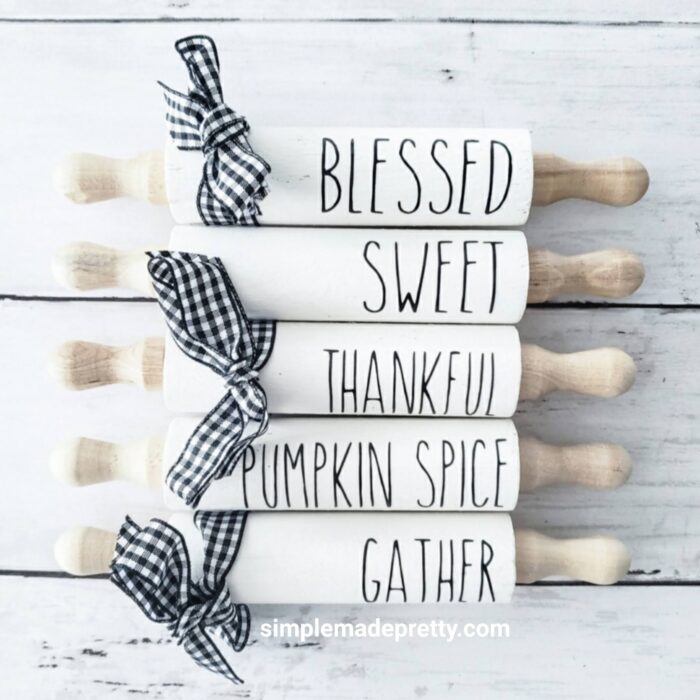
The Rae Dunn Mini Rolling Pins are the most popular so all of my mini rolling pins have the Rae Dunn font. I like to decorate my inspired by Rae Dunn mini rolling pins on a tiered tray with other Rae Dunn items.
In this tutorial, I share how to make farmhouse mini rolling pins by using alphabet stickers or a circuit machine.
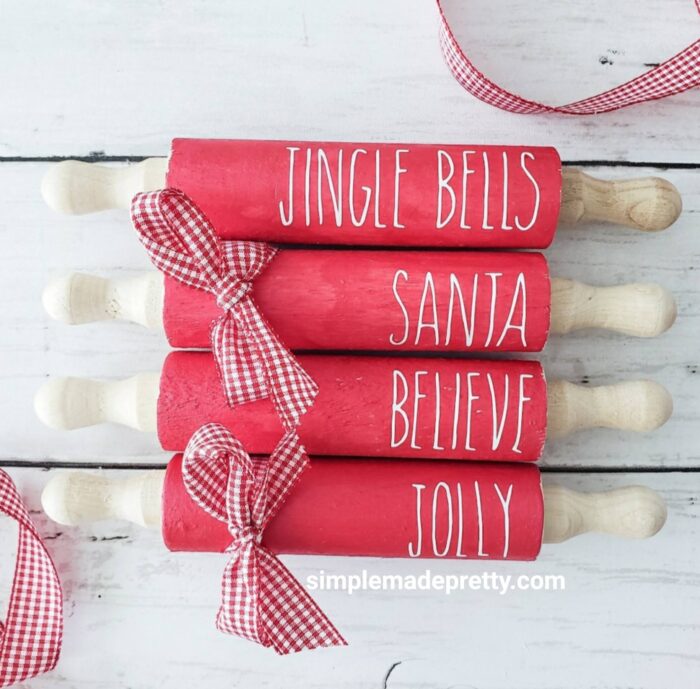
Christmas Rolling Pins
see color options and available decals:
GET THE DECALS HERE
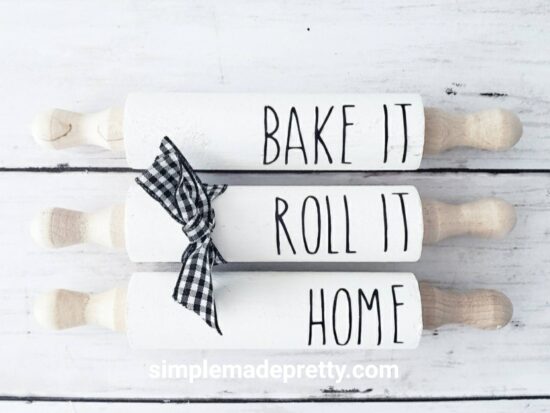
I like to paint my mini rolling pins to match our home decor and the current season.
I offer 100+ different decals in my shop, however, I do not offer custom decals at this time.
You can also find Etsy sellers that offer the entire rolling pin already made with the decal, but these mini rolling pins are so easy to Do It Yourself, you will save so much money!
Does Dollar Tree sell Mini Rolling Pins?
Unfortunately, Dollar Tree does not sell mini rolling pins. I can’t find a regular rolling pin on their website either.
How Do You Make a Mini Rolling Pin?
I purchase the plain wood rolling pins online here and then I decorate them with paint, decals, and ribbon.
I highly recommend purchasing the craft mini rolling pins online because they are very popular and are always sold out in stores. The wood mini rolling pins come in a package of 3 and I recommend purchasing multiples 😉
What do you do with Mini Rolling Pins?
You may be wondering what is the purpose of a mini rolling pin. That’s okay 🙂 Many people use them in their home decor on tiered trays. shelf decor, and table decorations.
I share some images in this post and on my Instagram page with ideas to use mini rolling pins in your home decor.
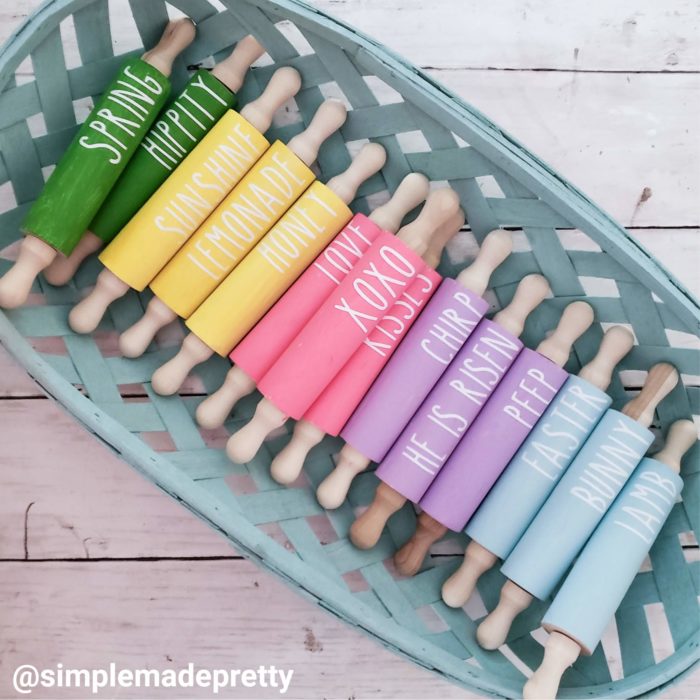
Easter Rolling Pins
see color options and available decals:
GET THE DECALS HERE
Want to see my latest DIY videos in Real-Time? Follow me on Instagram and YouTube!
–>>You can follow me on Instagram here
I post lots of “tasty” style videos on my Instagram account… just because it’s easier to share in real-time.
So if you want to be the first to know about my latest and greatest DIY’s and more, I highly encourage you to follow me on Instagram. If you don’t have an Instagram account, it’s really easy to set one up and in my opinion, it’s easier to use than Facebook 🙂
I’m including a detailed video below sharing how to make DIY Farmhouse Mini Rolling Pins.
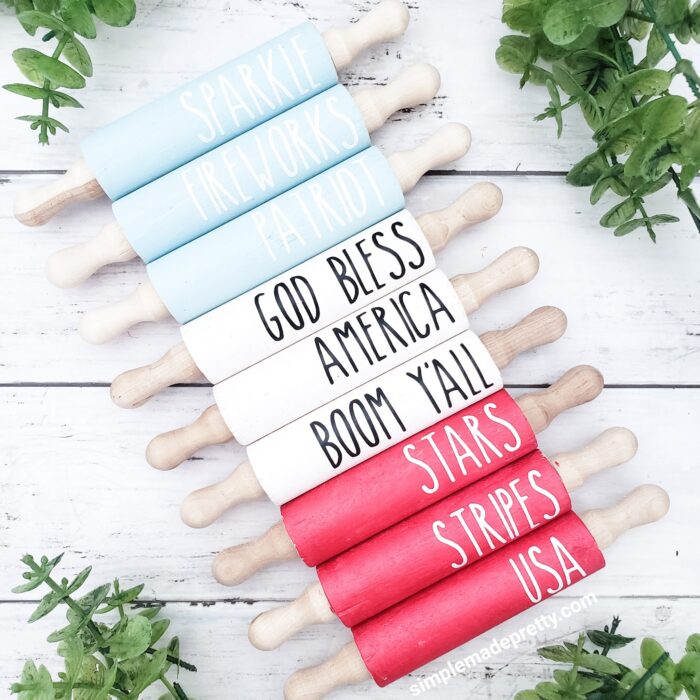
Patriotic Rolling Pins
see color options and available decals:
GET THE DECALS HERE
Let’s get started so you can see how easy and affordable it is to make these popular mini rolling pins!
DIY Tutorial to Make Rae Dunn Mini Rolling Pins
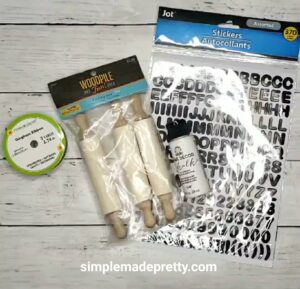
Supplies:
- Craft Wood Mini Rolling Pins
- Paint or Stain
- Alphabet Stickers (or make decals using Cricut Decal Supplies below)
- Ribbon
Cricut Decal Supplies:
- Cricut Explore, Joy, or Maker Machine
- Standard Grip Mat
- Oracal 651 or 631 Vinyl in Black
- Cricut Weeding Tools
- Cricut BrightPad (optional)
- Contact Paper
- Cricut Smoothing Tool
Directions:
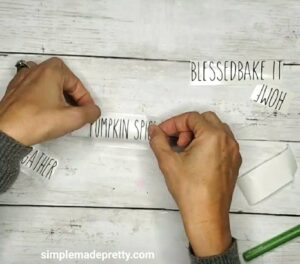
- Gather Supplies.

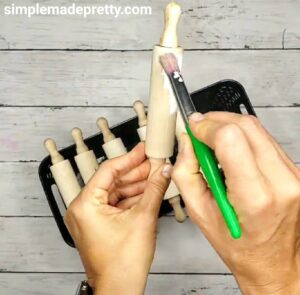
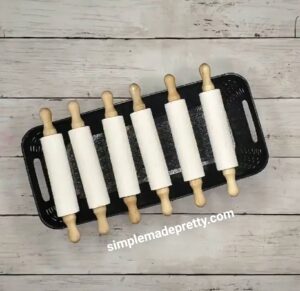
- Paint or stain the mini rolling pins in your desired color.
- Let dry using a small basket to hold the side of the pins.
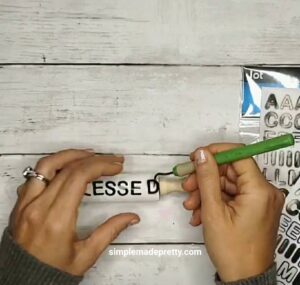
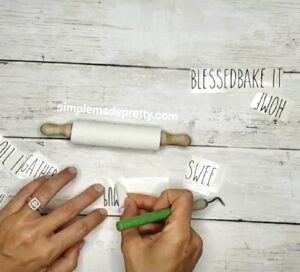
- Use alphabet stickers to decorate the mini rolling pins.
- If you are using a Cricut machine: Design your text in Cricut Design Space. I use The Skinny font in bold (if you plan to sell your decals or mini rolling pins, you must purchase the font commercial license).
- Size the text approximately 3″L x 0.9″H.
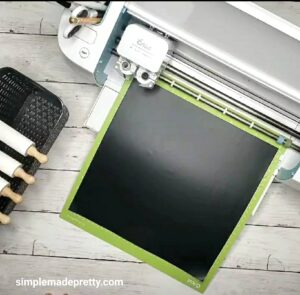
- Set your Cricut machine to cut vinyl and cut.
- Weed the image ( I use a Cricut BrightPad since the small text is difficult to weed).
- Apply contact paper to the image.
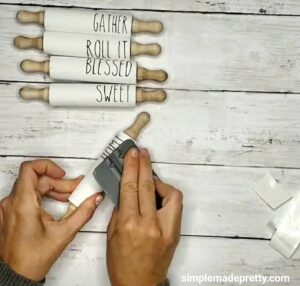
- Apply the image to the mini rolling pins and use a smoothing tool to press the vinyl firmly on the rolling pin.
- Slowly peel back the clear contact paper to reveal your finished Rae Dunn mini rolling pins (see the video for more details).
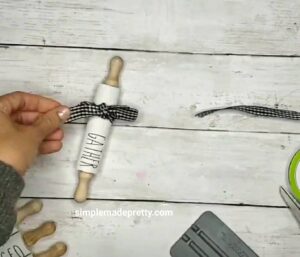
- Add ribbon if desired.

How to use Mini Rolling Pins in Decor
Here are a few ways that I’ve used these mini rolling pins in my home decor

Mini Rolling Pins on a Tiered Tray
Learn How to make this Tiered Tray for $1
WATCH THE VIDEO HERE
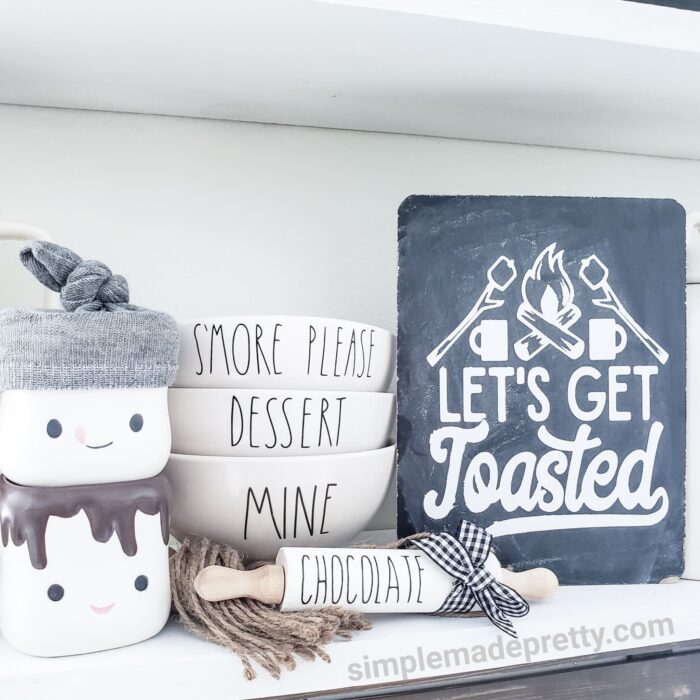
S’mores Station Mini Rolling Pin
Learn How to make this $1 Chalkboard Sign
WATCH THE VIDEO HERE
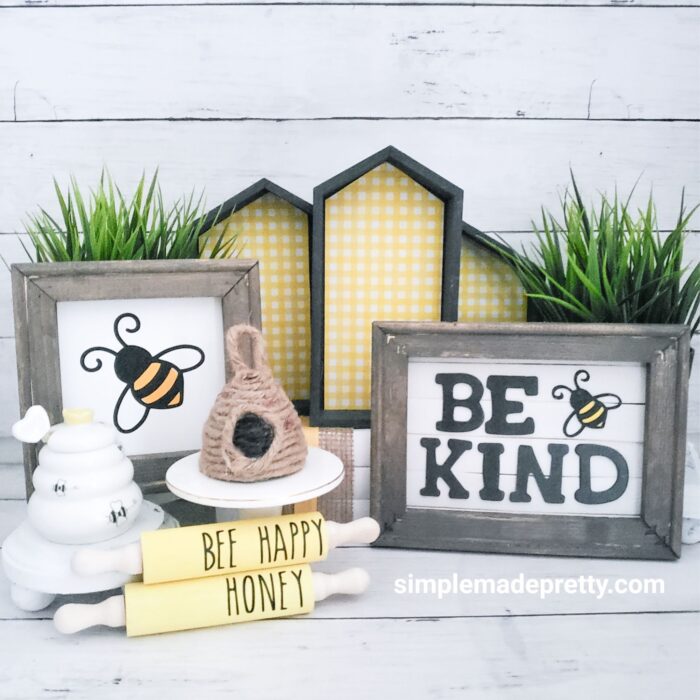
Bee themed Mini Rolling Pins Decor
Learn How to make this Bee Decor Set Up
SEE THE TUTORIALS HERE
Mini Rolling Pins Tutorial Wrap Up
I hope you enjoyed learning how to make these popular Rae Dunn inspired mini rolling pins. These mini rolling pins can be used in your seasonal decor and add a cute touch to holiday displays. Give these DIY farmhouse mini rolling pins to friends and family as unique gifts. Get your favorite mini rolling pin decals in my shop here!
If you’d like to see more DIY ideas, be sure to follow me on Instagram and subscribe to my YouTube channel.
–>>You can follow me on Instagram here
Did you make this DIY or a similar one? I would love to see it! Send me a picture on Facebook, Instagram, or email and I’ll share with my followers 🙂
Watch the Video to Make Mini Rolling Pins
Print the Tutorial to Make the DIY Farmhouse Mini Rolling Pins
DIY Mini Rolling Pins
Equipment
- Cricut Machine
Supplies
- Craft Wood Mini Rolling Pins
- Paint or Stain
- Ribbon
- Alphabet Stickers (or make decals using Cricut Decal Supplies below)
Instructions
- Gather Supplies.
- Paint or stain the mini rolling pins in your desired color.
- Let dry using a small basket to hold the side of the pins. Use alphabet stickers to decorate the mini rolling pins.
Cricut Machine Instructions
- Design your text in Cricut Design Space. I use The Skinny font in bold (if you plan to sell your decals or mini rolling pins, you must purchase the font commercial license).
- Size the text approximately 3"L x 0.9"H.Set your Cricut machine to cut vinyl and cut.
- Weed the image ( I use a Cricut BrightPad since the small text is difficult to weed).
- Apply contact paper to the image.
- Apply the image to the mini rolling pins and use a smoothing tool to press the vinyl firmly on the rolling pin.
- Slowly peel back the clear contact paper to reveal your finished Rae Dunn mini rolling pins (see the video for more details).
- Add ribbon if desired.
Video
Don’t forget!
✅ This is where I get plain wood mini rolling pins and I buy them in bulk online!
More Popular Budget-Friendly DIY Ideas…
Here are related articles that you might also like!
Over The Door Organizer Dollar Tree DIY
Learn how to make a cute and functional over-the-door organizer that I made using Dollar Tree supplies. I shared this over the door organizer shown in our pantry on Instagram and YouTube recently and I knew it would be pretty popular (because I was also in love with how it turned out!) so I wanted to share this tutorial on my blog as well. This back of the door storage organizer is made with Dollar Tree supplies. I’m also giving my readers some FREE Printable Pantry labels and Blank Labels in this post!
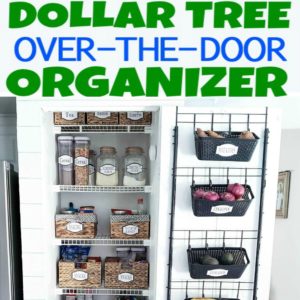
–>>Keep reading to learn how to make this Over The Door Organizer Dollar Tree DIY!
Dollar Tree Farmhouse Wall-Mounted Mug Rack DIY
DIY these popular farmhouse mug racks made using Dollar Tree supplies! I shared these DIY wall mug racks on Instagram and I knew they would be pretty popular (because I was also in love with how they turned out!) so I wanted to share this tutorial on my blog as well. These mug racks are made with Dollar Tree supplies.

–>>Keep reading to learn how to make this Dollar Tree Farmhouse Wall-Mounted Mug Rack DIY!
DIY Dollar Store Farmhouse Ladder
If you’ve seen those farmhouse ladders used for various home decor ideas, you probably know how much they cost in high-end decor stores. I got lucky and found a large antique ladder at a yard sale but I wanted an extra farmhouse ladder to use as a planter outside so I made my own! The best part about this DIY farmhouse ladder is that it’s made using items for less than a few dollars! This ladder was so easy that I made a mini tea towel ladder (yes, tea towel ladders are a thing!) for just $3!
–>>Keep reading to learn how to make a DIY Farmhouse Ladder For $3!
$1 Tiered Tray DIY
I bet you’ve seen those beautiful farmhouse style tiered trays and you may be wondering how you can DIY a tiered tray using Dollar Store materials. Well, it’s so simple that you might end up addicted to making a 2 tier serving tray that you make a whole bunch for your home!
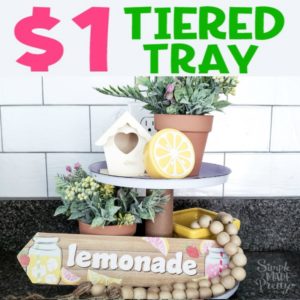
–>>Learn how to make a tiered tray for just a $1 with this Dollar Tree hack!
Psssssttt… Want more inspiration delivered directly to your inbox? Subscribe to our FREE weekly newsletter! We provide simple ideas for Organizing, Handmade Projects, Crafts, Home Decor, and more! Hurry up and sign up here!
Disclaimer: This post may contain affiliate links or a sponsored post. All opinions are always 100% mine and I don’t partner with any product or company that I don’t use and love. Please see our Full Disclosure for more information.
 A DIY Dollar Tree Apothecary Cabinet With Pictures