
DIY Dollar Tree Storage Baskets That Look Expensive
Turn $1.25 plastic bins into beautiful fabric-covered storage baskets with this easy Dollar Tree organization hack.
Would you believe these storage baskets started as inexpensive plastic bins from Dollar Tree? I covered them with burlap fabric to create the look of expensive woven baskets without paying designer prices.
This is one of my favorite Dollar Tree organization hacks because it isn’t just pretty—it has lasted. I originally made these baskets nearly a decade ago, and I’ve used them in my living room, craft room, garage and closets.
Each basket takes about 15 minutes to cover, and you can customize the fabric to match your home. Below, I’ll show you exactly how I turned ordinary $1.25 plastic bins into stylish storage baskets that look much more expensive than they are.
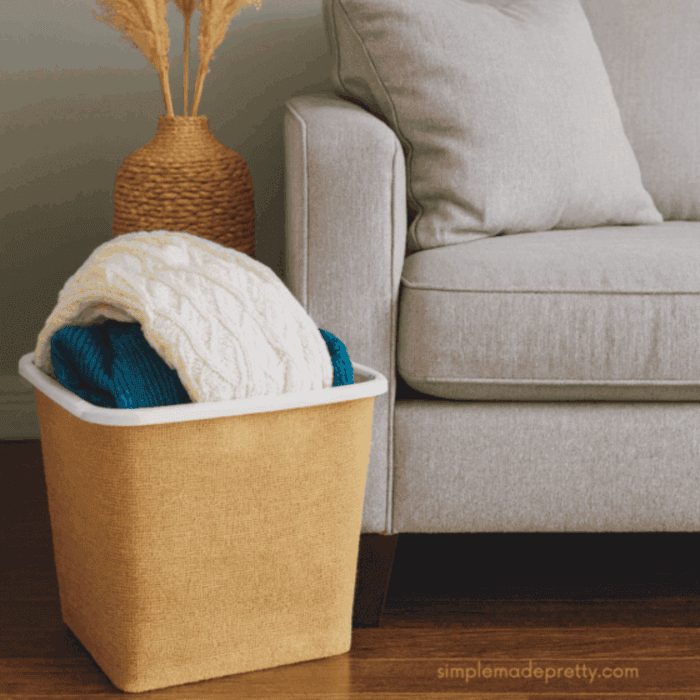
Originally published in 2017; updated in July 2026 with new tips, materials and long-term results.
DIY Dollar Tree Basket at a Glance
- 💵 Cost: About $3–$5 per basket, depending on the fabric
- ⏱️ Time: Approximately 15 minutes, excluding optional paint drying
- ✨ Skill level: Beginner
- 🌾 Best fabric: Tight-weave burlap, canvas or drop cloth
- 🧺 Best for: Closets, shelves, craft rooms, bathrooms and pantries
🧺 WATCH THIS BURLAP BASKET MAKEOVER 🧺
Watch how I transformed inexpensive Dollar Tree plastic bins into stylish burlap storage baskets—and see why they are still holding up in my home almost 10 years later.
✨ Watch the quick transformation above, then follow the complete tutorial below to make these affordable storage baskets for your home.
Supplies You’ll Need
Everything can be found at Dollar Tree or your local craft store!
- 🪣 Plastic organizing bins (rectangular or square work best)
- 🌾 Burlap fabric roll (or canvas drop cloth for a different look)
- 🔥 Hot glue gun + glue sticks
- ✂️ Sharp scissors
- ✨ Finger Protectors(to prevent glue gun burns)
- 🎀 Optional: Ribbon, twine, or chalkboard tags for labels
- 🖌️ Optional: Stencil + craft paint (to personalize with patterns or monograms)
💡 Pro Tip: Dollar Tree often carries seasonal fabrics—swap out burlap for linen, cotton, or patterned fabric to match holidays and seasons!
Why Make Your Own DIY Dollar Tree Storage Baskets?
Buying decorative storage bins can get expensive fast. By making them yourself:
- ✅ Save money with Dollar Tree supplies.
- ✅ Customize the look with different fabric or paint.
- ✅ Create farmhouse, rustic, or modern styles that fit your home.
- ✅ Eco-friendly – repurpose and reuse inexpensive bins.
This project is beginner-friendly and only takes about 15 minutes per basket! You will love this DIY Basket Dollar Tree hack!

How to Make DIY Burlap Dollar Tree Baskets
Step-by-Step Tutorial
Step 1: Choose or Paint the Dollar Tree Bins
Start by applying a line of hot glue at the bottom of your bin. Secure one edge of the burlap and slowly wrap it around the basket, pulling tight as you go.

Step 2: Measure and Cut the Burlap
Continue wrapping burlap upward until the entire basket is covered. Cut off excess and secure with hot glue inside the rim.
Pro Tip: Cut the burlap fabrics in strips to size. I cut 42″ x 9″ strips.

Step 3: Create a Clean Bottom Edge
Fold burlap over the top edge of the bin and glue inside for a clean, finished look.

Step 4: Glue the Fabric Around the Basket
- Hold the fabric tightly as you wrap and glue it in place.

Step 5: Tuck the Fabric Under the Rim
Pro Tip: Skip gluing under the rim – just tuck the fabric in place.


Step 6: Add Labels or Decorative Details
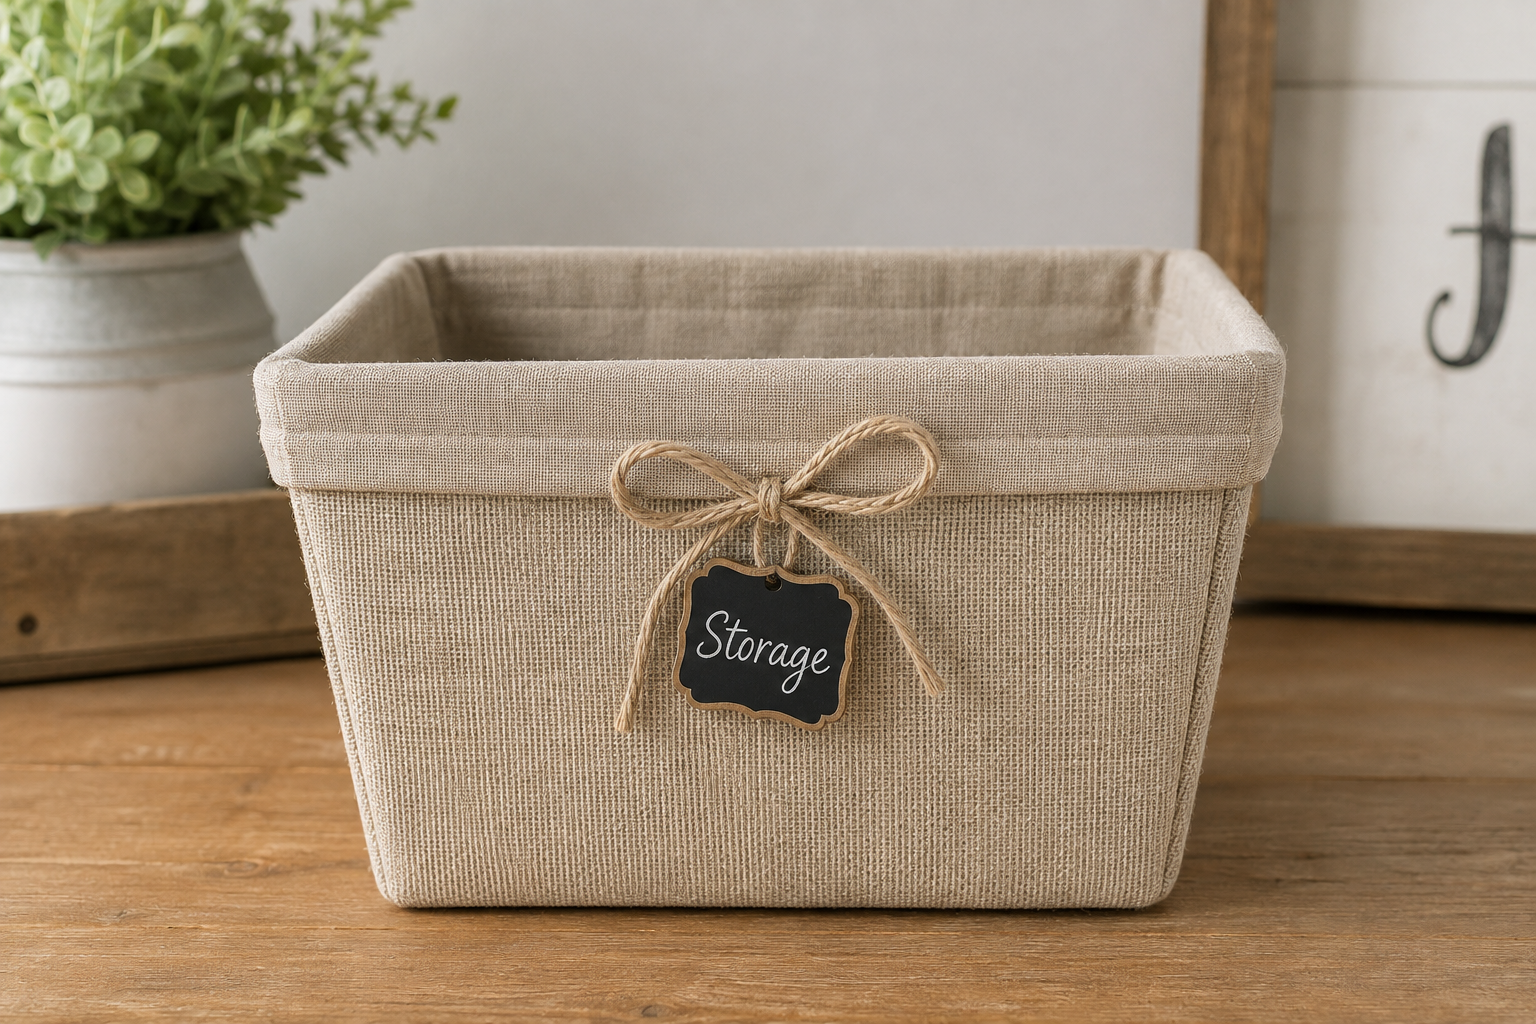
- Tie a piece of jute twine or ribbon around the middle.
- Add chalkboard tags for labeling pantry or bathroom items.
- Use stencils + paint to create patterns or monograms.

How Have These Dollar Tree Baskets Held Up?
I originally made these baskets in 2017, and they have held up surprisingly well! Over the years, I’ve used them in my living room, closets, craft room and even the garage.
The fabric disguises the inexpensive plastic base, while the bin remains lightweight and easy to carry. If part of the burlap ever loosens, it only takes a small amount of hot glue to secure it again.
After making several versions, I recommend using a tight-weave burlap or sturdy canvas fabric. It creates cleaner edges, sheds less and gives the finished basket a more polished look.
Which Hot Glue Gun is the Best?
For this project (and honestly almost every DIY I do), I used my cordless hot glue gun with a detailed tip—and I can’t recommend it enough!
- ✅ Cordless freedom → No tangled cords while wrapping baskets.
- ✅ Detailed precision tip → Perfect for neat edges and small glue lines (no messy overflow).
- ✅ Fast heat-up → Ready to use in just a couple of minutes.
- ✅ Reliable grip → Strong hold on burlap fabric without seeping through.
It’s one of those tools that makes DIY so much easier and stress-free. If you’re going to make more Dollar Tree hacks like this one, investing in a good glue gun is totally worth it.
💡 Pro Tip: Keep a pack of extra Surebonder glue sticks on hand—you’ll go through them fast with basket projects like these!

Why This Dollar Tree Storage Hack Works
Dollar Tree plastic baskets with handles are the perfect base for this DIY because they’re lightweight, durable, and easy to carry from room to room. The built-in handles make them super practical for everyday use—whether you’re hauling laundry, organizing kids’ toys, or tucking away blankets in the living room. Plus, their simple shape makes wrapping with burlap a breeze, giving you that designer storage look for just a few dollars.

Burlap is a budget-friendly fabric that instantly adds texture, warmth, and a rustic farmhouse feel to any DIY project. It’s easy to cut, wrap, and glue, making it the ideal material for transforming plain plastic bins into high-end storage. Burlap also pairs beautifully with other natural textures—like wood, wicker, or greenery—so your finished baskets look stylish in any room of the house. Best of all, you can grab a roll at Dollar Tree or your local craft store for just a couple of dollars.

Your DIY burlap baskets don’t just belong in closets and pantries—they can double as stylish décor pieces in your living room. With a few simple touches, you can transform them from storage workhorses into Pinterest-worthy accents.

🌿 1. Add Cozy Textiles
- Roll up throw blankets and tuck them neatly inside.
- Layer a soft throw casually draped over the edge of the basket.
- Use smaller baskets to hold decorative pillows in seasonal fabrics.
🕯️ 2. Style with Seasonal Décor
- Add faux greenery, pampas grass, or eucalyptus stems for a farmhouse vibe.
- In fall, tuck in mini pumpkins, pinecones, or a plaid blanket.
- For the holidays, fill with ornaments, fairy lights, or a poinsettia pot.
📚 3. Create a Functional Coffee Table Accent
- Place a burlap basket on the lower shelf of your coffee table.
- Use it to hold magazines, books, or remotes—keeping clutter stylishly hidden.
- Add a chalkboard tag or Cricut label for a chic, organized look.
🧺 4. Mix & Match with Other Natural Textures
- Pair burlap with wicker, seagrass, or wood accents in the room.
- Group a few baskets together in different sizes for a designer “collected” feel.
- Place them on open shelving alongside framed photos or candles for balance.
👉 With these easy ideas, your DIY burlap baskets become more than storage—they’re a budget-friendly way to refresh your living room with warmth and texture.
More Ways to Make Dollar Tree Storage Look Expensive
One of the things I love most about this Dollar Tree basket makeover is how easy it is to customize. You don’t have to use the exact same basket or burlap I used. Different shapes, fabrics and finishes can completely change the look while still keeping the project inexpensive.
Best Dollar Tree Baskets for This DIY
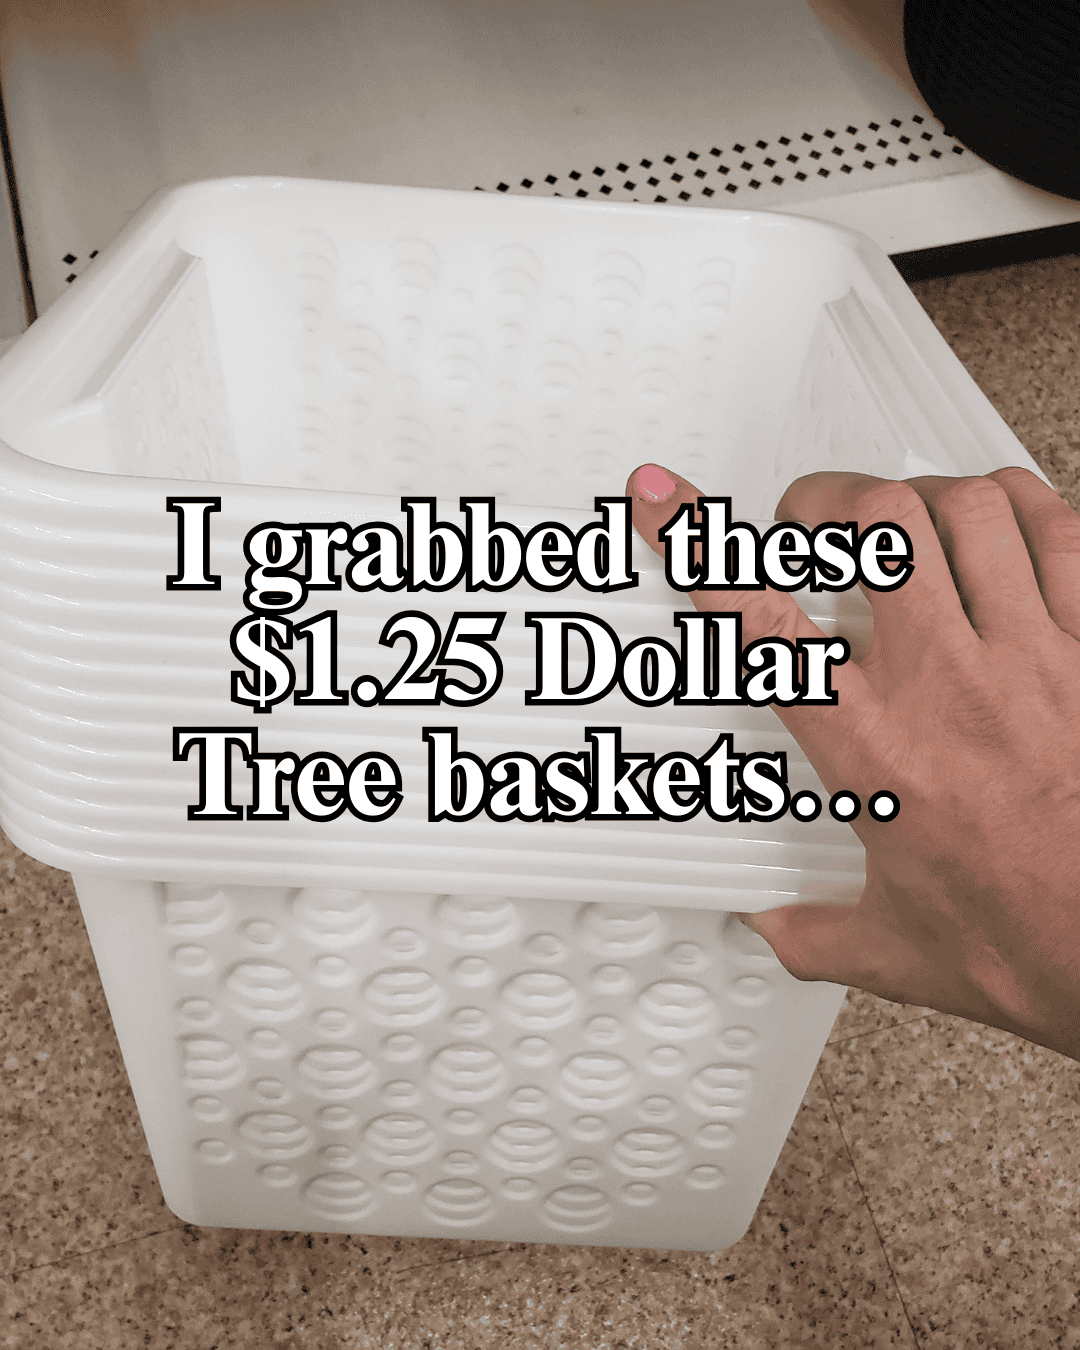
Plastic baskets with straight sides are the easiest to wrap because the fabric can sit smoothly against the surface. Rectangular baskets work especially well for shelves, closets and pantries, while deeper bins are great for blankets, toys and larger craft supplies.
Look for baskets with a sturdy shape and a fairly simple exterior. Decorative holes or handles are fine—you can either work around them or cover them completely depending on the look you want.
What Fabric Can You Use Instead of Burlap?
Burlap gives these baskets a warm, textured look, but you can use plenty of other inexpensive fabrics. A canvas drop cloth creates a softer neutral finish, while linen-look fabric can make inexpensive plastic baskets feel much more polished.
- Canvas drop cloth: durable, neutral and great for a relaxed high-end look.
- Linen-look fabric: ideal for bedrooms, bathrooms and living spaces.
- Cotton fabric: easy to find in seasonal colors and patterns.
- Tight-weave burlap: my favorite option when you want texture without excessive shedding.
- Seasonal fabric: an easy way to make baskets that coordinate with fall, Christmas or other holiday décor.
Ways to Use These Baskets Around Your Home
These aren’t just craft-room storage baskets. I’ve used versions of them all over my home because they’re lightweight, inexpensive and easy to customize for the room they’re in.
- Bathroom: rolled towels, toiletries, toilet paper or extra soaps.
- Pantry: snacks, packets, baking supplies and small kitchen items.
- Craft room: fabric, ribbon, vinyl scraps, tools and unfinished projects.
- Laundry room: dryer sheets, stain removers, cleaning cloths and laundry supplies.
- Closets: accessories, seasonal items, scarves and small clothing pieces.
- Living room: blankets, magazines, remotes, toys and everyday clutter.
How to Make Dollar Tree Storage Look Expensive
The secret is usually less about how much the container costs and more about the finishing details. Cover inexpensive plastic, repeat the same materials throughout the room, use coordinating labels and mix budget pieces with natural textures like wood, fabric and greenery.
Want more Dollar Tree DIYs that don’t look cheap?
More Dollar Tree Storage Ideas
If you’re already heading to Dollar Tree for baskets, there are several other inexpensive organizing products worth watching for. I especially like items that can work in more than one room so they don’t become clutter themselves.

Heading to Dollar Tree for organizing supplies?
Final Thoughts
If you are looking for a way to save money on expensive baskets to display in your home, try making these DIY burlap dollar store bins! Even if you don’t use burlap fabric, you can try wrapping these Dollar Store baskets with any fabric or leaving them plain to organize your entire home. I can’t wait to see how you use yours!

Love Dollar Tree DIYs That Look Expensive?
Keep the inspiration going with these budget-friendly Dollar Tree projects and shopping tips.
Dollar Tree DIYs That Look Expensive
See more inexpensive Dollar Tree finds transformed into beautiful home décor that looks much more expensive than it really is.
Dollar Tree Shopping Secrets You Need to Know
Before your next Dollar Tree trip, check out these shopping tips, hidden finds, and money-saving tricks.
Best Cricut Supplies to Buy at Dollar Tree
These are the Dollar Tree blanks, tools, and craft supplies worth grabbing for your next Cricut project.
Watch the Full Tutorial and Print the Instructions
Watch the complete YouTube tutorial inside the project card below, then print the supply list and step-by-step instructions for easy reference.

DIY Dollar Tree Baskets
Supplies
- Burlap Fabric (I use this fabric for the best results!)
- Dollar Tree Plastic Baskets
- Rotary Cutter
- Quilting Mat
- Glue Gun
- Finger Protectors (to prevent glue gun burns)
- Spray Paint (optional)
- Chalkboard Labels (optional)
Instructions
- Gather supplies. Please read the full post for more supply tips!
Video
🛒 Shop My Favorite Tools for This Project
Want to make your DIY burlap baskets even easier? Here are the tools I always keep on hand for craft projects like this one:
- 🔥 Surebonder Cordless Hot Glue Gun with Detailed Tip → My go-to for neat, mess-free gluing (no cords, no frustration!).
- ✂️ Sharp Craft Scissors → A must for clean burlap cuts and trimming twine.
- 🧵 Jute Twine & Ribbon Variety Pack → Perfect for adding farmhouse charm or seasonal flair to your baskets.
- 📏 Self-Healing Cutting Mat → Protects your table and helps measure straight cuts for fabric.
- 🪡 Chalkboard Tags or Cricut Labels → Adds that polished, organized look to your finished baskets.

Budget Decorating, Elevated
Want your home to feel more high-end?
I created Budget to Boutique to help you turn budget-friendly finds and simple DIYs into a home that feels warm, polished, and pulled together.
Disclaimer: This post may contain affiliate links or a sponsored post. All opinions are always 100% mine and I don’t partner with any product or company that I don’t use and love. Please see our Full Disclosure for more information.
 22 DIY Dollar Tree Wooden Houses
