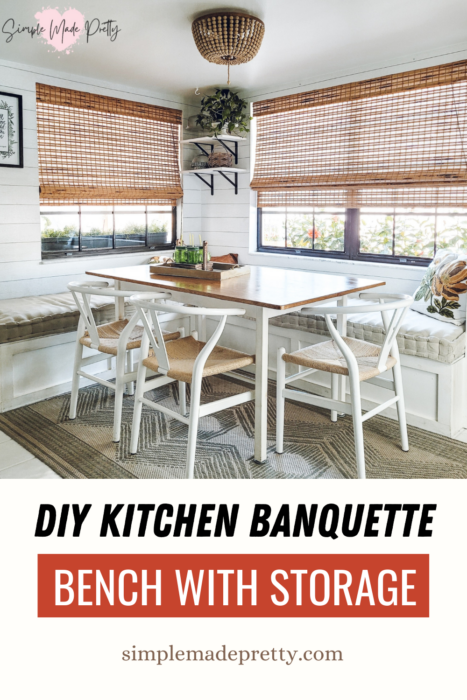
DIY Kitchen Banquette Bench Seat With Storage
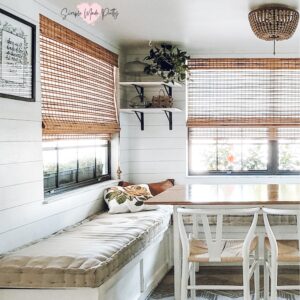
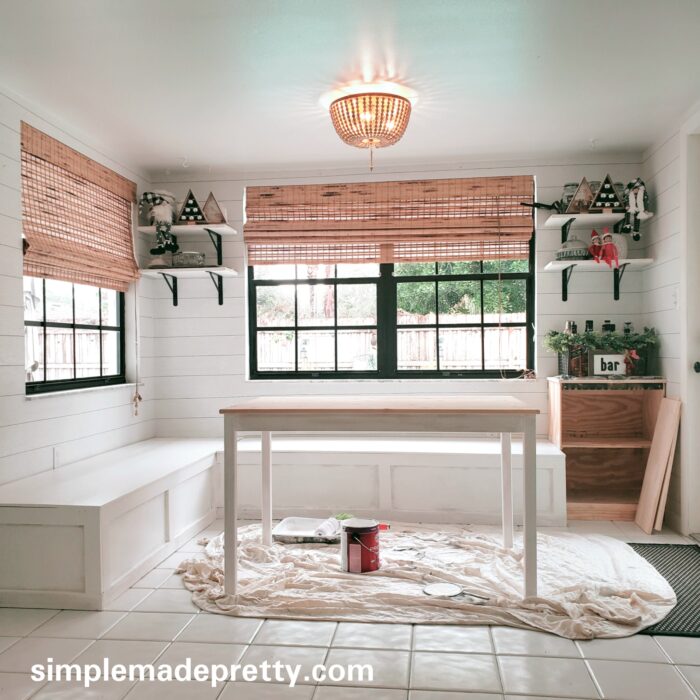
In this tutorial, I share how to build a storage bench with a hinged top. This DIY kitchen banquette bench seat with storage is perfect for small spaces that need a little extra seating and storage. The project is simple and inexpensive. Keep reading and watch the video to see how to make this DIY Kitchen Banquette Bench Seat With Storage!

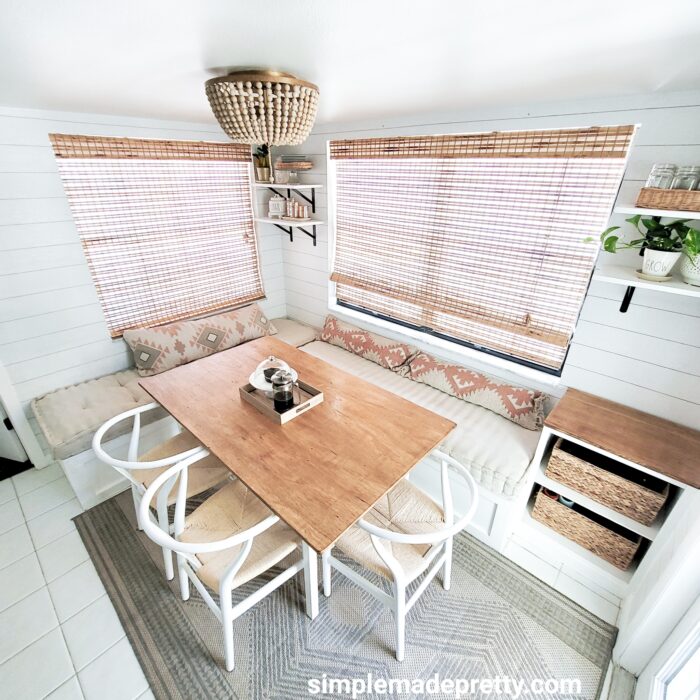
We love this kitchen banquette and use it for work, school, dining, and more! I personally never liked homes that had built-in benches in the kitchen, but after living with one, we see the true benefits. Our eat-in kitchen is in the center of the house and separates the family room from the office, so you can sit at the table and still see each room and TVs!
Shop Our Eat-In Kitchen

How do you build a kitchen banquette seat?
I share how to build a kitchen banquette seat in this tutorial using wood found at your local home improvement stores. You can easily build a banquette bench with storage using Ikea cabinets, however, we wanted a custom look and fit for our kitchen breakfast nook. Building the size and style you want will make your kitchen banquette unique.
How much does a built-in banquette cost?
The total cost for the wood, hardware, and paint supplies cost $150 to build a built-in banquette. If you have scrap wood, hardware, and power tools, this project can cost less than that. Most dining tables sets have 1 chair for $150 so I’d say this is a great investment!
Does banquette seating save space?
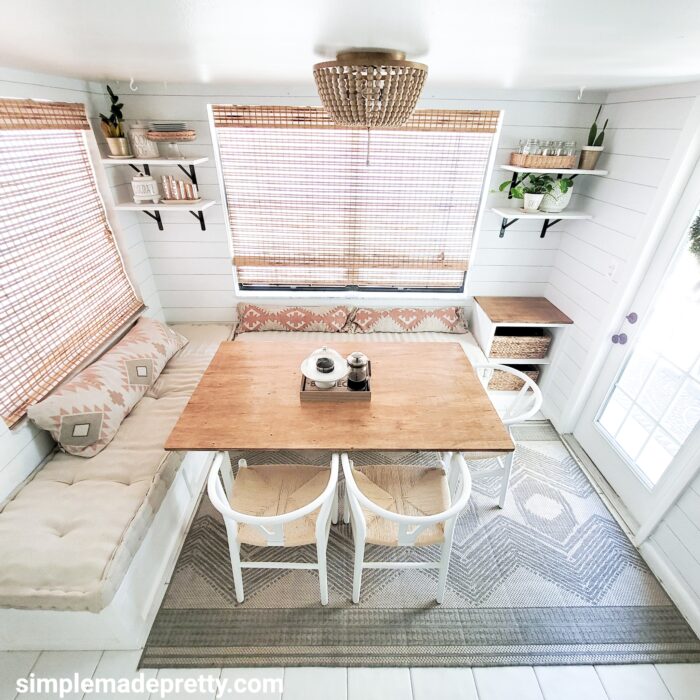
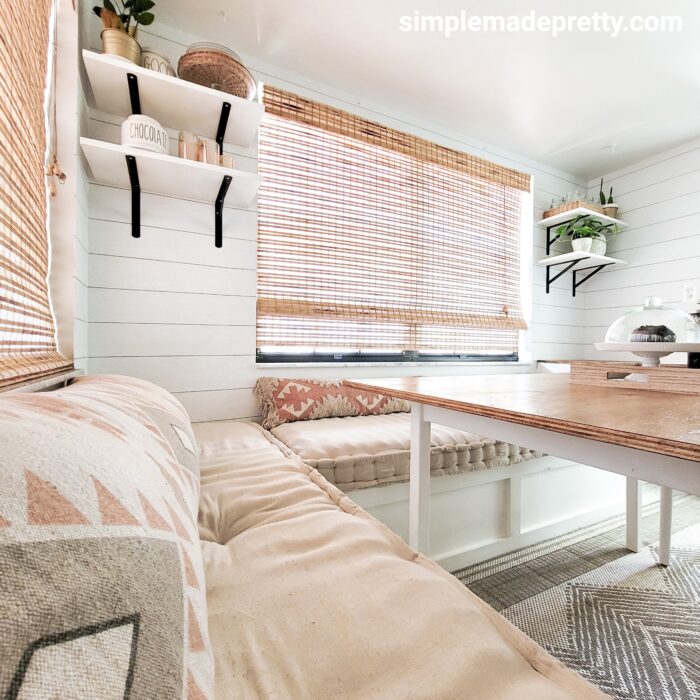
Yes! We created enough space to seat our family plus our friends and their 4 kids at this table! Not only do we have more space for seating, but we increased our storage space as well. I store lots of kitchen items in our banquette benches… extra mugs, seasonal kitchen items, BBQ supplies, outdoor entertaining items, etc.
How do you make a kitchen corner bench with storage?
Keep reading and watch the video to see how easy this kitchen corner bench is to do it yourself!
How to Build a Kitchen Banquette Bench with Storage
Have an extra few feet in your kitchen? Use these plans to build a banquette seat with hidden storage. See how to make this bench seat here.
Supplies:
- (1) Plywood 3/4″ x 4′ x 4′
- (1) Plywood 1/2″ x 4′ x 8′
- (10) Pine 2″ x 4″ x 96″
- (1) Underlayment 4′ x 8′
- (6) 1″ x 4″ x 8′ pine board
- Power Drill or hammer/nail gun
- Screws or nails
- Table Saw or Circular Saw
- (4) Cabinet hinges
- Wood Stain
- Water-Based Polyurethane
- Brushes/Sponges/Rags
- Dropcloth
Directions:
- Gather supplies listed above. Watch the video for more tips!
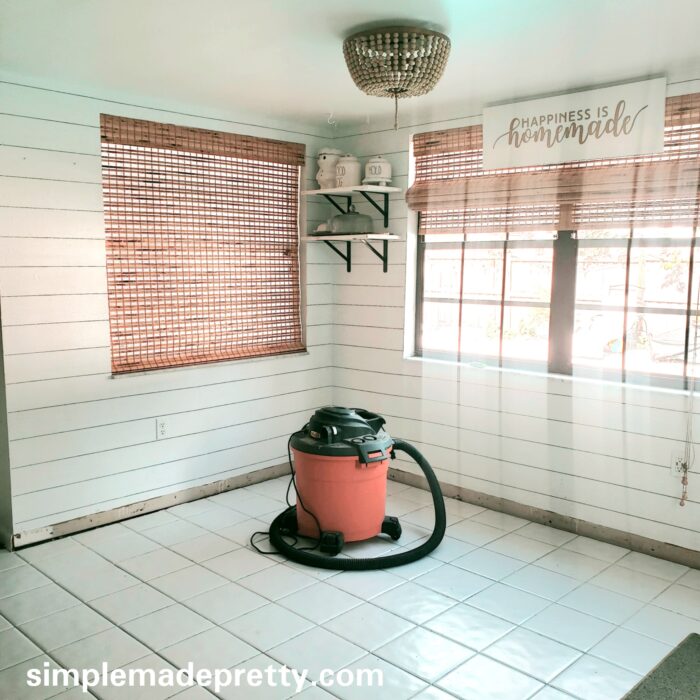
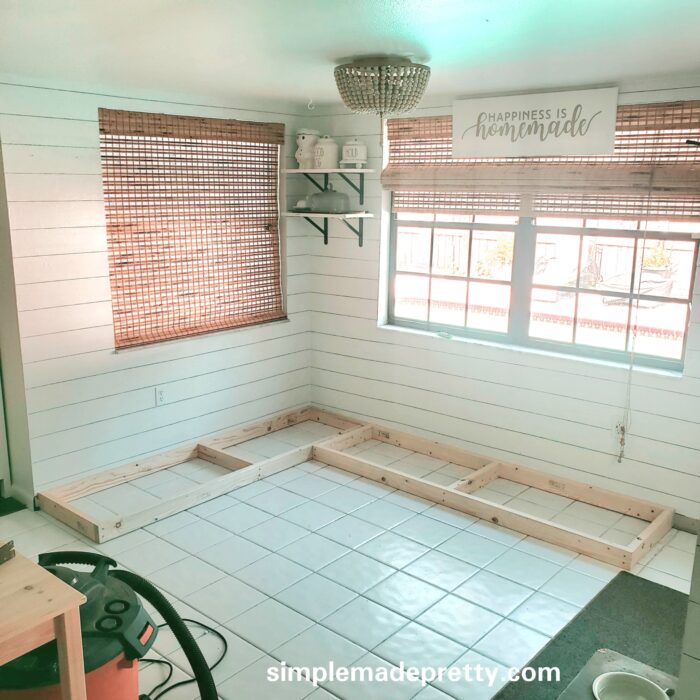
- Start out by measuring the area you want the banquette.
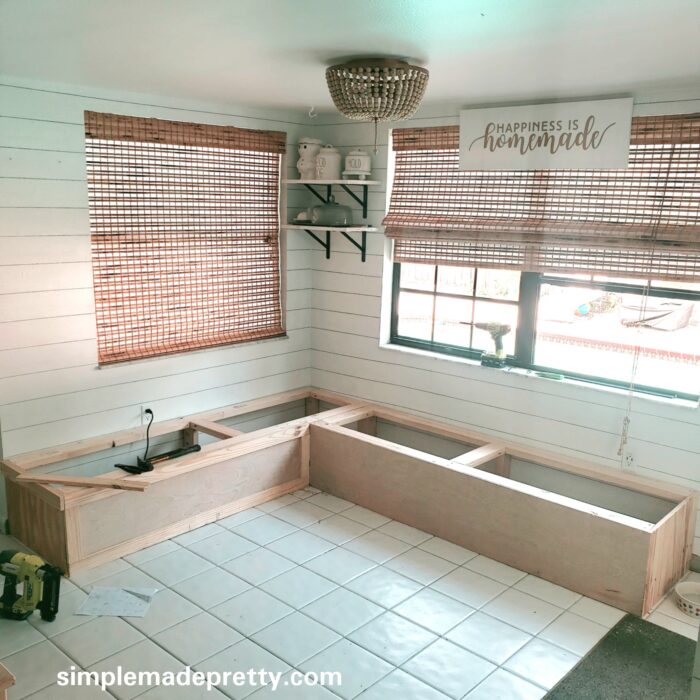
- Remove the baseboards and cut the 2″x 4″ to build a frame on the floor with the short side of the 2 x 4 on the floor.

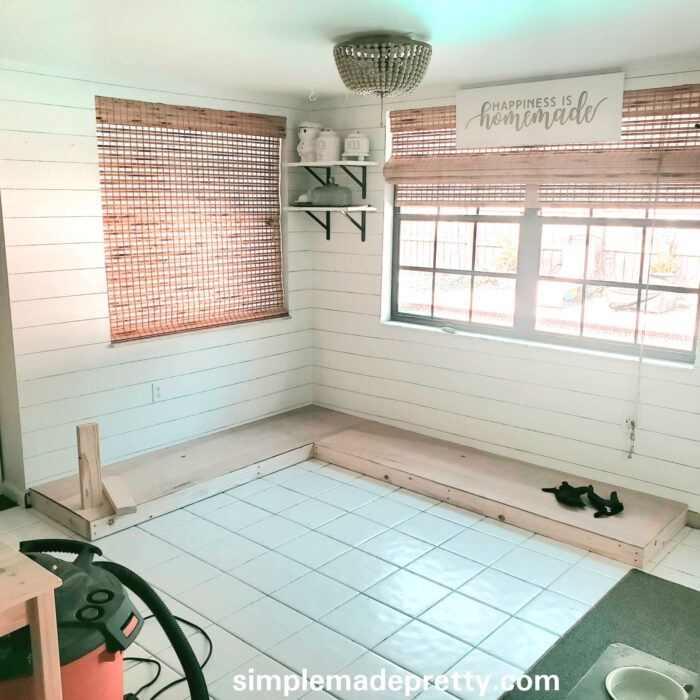
- Attach the floor frame to the wall using screws, then cut and attach the underlayment to cover the 2″x 4″ frame.
- Determine what seat height you want. Ours is 15.5″ high because we were adding a 4″ cushion on top, which brings the height of the seat to around 20.”
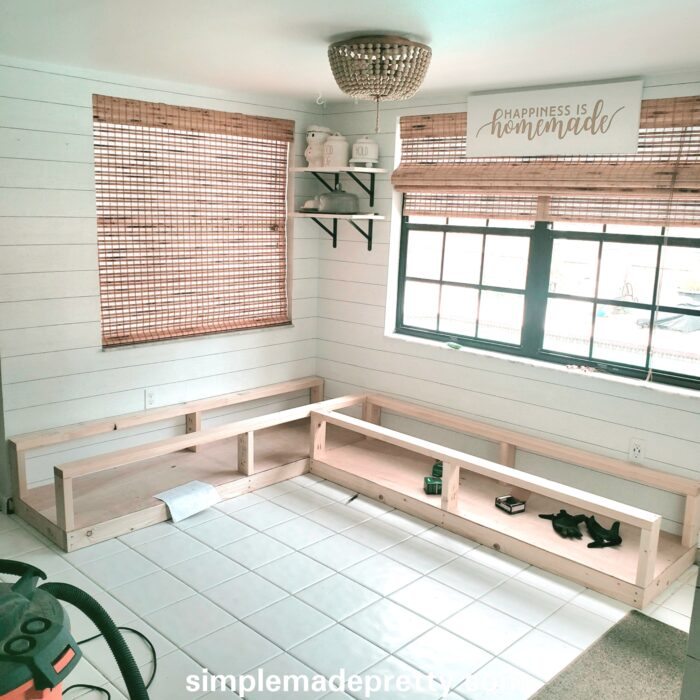
- Cut and attach (6) 2″ x 4″ for uprights to support the upper frame. I used a Kreg Pocket-Hole Jig to drill holes on the side of the 2″ x 4″ in order to secure them properly.
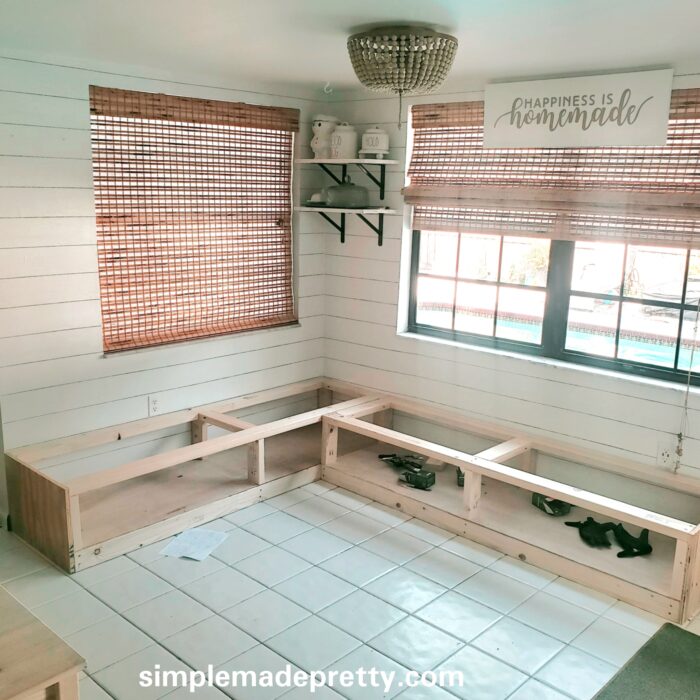
- Add the upper 2″ x 4″ frame and attach them to the 2 x 4 uprights with the pre-drilled holes using the Kreg.
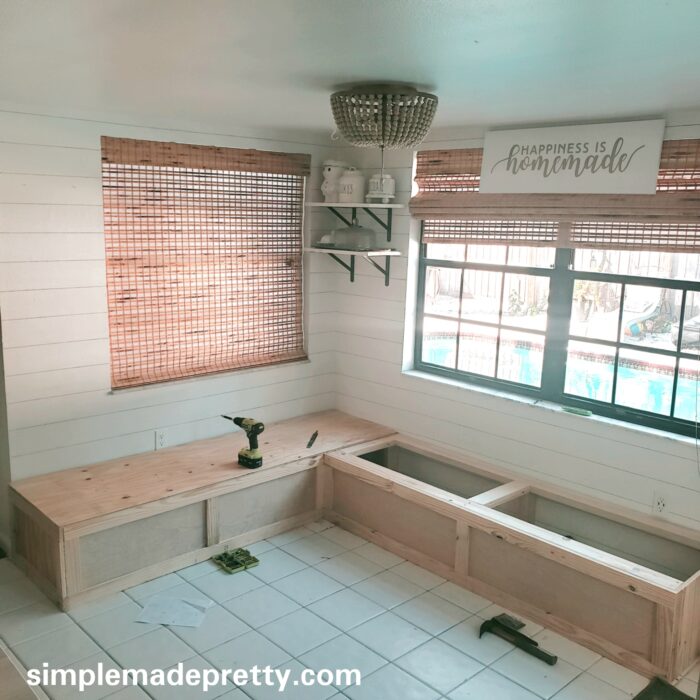
- Cut the end caps for the bench using the 3/4″ plywood and attach them using the screws.
- Cut the fronts for the box using underlayment and attach them, making sure the side pieces are flush with the 2 x 4 frame.
- Cut and attach the 1″ x 4″ pine board shaker frame to add detail and dimension.
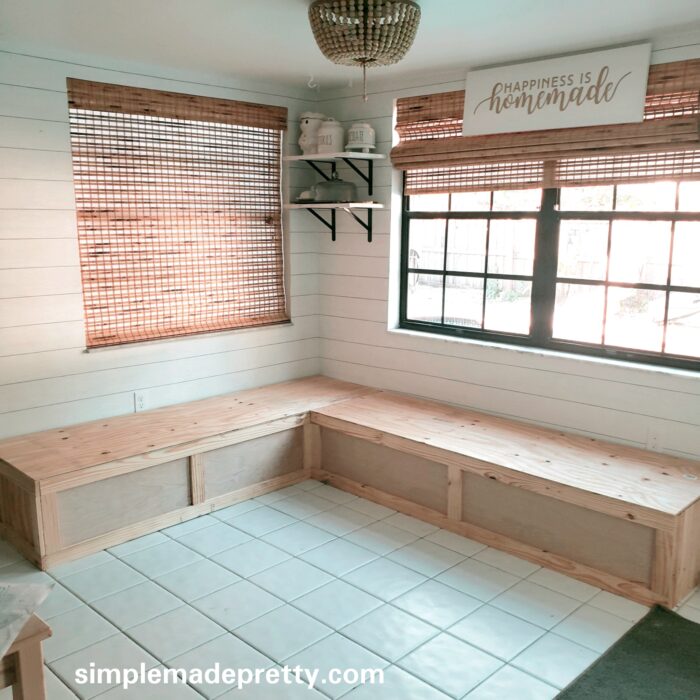
- Measure the lid (I decided to go 1/4″ over the edge of the box to have a small lip on the lid for easier access), then cut the 1/2″ plywood to make the box lid.
- Once the lid is in place, lift it up and attached the hinges inside the box.
- Paint the bench your preferred color. Any color and finish works, however, I’d recommend Satin or Enamel paint like you would use on kitchen cabinets. The bench will get scuffs so you’ll want durable paint that’s easy to clean.
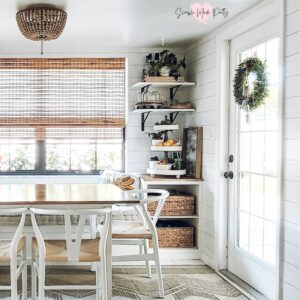
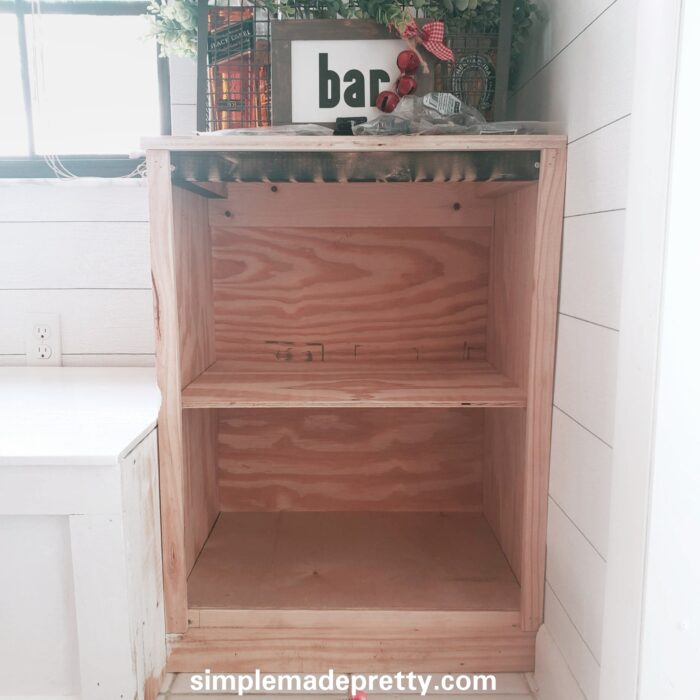
- We added a little cabinet off to the side to use as a side table and storage.
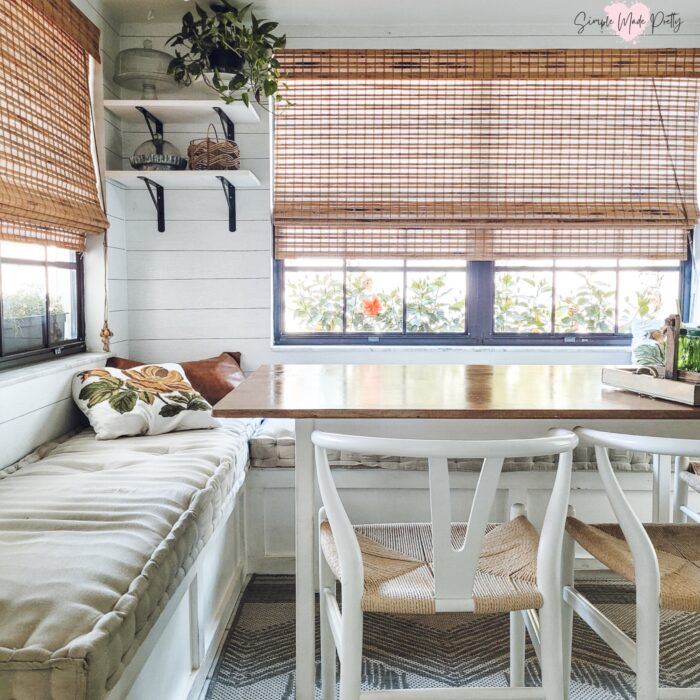
- We used a table from Ikea, added a piece of plywood to the top, which I stained in Golden Oak wood stain. I painted the legs white to match the bench.
- I made no-sew cushions for our benches using foam, a mattress topper, and canvas drop cloth (tutorial coming soon!).
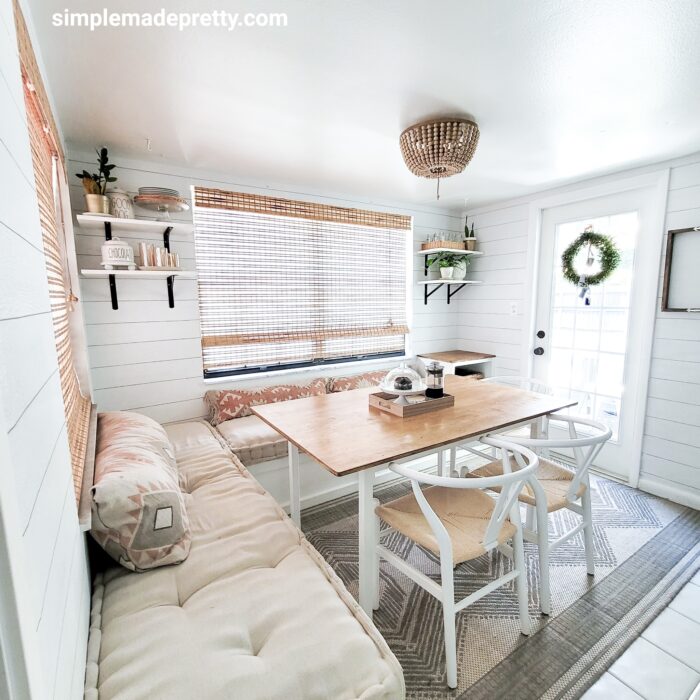
Wrap up for How to Build a DIY Kitchen Banquette Bench Seat With Storage
You can create your own comfortable banquette bench at home with a few simple supplies. See how easy it is to create a bench that works great in kitchens and small spaces! Give your kitchen that diner look by building a sturdy banquette bench seat with storage underneath. This project is budget-friendly, and it’s easy enough to do with basic tools!
Links to Products Shown
- Dining Table indoor outdoor rug
- Poly Bark Dining Chairs
- Kitchen Shelf Brackets
- Ikea dining table
- 3 Tiered Stand
- Cactus Glasses Set (similar)
- Wood bead light
- Bamboo Blinds (similar)
- Wood tape edging
- Polyurethane satin oil-based
- No-Sew Rug Pillows Tutorial
- Hot-Glue French Mattress Cushions Tutorial (coming soon!)
Shop Our Eat-In Kitchen
Print the Instructions and Watch the Video to Make DIY Kitchen Banquette Bench Seat With Storage

DIY Kitchen Banquette with Storage
Supplies
- (1) Plywood 3/4" x 4' x 4'
- (1) Plywood 1/2" x 4' x 8'
- (10) Pine 2" x 4" x 96"
- (1) Underlayment 4' x 8'
- (6) 1" x 4" x 8' pine board
- Power Drill or hammer/nail gun
- Screws or nails
- Table Saw or Circular Saw
- (4) Cabinet hinges
- Wood Stain
- Satin Oil-Based Polyurethane
- Brushes/Sponges/Rags
- Dropcloth
Instructions
- Gather supplies listed above.
- Measure the area you want the banquette.
- Remove the baseboards and cut the 2"x 4" to build a frame on the floor with the short side of the 2 x 4 on the floor.
- Attach the floor frame to the wall using screws, then cut and attach the underlayment to cover the 2"x 4" frame.
- Determine what seat height you want. Ours is 15.5" high because we were adding a 4" cushion on top, which brings the height of the seat to around 20."
- Cut and attach (6) 2" x 4" for uprights to support the upper frame. I used a Kreg Pocket-Hole Jig to drill holes on the side of the 2" x 4" in order to secure them properly.
- Add the upper 2" x 4" frame and attach them to the 2 x 4 uprights with the pre-drilled holes using the Kreg.
- Cut the end caps for the bench using the 3/4" plywood and attach them using the screws.
- Cut the fronts for the box using underlayment and attach them, making sure the side pieces are flush with the 2 x 4 frame.
- Cut and attach the 1" x 4" pine board shaker frame to add detail and dimension.
- Measure the lid (I decided to go 1/4" over the edge of the box to have a small lip on the lid for easier access), then cut the 1/2" plywood to make the box lid.
- Once the lid is in place, lift it up and attached the hinges inside the box.
- Paint the bench your preferred color. Any color and finish works, however, I'd recommend Satin or Enamel paint like you would use on kitchen cabinets. The bench will get scuffs so you'll want durable paint that's easy to clean.
- We added a little cabinet off to the side to use as a side table and storage.
- We used a table from Ikea, added a piece of plywood to the top, which I stained in Golden Oak wood stain. I painted the legs white to match the bench.
- I made no-sew cushions for our benches using foam, a mattress topper, and canvas drop cloth.
Video
Pin this DIY tutorial for later…
Here are More Home Improvement Tips You Might Like…
How to pick the right paint colors
Have you ever had trouble picking the right paint colors for your home? Choosing the right paint colors for your home can be overwhelming. There are so many different “whites” and “grays” these days, how can anyone know they are making the right paint color choice?
That’s why I put together the best tips on How to Choose Interior Paint Colors in this post.
Every home is different… the entryway in our first home was much different than the entryway in our second home, and both of those were very different from the entryway in our third home! So I chose a different paint color for each entryway in all three of our homes. Not to mention, from the time that we bought our first home, to the time that we bought our third home, home paint color trends changed drastically. The colors that I used back then are no longer a trendy color and well, I just didn’t like the brown-ish tan that was in our first home, haha.
So if you need help choosing paint colors for the rest of your home, head on over to this post to see my paint-picking tips and what has worked for me in all three of our homes 🙂 My post with how to choose paint colors for your home is one of my most popular posts and readers have benefited from reading it before heading to the store to buy paint that ends up not working out.
I also have some ideas for choosing paint color combinations for bedrooms (with themes!)
Paint Versus Peel & Stick Wallpaper
Peel and stick wallpaper has become very popular recently since not everyone has access to tools to build their own Shiplap walls (thanks Chip and Joanna) or wants to tile an entire wall with subway tile. I love tiling but if I could slap up some wallpaper and call it a day, that would make me, the hubby, and my wallet happy!
You can find peel and stick wallpaper online at Target, Amazon, Home Depot, and more! I’ve linked my favorite peel and stick wallpaper and the ones I’ve used personally below.
How To Paint Kitchen Cabinets Without Sanding
If you love white farmhouse kitchens and want to paint your kitchen white, then you will love this post that teaches you How To Paint Kitchen Cabinets White Without Sanding! I’ll show you how to paint old kitchen cabinets and answer how much does it cost to paint kitchen cabinets (it’s much cheaper than you think!). I also have lots of pictures of painting kitchen cabinets before and after!
You don’t have to worry about how to paint kitchen cabinets without brush strokes because I have a secret in this post that reveals a step-by-step DIY tutorial with how to paint kitchen cabinets like a pro.
–>> Learn how to Paint Kitchen Cabinets without Sanding here!
Cheap Home Hacks that’ll Increase Value
Renovating a home can come with a high price tag if you’re not budgeting and deciding which updates bring the best return on investment. After selling our updated first home in just 4 years, we bought an even bigger house that needed a lot of updating. We sold our second home after 4 years while doing the much-needed work to produce a profit by following the same strategies we did in our first home.
If you enjoy updating your home, want to increase your home value or just want your home to look better, you should check out thee 10 Cheap Home Hacks That’ll Make Your House Look So Much Better.
Tour Our Homes
Take a Tour of our Second Home here
Psssssttt…Right now I’m offering FREE access to our Digital Resource Library to all of our newsletter subscribers. Your private access includes dozens of free printable crafts, home decor and organization guides. Hurry up and grab your freebies here! (Access instructions are sent after subscribing).
Disclaimer: This post may contain affiliate links or a sponsored post. All opinions are always 100% mine and I don’t partner with any product or company that I don’t use and love. Please see our Full Disclosure for more information.
 Easy To Follow DIY Instructions For Painting Two-Toned Kitchen Cabinets