xTool WonderPress Review: What Can You Actually Make With It?
Is the xTool WonderPress really more than a heat press? I wanted to find out by actually using every module instead of just unboxing the machine and showing you the features.
I tested the xTool WonderPress Heat Press, Craft Oven and 3D Form Module to make three completely different projects: a polymer clay teacher keychain, a 3D shaker card and a personalized Dollar Tree teacher tote.
And I learned quite a few things along the way.
I had to experiment with the Craft Oven to figure out the right polymer clay baking time, I made my own vacuum-forming mold with my xTool M2, and I tested regular iron-on with the Heat Press because that’s what I actually use in my craft room.
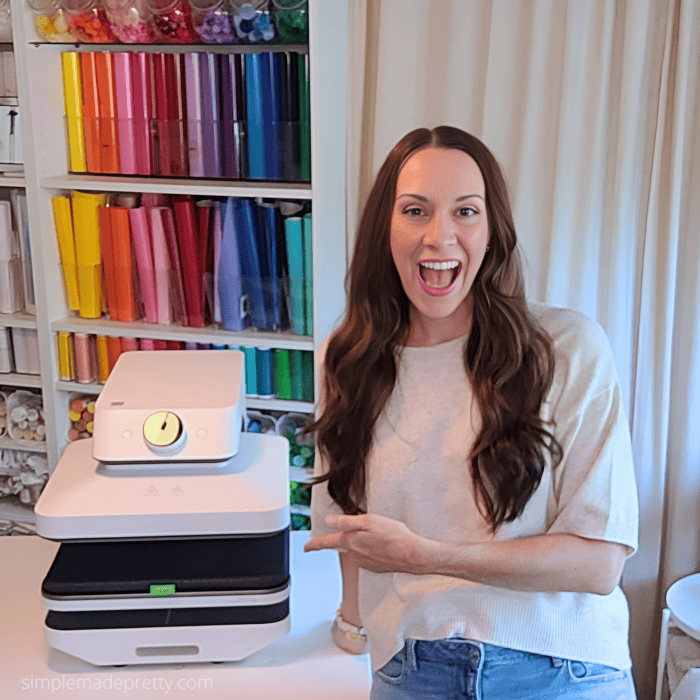
xTool WonderPress at a Glance
- 🔥 Heat Press: Iron-on/HTV, sublimation, DTF and compatible heat-transfer projects
- 🎨 Craft Oven: Polymer clay, shrink plastic and compatible baking or curing crafts
- ❤️ 3D Form: Heat and form plastic around objects or custom molds for dimensional crafts
- ✨ Skill level: Beginner-friendly, with some experimenting depending on the material
- 🛍️ Best for: DIY gifts, personalized crafts, dimensional projects and handmade products to sell
- ⭐ My favorite: The Heat Press — easily the best heat press I’ve personally owned
🔥 SEE ALL 3 WONDERPRESS MODULES IN ACTION 🔥
Watch how I used the xTool WonderPress to bake a polymer clay keychain, form a dimensional shaker card and heat press a personalized Dollar Tree teacher tote—all in under a minute.
✨ Watch the three projects above, then keep reading for my exact WonderPress settings, step-by-step details and what I learned while testing each module.
What Is the xTool WonderPress?
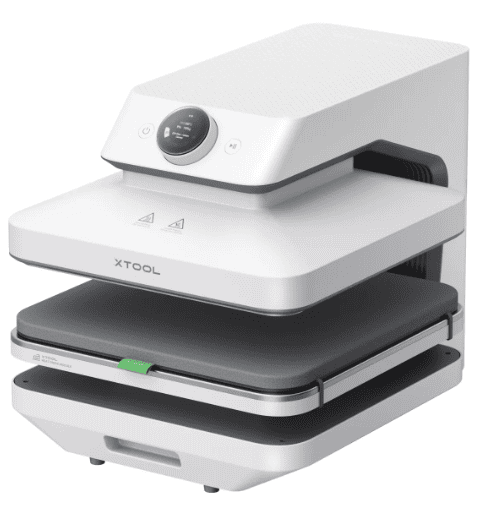
The xTool WonderPress is a modular crafting system that lets you do much more than traditional heat pressing. Depending on the modules you choose, you can heat press, bake and cure craft materials, and even form plastic into dimensional shapes.
That’s what initially caught my attention. Instead of buying one machine that only performs one type of craft, WonderPress can expand as the types of projects you make change.
You can start with the Heat Press Module and add other modules as you need them, or purchase a setup that includes the additional modules.
- Heat Press Module: for iron-on/HTV and compatible sublimation and DTF projects.
- Craft Oven Module: for polymer clay, shrink plastic and other compatible crafts that need controlled heating or curing.
- 3D Form Module: for heating and forming plastic around dimensional objects or molds.
- Dual Station: gives you two work surfaces so you can prepare another project while one is being pressed.
👉 See the xTool WonderPress and available module options here.
Materials & Tools You’ll Need
Here are the main tools and supplies I used to make all three WonderPress teacher gift projects:
- 🔥 xTool WonderPress — Heat Press, Craft Oven and 3D Form modules
- ✨ xTool M2 — used to make my custom heart form and wooden teacher confetti
- 🎨 Polymer clay — the exact clay I tested in the WonderPress Craft Oven
- 🖍️ Paint markers — for adding the colorful paint details to the palette keychain
- 👜 Inexpensive blank tote bags — perfect for personalized teacher gifts and crafts to sell
- 🍎 Iron-on / heat-transfer material — used for the personalized teacher tote
- 🛒 More WonderPress project supplies — see my complete supply list
💡 Pro Tip: You don’t need every WonderPress module to get started. Choose the setup that fits the crafts you already make, then add modules later if you want to expand into polymer clay, dimensional crafts or other projects.
3 xTool WonderPress Projects I Tested
Since it’s back-to-school season, I decided to give all three modules the same theme and create a personalized teacher gift set.
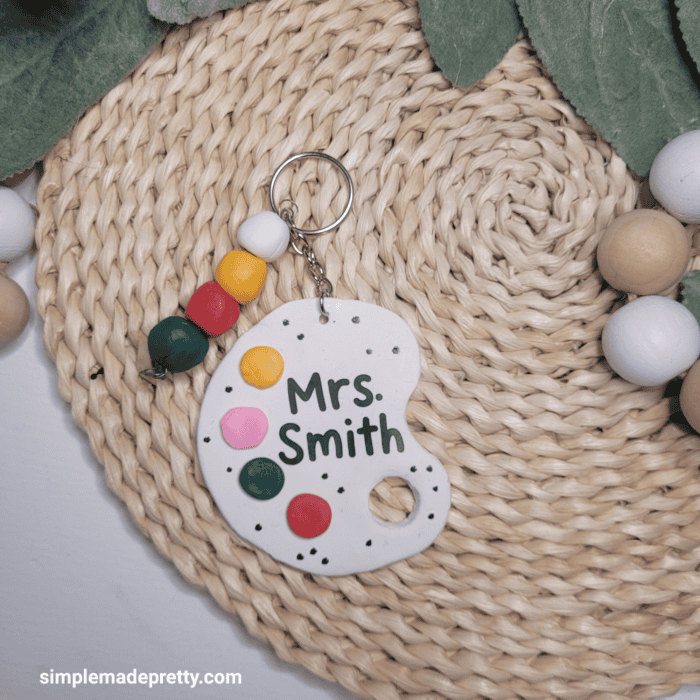
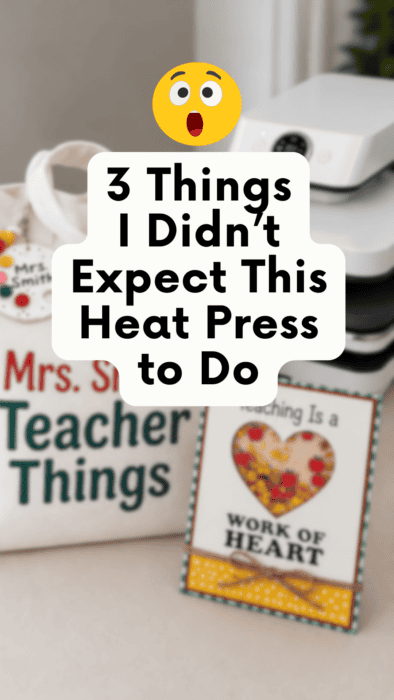
I made a polymer clay paint-palette keychain with the Craft Oven, a Teaching Is a Work of Heart shaker card with the 3D Form Module and a personalized Dollar Tree teacher tote with the Heat Press.
This ended up being a really good way to test the WonderPress because none of these projects uses the same crafting technique.
xTool WonderPress Craft Oven: Polymer Clay Keychain
I’ll start with a confession: I don’t have much experience with polymer clay.
I’ve worked with it before, but it’s definitely not one of the crafts I regularly do. Baking clay has always made me a little nervous because I worry about using the wrong temperature, taking it out too soon or somehow ruining something I just spent all that time making.
That’s one reason I was interested in trying the WonderPress Craft Oven. Having a dedicated craft oven with controlled settings took some of that anxiety out of the process.
However, I did have to experiment with the settings.
I had a difficult time finding detailed instructions online from someone who had actually baked polymer clay in the WonderPress and shared exactly what settings and times they used. So I’m documenting mine in detail in case you’re trying to figure out the same thing.
Mode: Baking & Curing Mode
Setting: Shrink Plastic
Exhaust Time: 30 secondsBaking Cycle 1: 456 seconds
Baking Cycle 2: 999 seconds
Baking Cycle 3: 350 secondsTotal baking time: approximately 30 minutes.
These are the settings that worked with the polymer clay I used for this particular project. Different polymer clay products can have different curing requirements, so always check the instructions for your specific clay.
Making the Polymer Clay Paint Palette
Since polymer clay isn’t really my thing, I wasn’t about to start my WonderPress experiment by sculpting something complicated!
I made a simple paint palette because it’s basically an organic blob shape with a hole in it. Even I couldn’t mess that up too badly.
I also rolled some of the leftover clay into simple beads that I could use on the finished keychain.
After baking and cooling everything, I added the teacher’s name with vinyl cut on my cutting machine. You could certainly hand-paint or hand-letter the name, but drawing isn’t exactly one of my talents, so I used the tools I know.
I added colorful paint dots with paint markers, strung the clay beads onto wire and attached everything to the keychain hardware.
I love how it turned out, and it’s a very approachable polymer clay project if you’re a beginner like me.
I’ll link the exact polymer clay and supplies I used in the supply list below.
xTool WonderPress 3D Form Module: DIY Teacher Shaker Card
The 3D Form Module was probably the module I was most curious about because this is where WonderPress starts doing something completely different from a regular heat press.
It heats and forms compatible plastic around an object or mold, allowing you to create dimensional pieces for your crafts.
I decided to use it to make a clear heart-shaped shaker for a card that says:
Teaching Is a Work of Heart ❤️
But instead of using an existing mold, I wanted to see if I could make my own custom mold with my xTool M2.
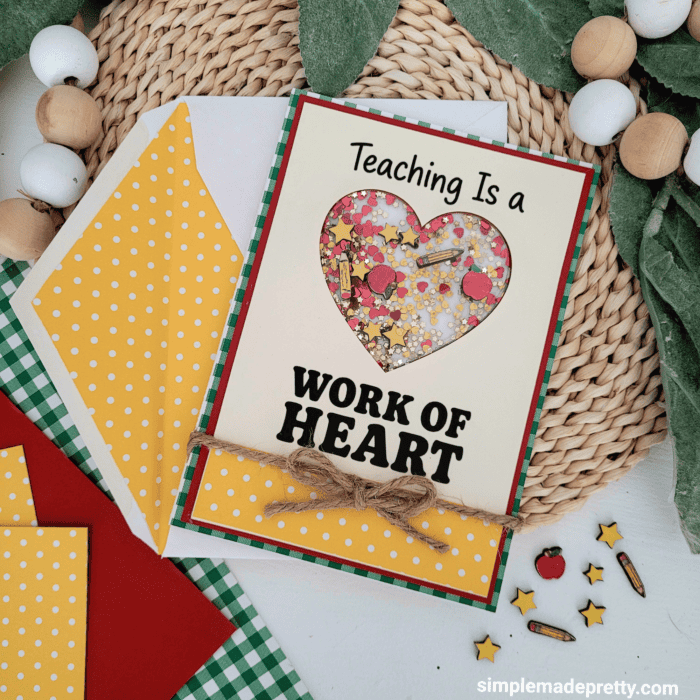
How I Made My Own 3D Form Mold with the xTool M2
I cut two identical heart shapes from approximately 3mm basswood using my xTool M2.
I glued the two hearts together and lightly sanded the sides and edges to create a smooth shape for the plastic to form around.
It worked—but I already know what I would change next time.
I would use four layers instead of two.
The two layers created enough depth for my shaker card, but four layers would create a deeper pocket and give the glitter and confetti more room to move.
That’s one of those things you don’t necessarily know until you actually make the first one.
Making the Heart Shaker Pocket
I placed my wooden heart form onto the 3D Form Module and used one of the plastic sheets included with the module.
The WonderPress heated the material and formed it around my custom wooden heart, creating the clear dimensional pocket I needed for the card.
Then I cut the card layers from cardstock I already had in my craft stash.
DIY Wooden Teacher Confetti with xTool M2 Print Then Cut
I could have filled the heart with regular glitter and called it finished, but of course I couldn’t leave it alone.
I used Dollar Tree glitter along with tiny custom teacher-themed wooden confetti that I made using xTool M2 Print Then Cut.
The miniature teacher designs made the shaker so much more unique than using plain glitter alone.
I’m actually considering making sets of this wooden teacher confetti for my Etsy shop. If that’s something you’d use for shaker cards or other crafts, leave me a comment and let me know!
❤️ NEW WORKSHOP • WEEKEND SPECIAL
Want to Make the Teacher Shaker Card?
Make it with me step-by-step! The workshop includes the complete Cricut Design Space tutorial, assembly video and Teaching Is a Work of Heart SVG.
Regularly $14
$5
THIS WEEKEND ONLY
Get the Workshop + SVG for $5 →
Instant access • Lifetime workshop access • SVG included
xTool WonderPress Heat Press: Dollar Tree Teacher Tote
Next came the module I have considerably more experience with: the Heat Press.
The WonderPress can support crafts including sublimation and DTF transfers, but I actually don’t currently do either of those types of crafting. I know—that might be surprising!
Instead, I tested it with something I’ve been using for years: good old-fashioned iron-on heat transfer material.
I’ve been making heat-transfer projects since 2013, and I’ve used quite a few different heat presses and pressing tools during that time.
After using this one, I can confidently say that the WonderPress is by far the best heat press I’ve personally owned.
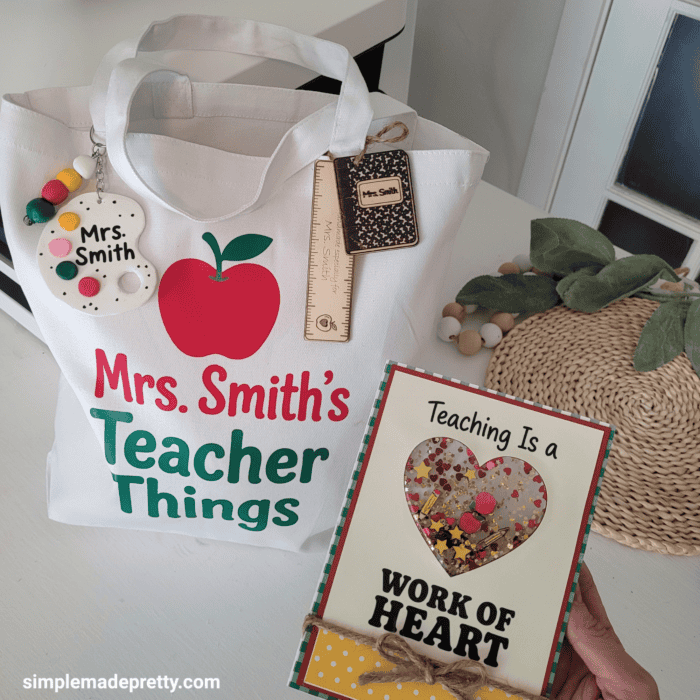
Dollar Tree Personalized Teacher Tote
I started with a simple tote bag from Dollar Tree and cut a design that says Mrs. Smith’s Teacher Things from iron-on using my cutting machine.
I placed the pressing pad inside the tote, positioned the iron-on and covered it with the protective sheet that came with the WonderPress.
xTool WonderPress HTV Settings I Used
Temperature: 315°F
Time: 30 seconds
Pressure: 60 kg
I added the smaller apple stem detail afterward and gave the design an additional 5-second press.
Always follow the recommended temperature and pressing instructions for the specific heat-transfer material and blank you’re using.
And it came out perfect.
I got even pressure without having to stand over the machine and manually press down, and the finished transfer adhered beautifully.
Is the xTool WonderPress Dual Station Worth It?
I also have the WonderPress Dual Station, and I think this becomes especially useful if you’re making multiples.
Instead of waiting for one project to finish before setting up the next one, you can prepare another blank on the second station while the first project is pressing.
For someone making shirts, tote bags or personalized products in batches, that can make the workflow much more efficient.
And that’s particularly interesting to me because I’m always looking at craft tools from two perspectives: What can I make with this? And could I use it to make products to sell?
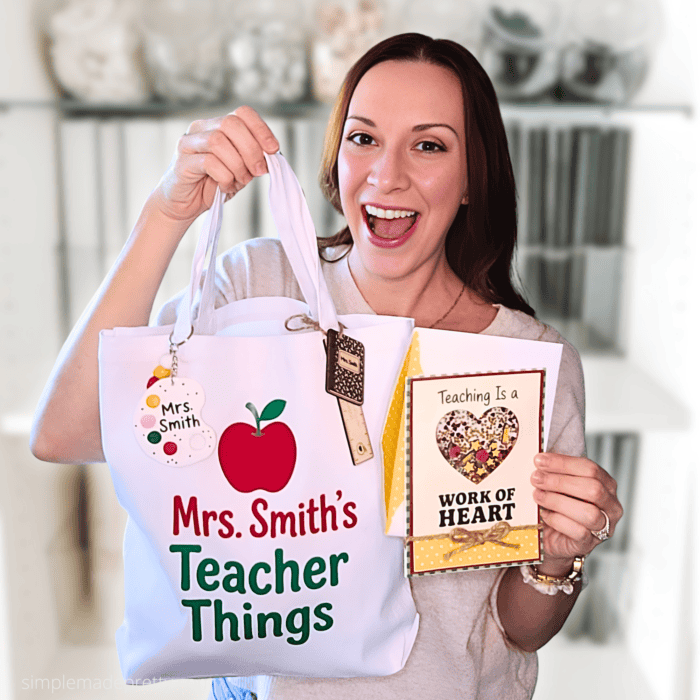
DIY Personalized Teacher Gift Set
Once I put all three projects together, I had an entire personalized teacher gift set:
- Personalized Dollar Tree teacher tote
- Handmade polymer clay palette keychain
- Teaching Is a Work of Heart shaker card
- Custom wooden teacher confetti
What I really like is that these don’t feel like three versions of the same craft. One is polymer clay, one is paper crafting and 3D forming, and one uses heat transfer.
That’s really where I started to understand the appeal of the WonderPress system.
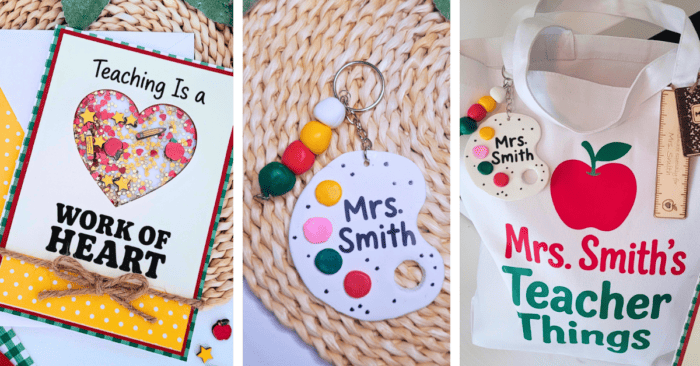
Could You Sell This Teacher Gift Set on Etsy?
You know I can’t make something without immediately wondering whether it could become a product to sell.
Packaged nicely as a ready-to-give personalized teacher gift, I would probably test this set around $25–$27 and then adjust the price based on actual material costs, personalization, packaging, production time, fees and customer response.
You could also test the individual pieces as separate products:
- Personalized teacher totes
- Polymer clay teacher keychains
- Teacher shaker cards
- Wooden teacher confetti
- Personalized teacher gift bundles
That’s one of my favorite ways to approach a craft business: instead of constantly trying to invent something completely new, look at one project and ask how many different products or offers you could create from it.
Want to Turn Your Crafts Into Products to Sell?
If you already know how to craft but aren’t sure what to sell, how to price it or how to turn your ideas into actual products, that’s exactly what I teach inside Cricut to Cash.
Is the xTool WonderPress Worth It?
After testing all three modules, I think the biggest advantage of WonderPress is that you’re not limited to one type of crafting.
You can also choose the setup based on what you actually make. If you primarily make heat-transfer projects, you can start there. If you want to expand into other types of crafting, you can add additional modules as you need them.
For me personally, the Heat Press was the standout. I’ve been working with heat-transfer products for more than a decade, and this is easily my favorite heat press I’ve owned.
The Craft Oven pushed me outside of the types of crafts I normally make, while the 3D Form Module opened up possibilities I hadn’t really considered before—especially once I realized I could create my own custom forms.
👉 See the xTool WonderPress, current bundles and module options here.
xTool WonderPress FAQs
Is the xTool WonderPress only a heat press?
No. WonderPress is a modular crafting system. In addition to heat pressing, compatible modules can add craft-oven and 3D-forming capabilities.
Can you bake polymer clay in the xTool WonderPress?
I used the WonderPress Craft Oven to bake polymer clay at 265°F for approximately 30 minutes total using Baking & Curing Mode, the Shrink Plastic setting and a 30-second exhaust time. Those settings worked with my clay, but always follow the curing recommendations for your specific product.
What xTool WonderPress settings work for HTV?
For the iron-on used on my Dollar Tree tote, I used 315°F for 30 seconds at 60 kg pressure, followed by an additional approximately five-second press after adding the smaller detail. Follow the recommendations for your specific HTV and blank.
Can you make your own mold for the xTool WonderPress 3D Form Module?
I made a custom heart form from two layers of approximately 3mm basswood cut with my xTool M2. I glued the layers together and lightly sanded the edges before using it with the 3D Form Module. Next time, I would use four layers to create more depth.
Do I need a WonderPress to make the teacher shaker card?
No. I’m creating a complete workshop that also includes an alternative way to make the shaker element if you don’t have the WonderPress 3D Form Module.
Can you use the xTool WonderPress for crafts to sell?
Yes. Heat-transfer products such as personalized totes and apparel are obvious possibilities, but the Craft Oven and 3D Form Module also open up additional options for handmade products. The Dual Station can also make batch pressing more efficient when you’re producing multiples.
More Crafts, Tools & Ideas to Make and Sell
If these WonderPress projects have you thinking about what else you can make, these are great places to go next—especially if you love turning inexpensive supplies into personalized projects and products you can sell.
Want to Make Even More with xTool?
I used my xTool M2 to create both the custom wooden heart form and the tiny teacher-themed confetti in this project. If you’re curious about using a laser for personalized crafts or products to sell, this is where I’d go next.
See how I’m using the xTool M2 to create personalized products.
Stock Your Craft Room for Less
The inexpensive tote and glitter in this teacher gift set are a good reminder that you don’t need expensive blanks and supplies to make something personalized. Dollar Tree is still one of my favorite places to look for basic craft supplies and blanks.
Before you pay craft-store prices, check Dollar Tree.
Looking for More Crafts You Can Actually Sell?
The teacher tote and gift set are just two examples of how inexpensive blanks can become personalized products. If you’re thinking about making crafts for extra income, start with products people already have a reason to buy.
Want more inexpensive product ideas you can make for profit?
🎥 Want to see all 3 projects in action?
My full xTool WonderPress video goes live tonight (8/14/26) at 6 PM ET! I will be sharing the complete projects, my experience using all three modules, exact settings and more.
Watch My Full xTool WonderPress Tutorial
If you want to watch the entire process from beginning to end, including how I used each of the three modules and what I learned while testing them, you can watch my complete WonderPress video below.
And I’m not finished experimenting with WonderPress yet. Stay tuned because I’ll be testing even more craft possibilities with it in my next video!
Pin this post for later
Disclaimer: This post may contain affiliate links or a sponsored post. All opinions are always 100% mine and I don’t partner with any product or company that I don’t use and love. Please see our Full Disclosure for more information.
 Dollar Tree DIY Flower Rack for Every Season
