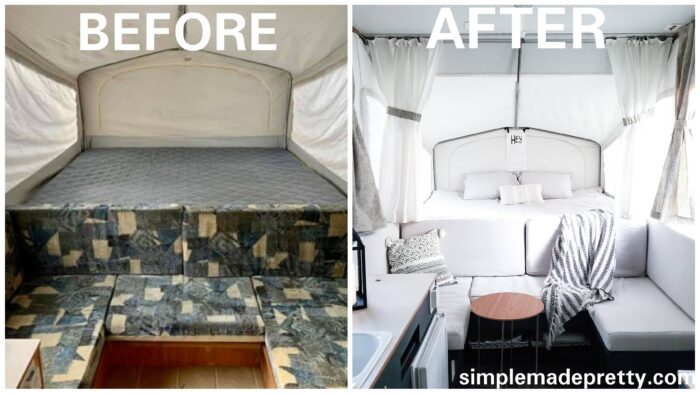
Pop Up Camper Remodel
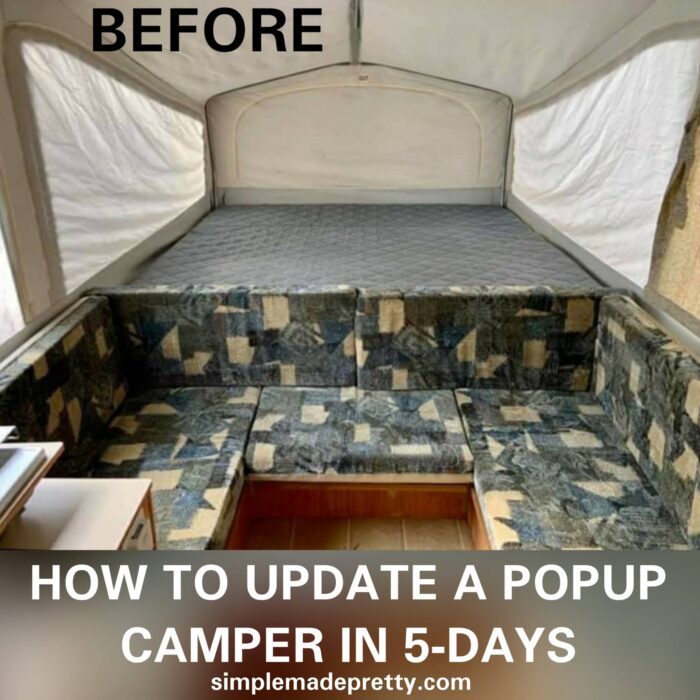
We purchased a 2005 Jayco Swift Pop Up Camper and went right to work to restore the Pop Up camper. I shared all of my pop up camper hacks and pop up camper remodel ideas in my Instagram stories and my followers loved it so much that I decided to put together this post and video with our Jayco Pop Up Camper Remodel Before and After pics. Keep reading and watch the video to see how we updated our pop up camper in 5 days!
I was able to update our camper in just 5 days! During this time, I was still working on other projects, so I would say I spent between 3-6 hours a day working on the pop up camper redo.
Before starting the pop up camper remodel, I did some research on Pinterest to find some popup camper decoration ideas and the best pop up camper makeovers. I found some amazing Pop Up camper inspiration at the Pop Up Princess and Rice Camp blog.
I created a mood board with the pop up camper remodel color scheme I wanted (dark cabinets, wood accents, white textures, and bright and clean. I really wanted cognac-colored leather cushions, however, these were out of my budget so I stuck with using materials that I had on-hand.
Q: What are some budget-friendly pop-up camper makeover ideas?
A: Painting cabinets, updating flooring with peel-and-stick tiles, and sewing new cushion covers are cost-effective ways to refresh your camper’s interior.
Q: How can I prevent paint from chipping in a pop-up camper?
A: Applying a polyurethane topcoat over painted surfaces can enhance durability and resist chipping.
Remodel Supplies I Used & Loved
- 🪄 Peel-and-Stick Flooring
Easy to install and renter-friendly! Great for campers, bathrooms, or laundry rooms.👉 Shop it here - 🎨 PPG Gripper Paint
No sanding required! The perfect paint for a smooth, matte finish on cabinets and furniture.👉 Get yours here - 🎨 Appliance Epoxy Paint
Easily update a mini fridge in the pop up camper.👉 Get yours here - 🎨 Polyurathene Clear Coat
Keeps cabinets from getting scratched.👉 Get yours here - 🧵 Canvas Drop Cloths
My go-to fabric for sewing cushion covers or curtains — affordable and durable!👉 See it here - 🖌 Paintbrush & Roller Set
This combo set gave me super clean edges and made painting go faster!👉 Check it out - 🧼 Multi-Surface Cleaner (Pre-Paint Prep)
Prep like a pro — this cleaner removes residue so your paint sticks beautifully.👉 Grab it here - 🪟 Cabinet Hardware Pack
I upgraded our knobs & pulls with a modern black set — major style for minimal spend.👉 Shop this set - 🌿 Mini Faux Plants
Adds life and color to your space without the mess of real dirt in a moving camper 😄👉 Get a set here - 🧺 Storage Bins & Baskets
Keep clutter out of sight with these collapsible canvas bins — perfect for under-bench storage.👉 Snag them here - 🔩 Cordless Drill & Tool Kit
The MVP of this whole makeover — lightweight, compact, and powerful.👉 See this must-have - 🎀 Cute Curtain Clips or Rods
These simple clips helped me hang drop cloth curtains without sewing a thing!👉 Find them here
Shop our Pop Up Camper:

Jayco Swift Pop Up update
My hubby and I really knew nothing about pop up campers (or camping, lol) before we bought our Jayco Swift Pop Up Camper. However, we’ve purchased 3 homes that we’ve transformed and updated ourselves so how hard could this tiny camper be?
Update a Pop Up Camper
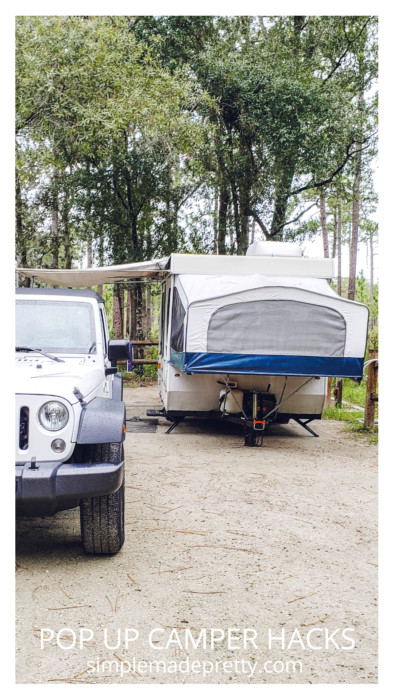
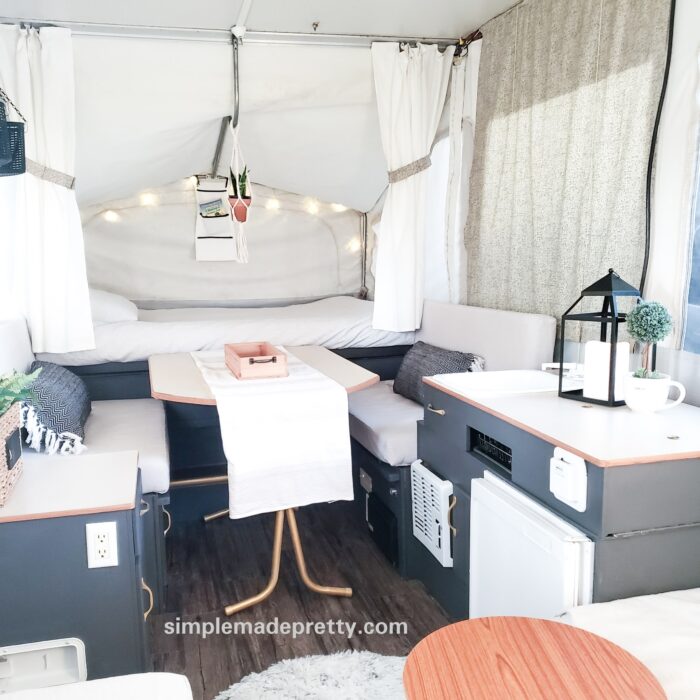
Many of my followers didn’t realize the camper video I was sharing on Instagram was a Pop Up camper. When I shared a picture of the pop up camper closed, they were shocked because the space inside was roomy and beautiful… keep scrolling to see for yourself!
How Do You Fix an Old Pop Up Camper?
If you are serious about fixing up an old pop up camper, I highly recommend finding one that is in good condition so you have less of the major fixes to do, lol.
The first thing to look for when purchasing an old pop up camper is water damage. You can usually tell if the canvas is discolored in certain areas or if the wood has soft spots or discolorations. Those are warning signs that the plywood floor might need to be replaced which is a huge job!
Our pop up was in great shape and since it is less than 15 years old, there is little wear and tear on the interior and exterior. If you can find a used pop up camper that is less than 20 years old and was well-taken care of (or garage kept) that is your best bet.
–>>See the entire process of our Pop Up Camper Update in my Instagram Highlight Here
Can You Paint a Pop Up Camper?
I painted the inside cabinets in our pop up camper and I plan to paint the outside. I will update this post once I paint the outside of our pop up camper.
How Do You Update a Camper?
We updated our pop up camper by giving it a complete face-lift inside and taking care of maintenance, and normal wear and tear issues. My hubby did most of the exterior, plumbing, and electrical updates. I did all of the cosmetic updates inside the pop up camper.
Where to Start when you update a Popup Camper?
Here is the timeline that I followed to update our Pop Up Camper in 5 Days:
- Day 1: Deep clean inside and outside. Make a list of items that need to be replaced and order those items if they are only available online.
- Day 2: Paint the cabinets, cabinet pulls, fire extinguisher holder, threshold, dinette table legs, furnace cover, and epoxy the icebox.
- Day 3: Sew cushion covers and replace items from the list on Day 1.
- Day 4: Install floors and sew curtains.
- Day 5: Add bedding, accessories, and organize items in the cabinets.
It seems easy once you make a list 🙂
Day 1: Deep clean inside and outside.
In order to deep clean, I removed all of the cushions, all of the curtains, and anything that was left by the previous owner in the cabinets and drawers.
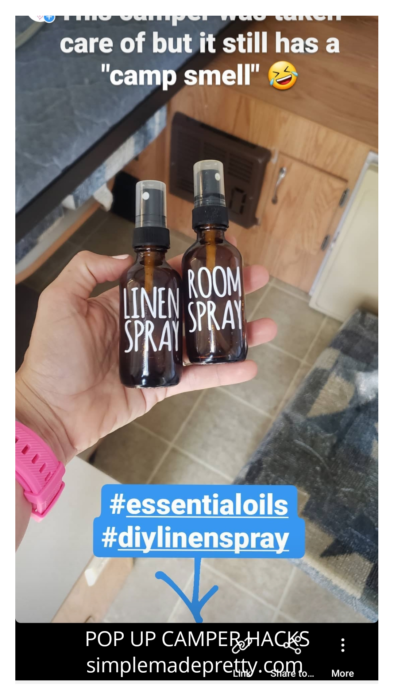
I sprayed the cushion inserts with some essential oils linen spray and room spray (find the recipes here).
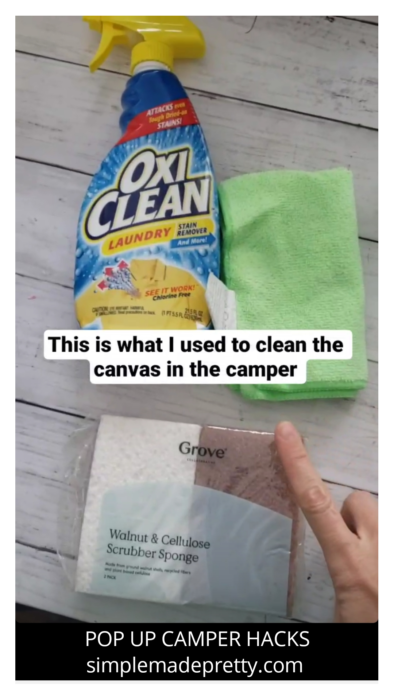
I used cleaning items that I already had to clean the canvas and the inside of the camper.
Make a list of items that need to be replaced and order those items if they are only available online.
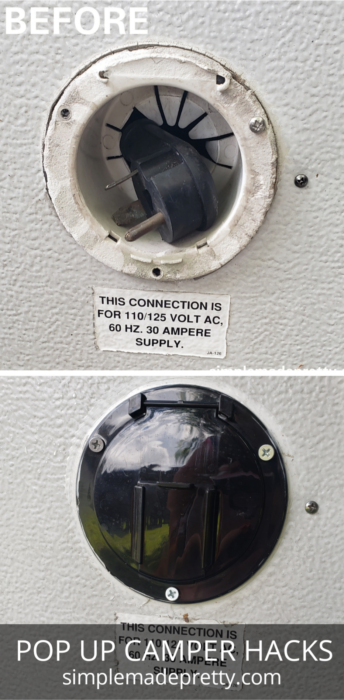
Our pop up camper needed a new cover for the exterior electrical cord and we ordered it on Amazon since we couldn’t find one at a local store.
My hubby also replaced various other hardware pieces and checked the electrical wiring, plumbing, and AC unit. These are all tasks that he is skilled and trained to do himself.
Our spare tire was also leaking air and needed a new air valve, which a local tire shop replaced for us.
Shop our Pop Up Camper:
The exterior of the camper needs a paint job but we are saving that for another day – Check out how to paint a pop up camper exterior in this post!
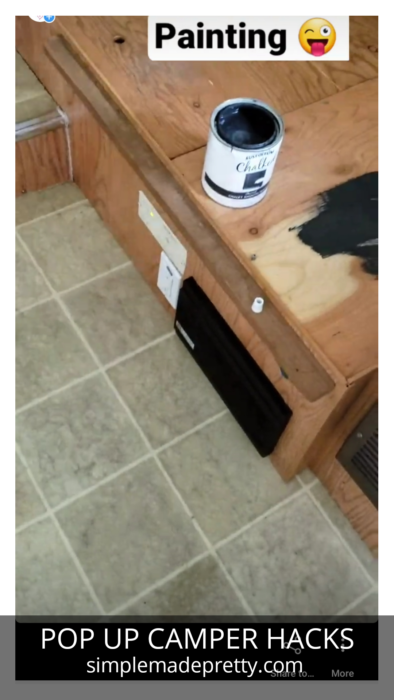
Day 2: Paint the Cabinets
In addition to painting the cabinets, I painted all the accessories in the camper to give it a fresh face-lift!
How to Paint Pop Up Camper Cabinets
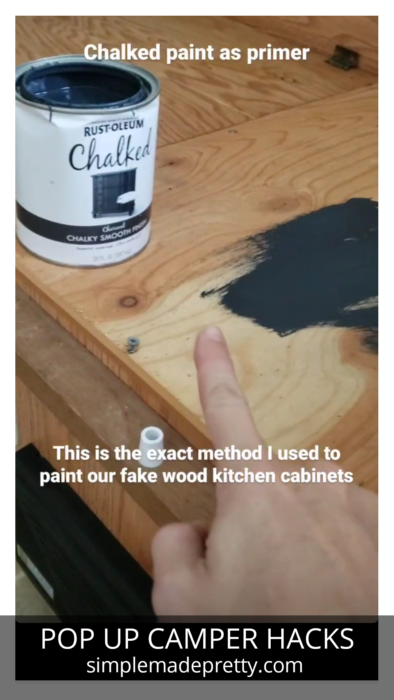
I painted our pop up camper cabinets the same way I painted our faux wood kitchen cabinets. The only difference was, I added a polyurethane coat to the camper cabinets (I’ll tell you why below!). However, if I had to do it all over again, I’d paint the cabinets with PPG primer, then paint them with eggshell paint in the preferred color, then polyurethanr. I used PPG when painting our Travel Trailer and it’s so much better than chalked paint! Please let each coat of primer, paint, and polyurethane dry for at least 24 hours between applications!
No sanding was necessary to paint the pop up camper cabinets. I used charcoal chalked paint as my base and primer for the cabinets. I used the charcoal color because I knew I was painting the pop up camper cabinets in a dark color. If you plan to paint your pop up camper cabinets white, then use the Linen Chalked paint as a primer. However, if I had to do it all over again, I’d paint the cabinets with PPG primer, then paint them with eggshell paint in the preferred color, then polyurethanr. I used PPG when painting our Travel Trailer and it’s so much better than chalked paint! Please let each coat of primer, paint, and polyurethane dry for at least 24 hours between applications!
Once the Chalked paint dried, I painted the cabinets in Glidden Paint and Primer in One with an Eggshell finish in the color Benjamin Moore Gray (I had Home Depot color match the color).
My cabinets looked great after those 2 coats of paint, however, I had some chipping after moving things around inside so I decided to apply one coat of Triple Thick Water-Based Polyurethane.
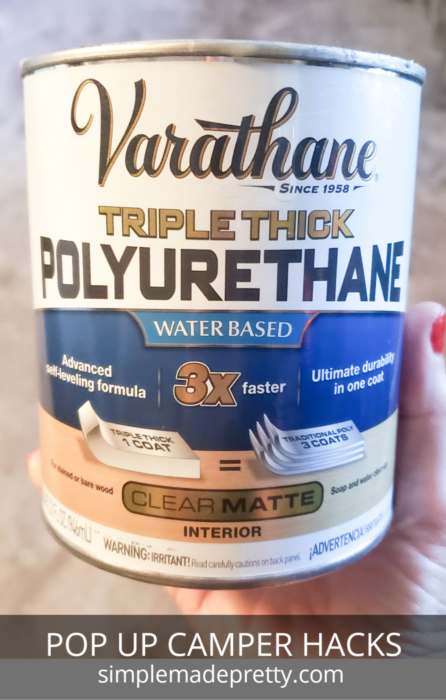
The polyurethane made a huge difference since the camper is tiny and we are constantly shoving things around the cabinets and they are easily scratched and bumped. I highly recommend polyurethane on pop up camper cabinets because the space is so small!
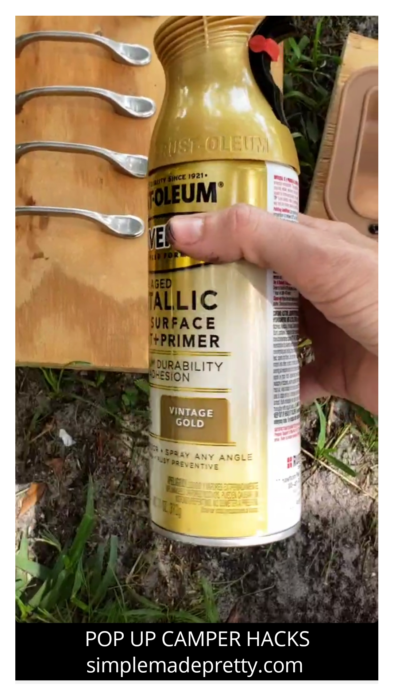
I used gold spray paint on the door handles, the threshold on the bunk step, and the legs on the dinette table.
I removed the icebox door and frame and used white epoxy on it so it wasn’t an ugly beige color.
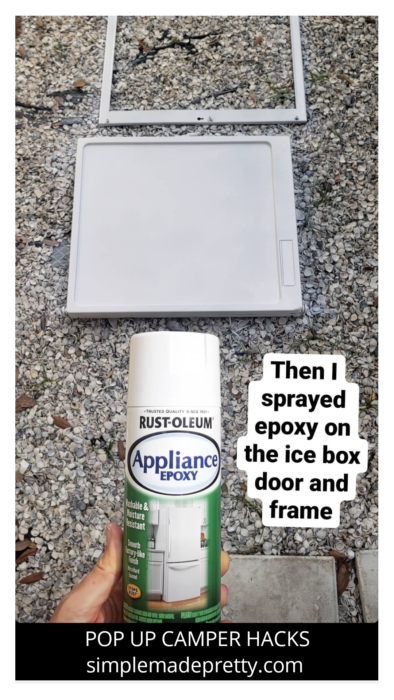
I also spray painted the furnace cover and the fire extinguisher cover White to match the icebox.
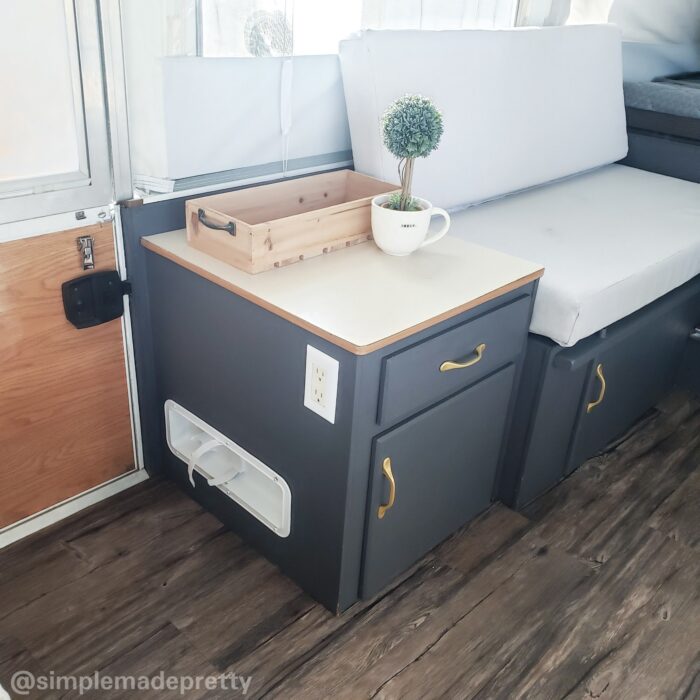
Our Pop Up Camper Color Schemes ended up being Black, White, Gold, with Wood accents 🙂
Day 3: Sew cushion covers
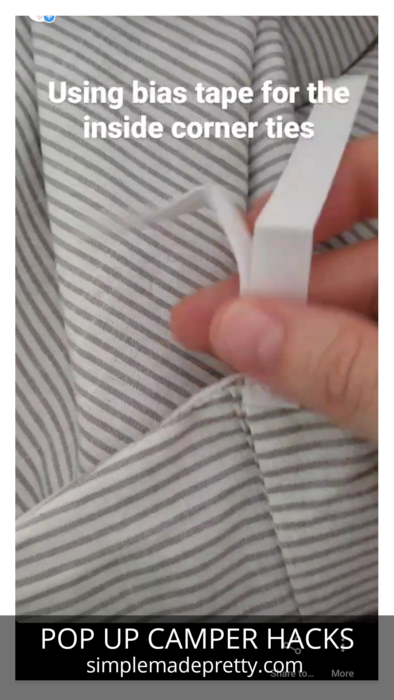
Sewing the cushion covers were the most time-consuming part of our Pop Up Camper update. We have 11 cushions in our camper and I made new covers for all of them using Canvas Drop Cloth.
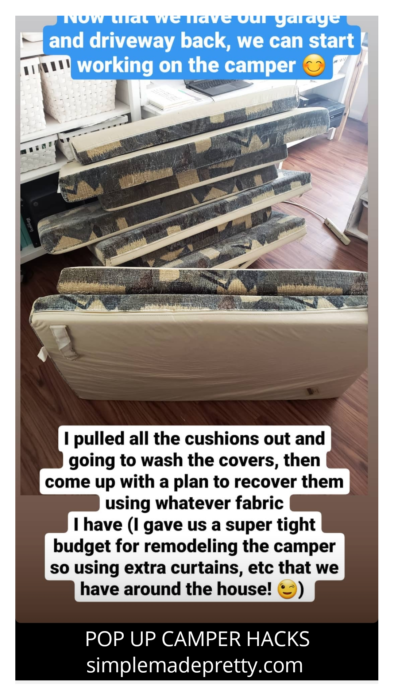
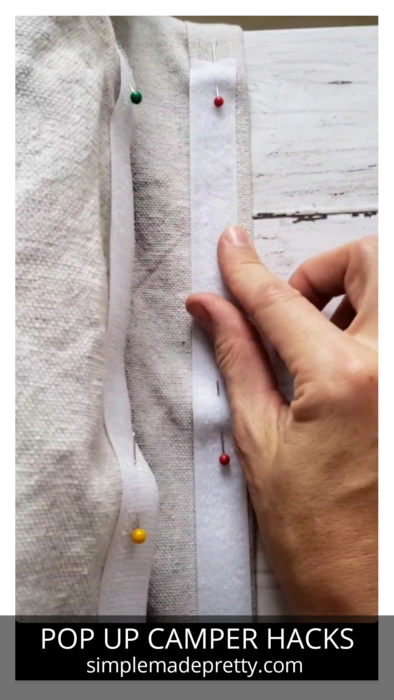
I chose to sew our cushions rather than a no-sew cushion because I wanted them to be durable and easy to remove and throw in the wash.
As I mentioned earlier, I really wanted cognac leather cushion covers, but they weren’t in our budget so I settled with using canvas drop cloth since I had extra from previous projects.
The cost for the Canvas Drop Cloth was around $45, however, I had a couple of packs already so I only spent $22 for the cushion covers.
Shop our Pop Up Camper:
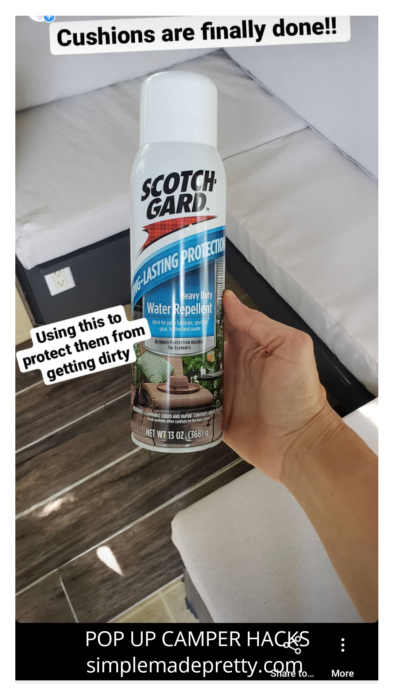
I used Scotchgard 0n our cushions to reduce the number of stains since they are a light color fabric.
Day 4: Install floors and sew curtains.
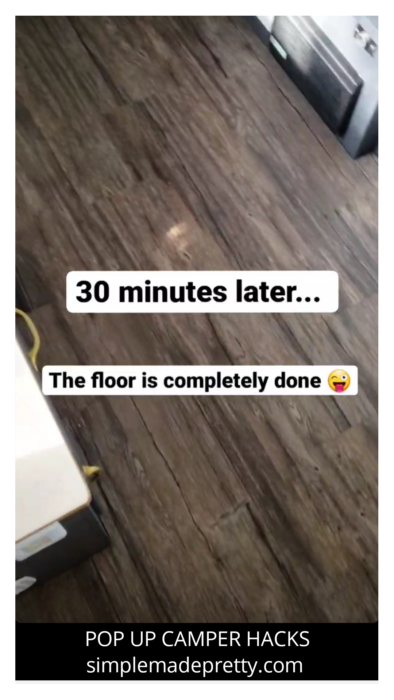
Installing the floors was easier than I thought they would be because I used peel and stick floor tiles that look like wood.
–>> I used this peel and stick flooring.
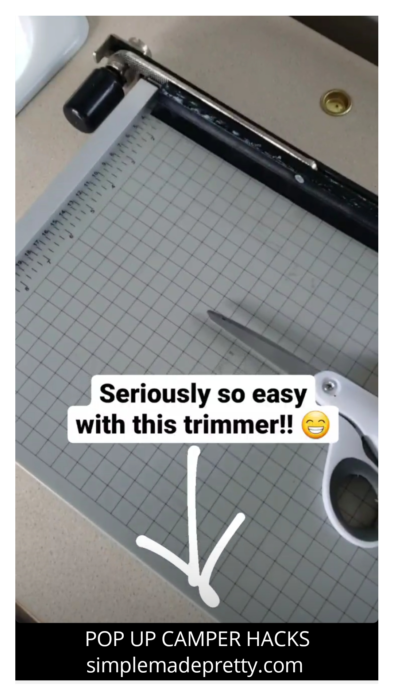
I used my paper trimmer to slice the perfect straight edge! Many DIYers use a box cutter or scissors to cut peel and stick tiles, but the paper trimmer saved me SO much time and it resulted in the perfect cut!
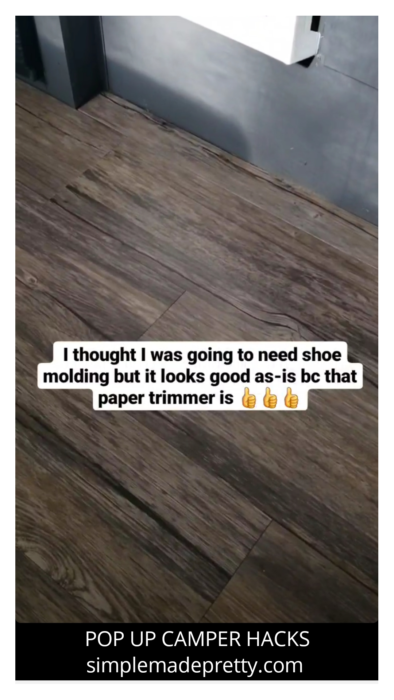
–>>You can find my paper trimmer here.
It took around 45 minutes and only $34 to install the floors!
For the curtains, I ended up washing all the curtains and keeping the window curtains the same. The colors matched perfectly and I saved some time and money by keeping the curtains.

I updated the bunk curtains by cutting the strip with the clips that slide into the camper and sewing them on to some old Ikea curtains.

I cut one Ikea curtain panel in half to use for one bunk and I reused the sashes to tie back each curtain so the fabric matched the window curtains.
Day 5: Add bedding, accessories, and organize items in the cabinets.
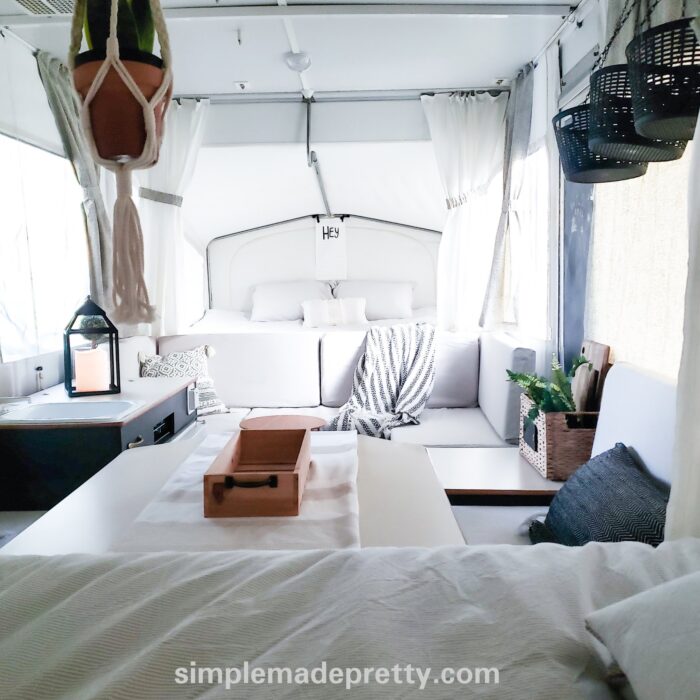
Our Pop Up Camper has 4 beds and we didn’t have extra bedding in our house, so I needed cheap bedding options.
I went to Ikea looking for inexpensive comforters and I came up with a solution that saved us so much money! I used these Ikea comforters in this DIY.
I was able to DIY:
- 1 King Comforter for $16
- 1 Queen Comforter $16
- 1 Twin Comforter $8
–>>I shared the bedding hack in this Instagram Highlight!
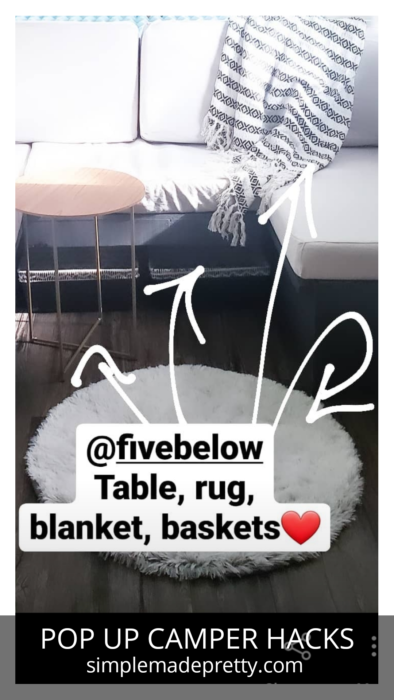
As for other accessories for the camper, I found several items at Five Below that were very useful. A collapsible table, some cute baskets, a fur rug, a large outdoor lantern with a large candle, a comfy boho blanket, and more!
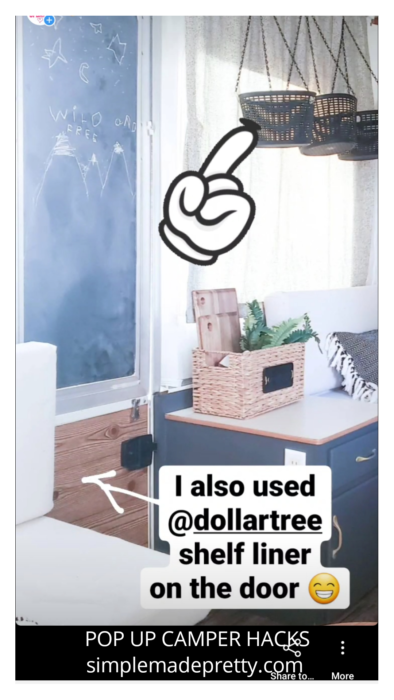
I also used some baskets from Dollar Tree with some metal floral hangers to create hanging basket storage.
I used various Dollar Tree baskets and hooks to organize inside the camper, but I will have to save that for another post since there is a lot to talk about when it comes to organizing a Pop Up Camper!
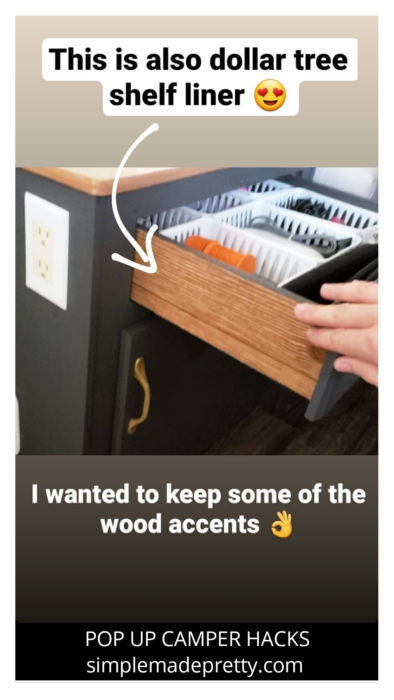
Dollar Tree shelf liner came in handy too!
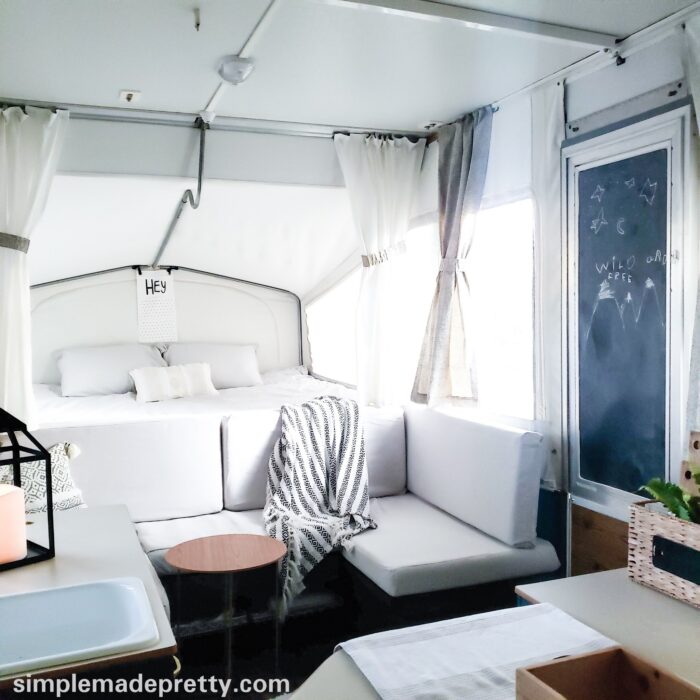
I used Dollar Tree Shelf liner on the lower half of the interior door and for the upper half of the door, I applied Chalkboard vinyl.
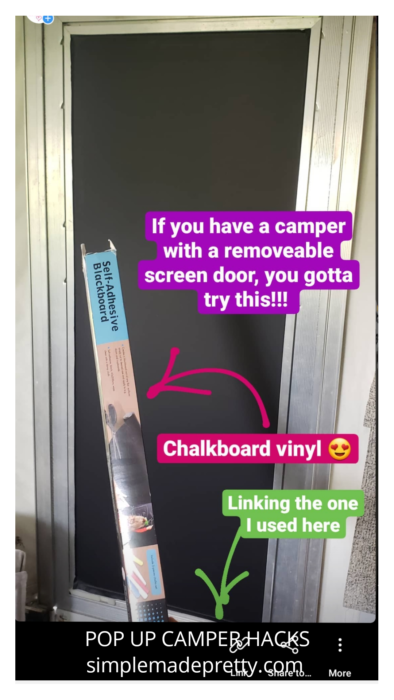
I loved this Pop Up Camper Hack and think anyone with kids needs a removable chalkboard door!

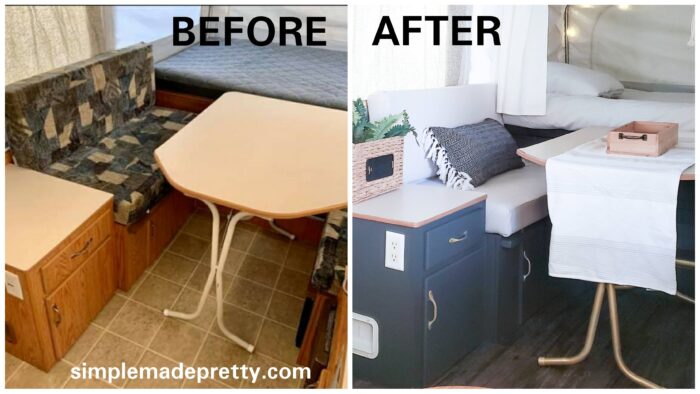
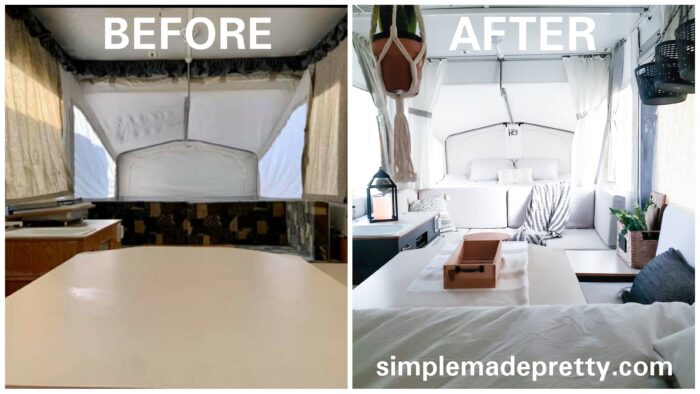
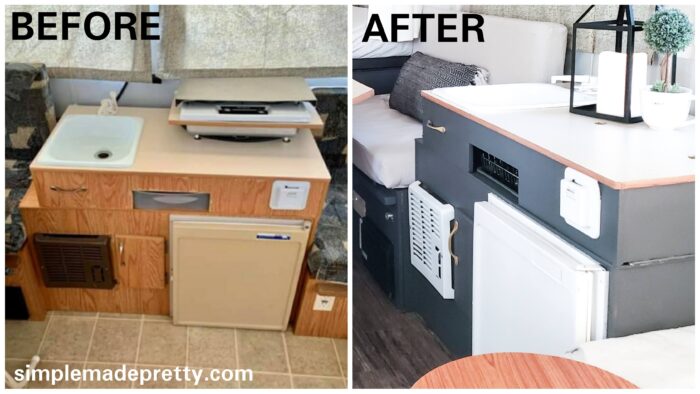
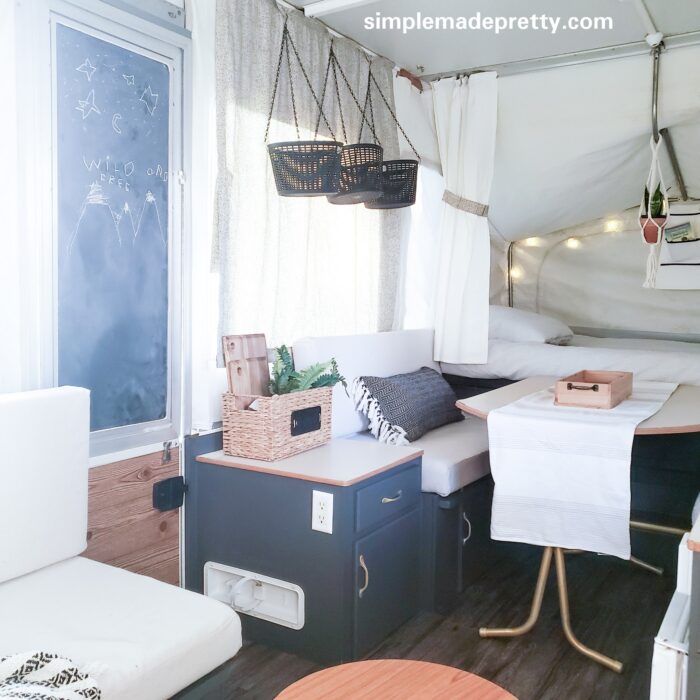
Pop Up Camper Remodel Before and After Pictures
Here are all the Before and After pictures with more AFTER pictures at the end (keep scrolling!).
Is it Worth Buying a Pop Up Camper?
We searched Facebook Marketplace and Craiglist for several months before we bought our used pop up camper. We had a price in mind that we were willing to spend and we looked at a few used campers before finally purchasing this pop up camper.
Purchasing a pop up camper was worth it for our family because it gives us the ability to travel and spend more times outdoors doing family activities.
We moved to Florida 2 years ago and we want to explore areas in Florida that we’ve never been before. The pop up camper allows us to travel and site-see without spending a ton of money.
So far, we’ve enjoyed using our pop up camper and updating the pop up camper BEFORE our first camping trip made a huge difference in the quality of our first pop up camping experience!
I have to say that it has been worth it for use to buy a Pop Up Camper 🙂
Pop Up Camper Redo After Pictures
Did you update a camper inspired by this post? I would love to see it! Send me a picture on Facebook, Instagram, or email and I’ll share with my followers 🙂
Remodel Supplies I Used & Loved
- 🪄 Peel-and-Stick Flooring
Easy to install and renter-friendly! Great for campers, bathrooms, or laundry rooms.👉 Shop it here - 🎨 PPG Gripper Paint
No sanding required! The perfect paint for a smooth, matte finish on cabinets and furniture.👉 Get yours here - 🎨 Appliance Epoxy Paint
Easily update a mini fridge in the pop up camper.👉 Get yours here - 🎨 Polyurathene Clear Coat
Keeps cabinets from getting scratched.👉 Get yours here - 🧵 Canvas Drop Cloths
My go-to fabric for sewing cushion covers or curtains — affordable and durable!👉 See it here - 🖌 Paintbrush & Roller Set
This combo set gave me super clean edges and made painting go faster!👉 Check it out - 🧼 Multi-Surface Cleaner (Pre-Paint Prep)
Prep like a pro — this cleaner removes residue so your paint sticks beautifully.👉 Grab it here - 🪟 Cabinet Hardware Pack
I upgraded our knobs & pulls with a modern black set — major style for minimal spend.👉 Shop this set - 🌿 Mini Faux Plants
Adds life and color to your space without the mess of real dirt in a moving camper 😄👉 Get a set here - 🧺 Storage Bins & Baskets
Keep clutter out of sight with these collapsible canvas bins — perfect for under-bench storage.👉 Snag them here - 🔩 Cordless Drill & Tool Kit
The MVP of this whole makeover — lightweight, compact, and powerful.👉 See this must-have - 🎀 Cute Curtain Clips or Rods
These simple clips helped me hang drop cloth curtains without sewing a thing!👉 Find them here
Shop our Pop Up Camper:
MORE SOURCES:
- Cabinet Paint Color: BM Gray
- Triple Thick Water-Based Polyurethane
- Gold Spray Paint
- White Spray Paint
- Peel and Stick Flooring
- Paper Trimmer (to cut peel and stick flooring)
- Cushions Canvas Drop Cloth
- Wood Shelf Liner
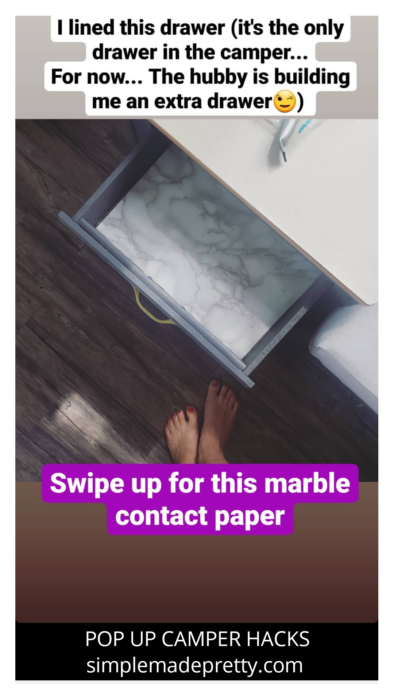
- Marble Shelf Liner
- Boho Pillow Cover
- Boho Blankets
- Outdoor Lantern
- Large Battery Operated Candle
- Ikea Comforter
- Ikea Duvet Cover
- Hanging Baskets
WATCH THE FULL VIDEO TOUR OF OUR POP UP CAMPER AFTER THE RENOVATION!
More Camper Remodel Resources You’ll Love
Looking to take your camper makeover even further? Don’t miss these helpful posts packed with tips, tools, and free resources:
🎨 How to Paint a Pop-Up Camper Exterior – Step-by-step guide to give your camper’s exterior a fresh new look.
📝 Pop-Up Camper Checklist – Free Printable – Stay organized on your next trip with this must-have checklist!
🚐 How to Update a Travel Trailer on a Budget – Great ideas if you’re remodeling something bigger than a pop-up.
You Might Also Like…
Psssssttt…Right now I’m offering FREE access to our Digital Resource Library to all of our newsletter subscribers. Your private access includes dozens of free printable crafts, home decor and organization guides. Hurry up and grab your freebies here! (Access instructions are sent after subscribing).
Disclaimer: This post may contain affiliate links or a sponsored post. All opinions are always 100% mine and I don’t partner with any product or company that I don’t use and love. Please see our Full Disclosure for more information.
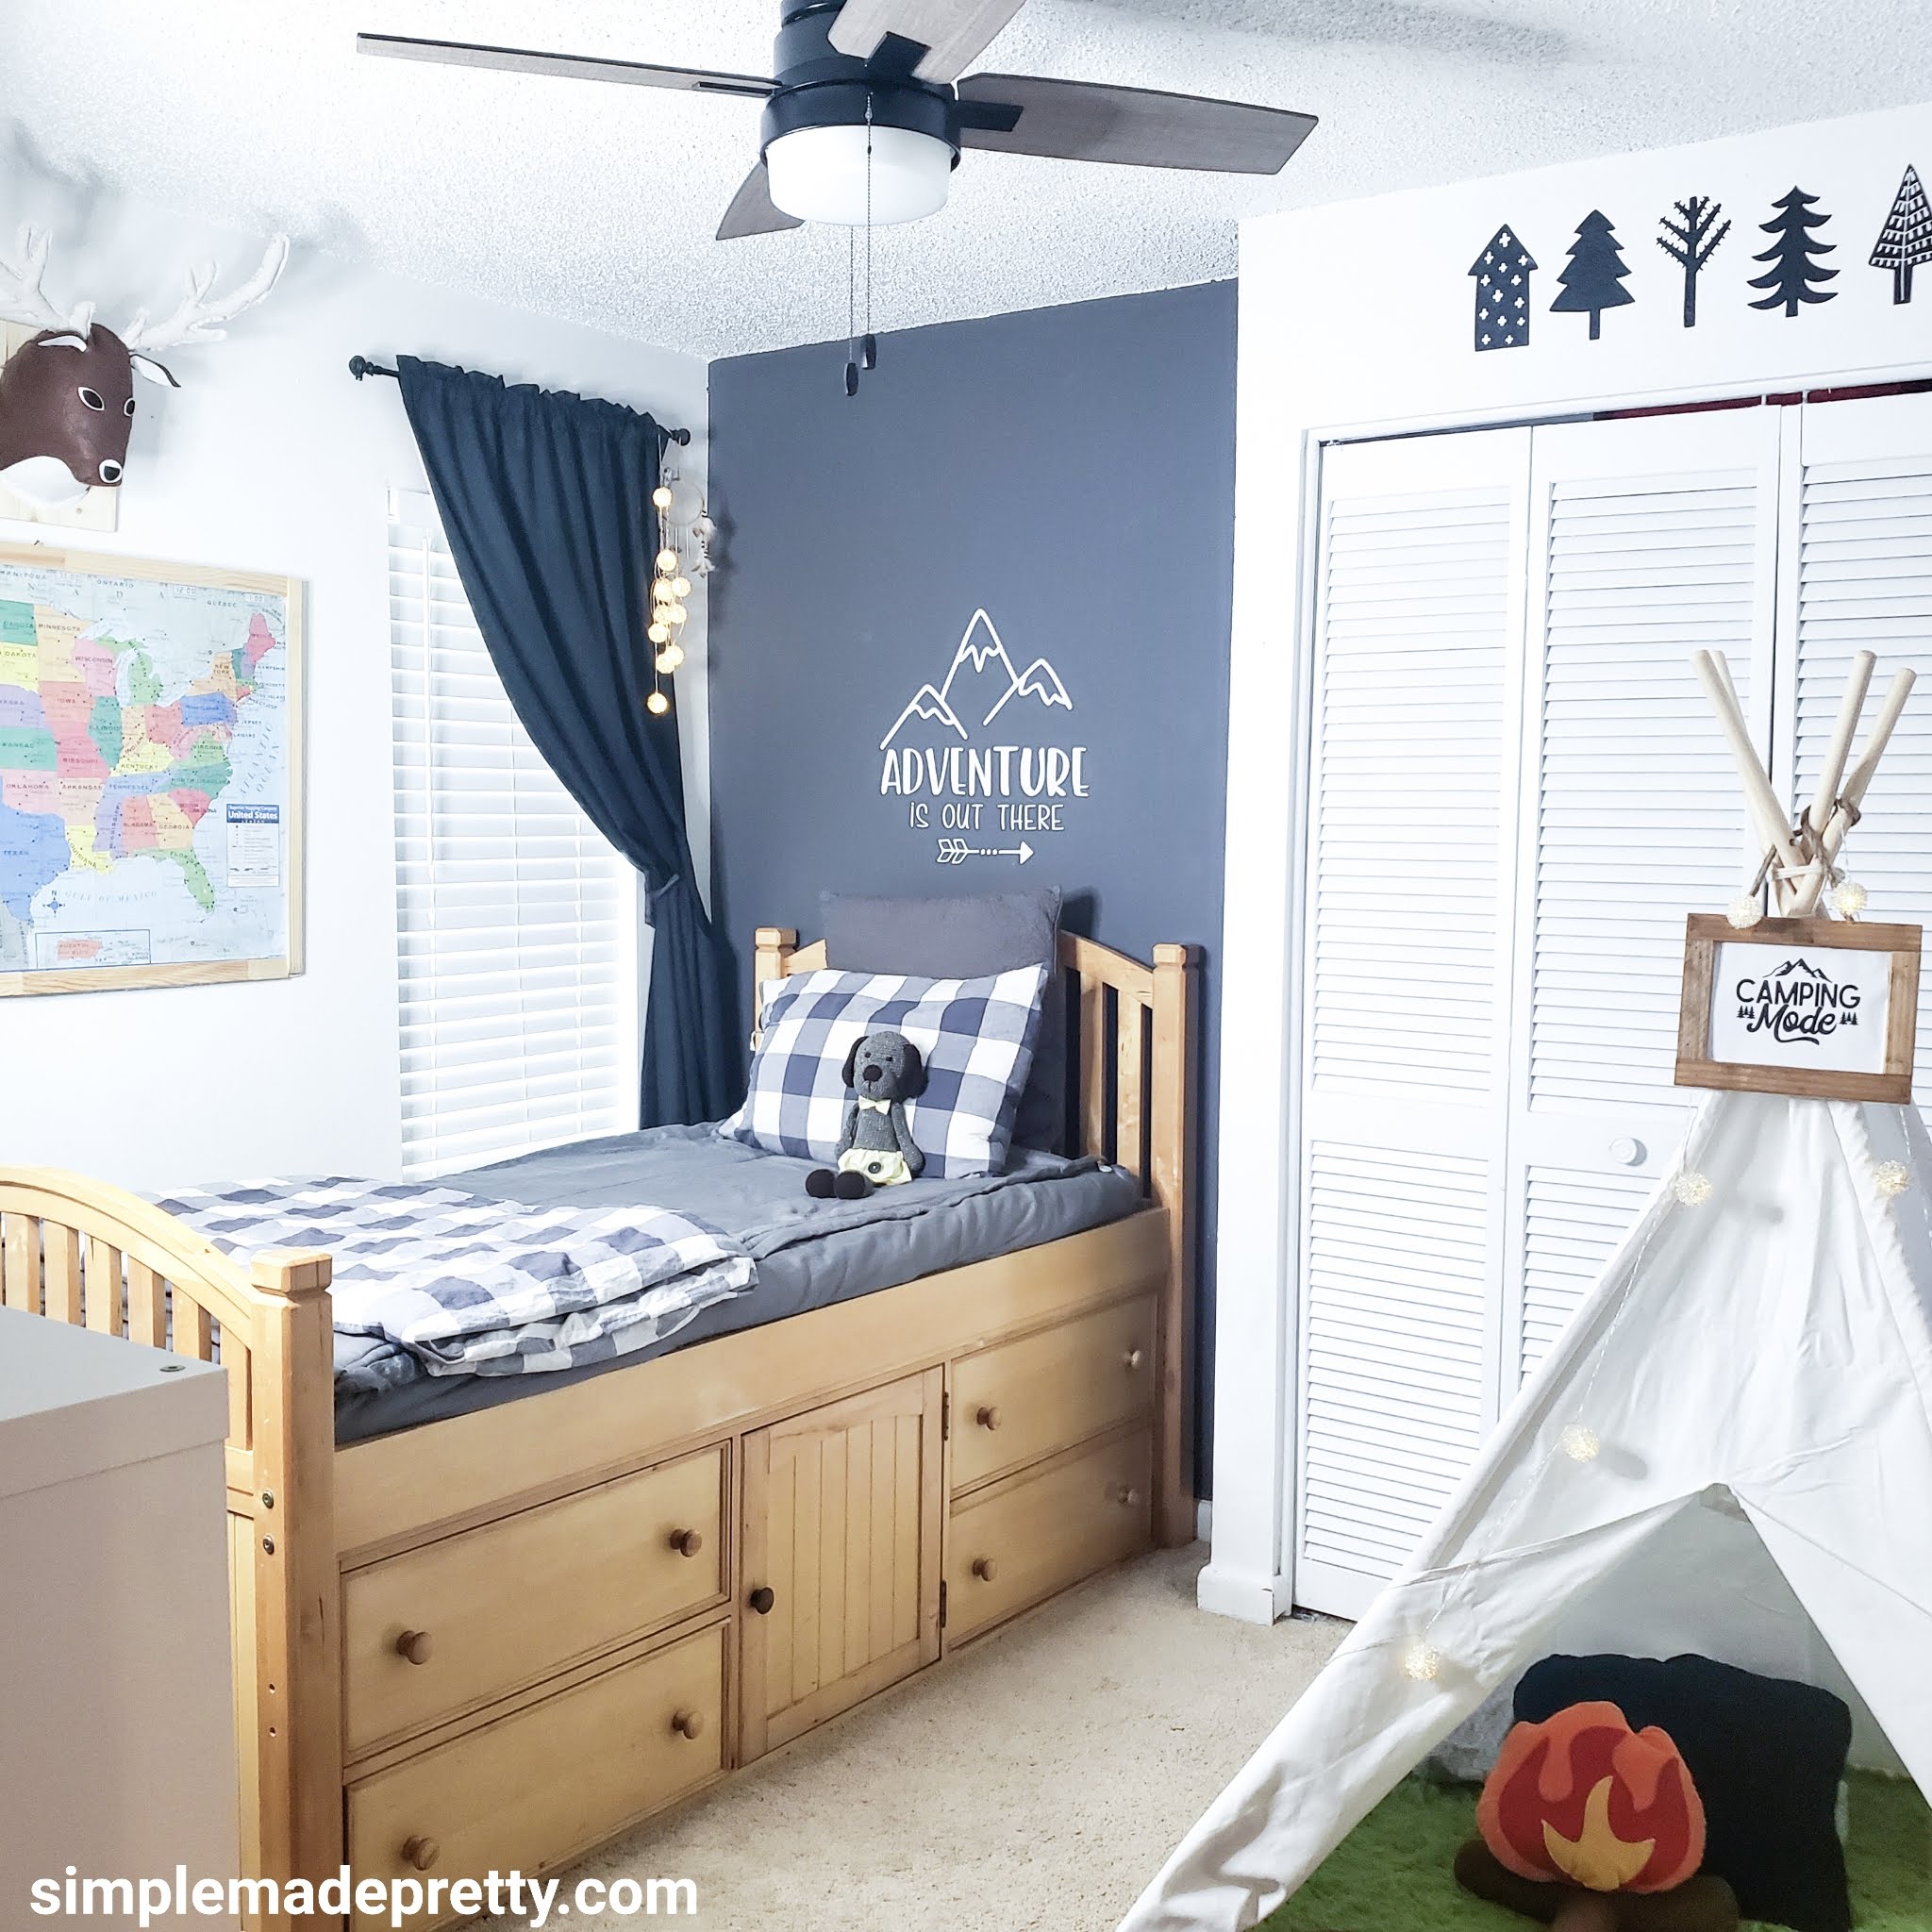 Boy’s Bedroom Wilderness Theme