Laser Engraved Luggage Tags Tutorial
Add a personal touch to your luggage with these easy DIY Laser Cut Wooden Luggage Tags. These laser-engraved wood luggage tags are a stylish and unique solution and make a great gift idea. Not only do they look great, but they are also durable and can withstand the wear and tear of travel. In this tutorial, we will guide you through the process of creating your own laser engraved wood luggage tags, so you can travel in style and never lose your bags again! Find the SVG file below so you can make these luggage tags right away!

In case you’re in a hurry…
SHOP xTool’s Sales Up to 60% Off and Free Gift. SHOP THE SALE HERE
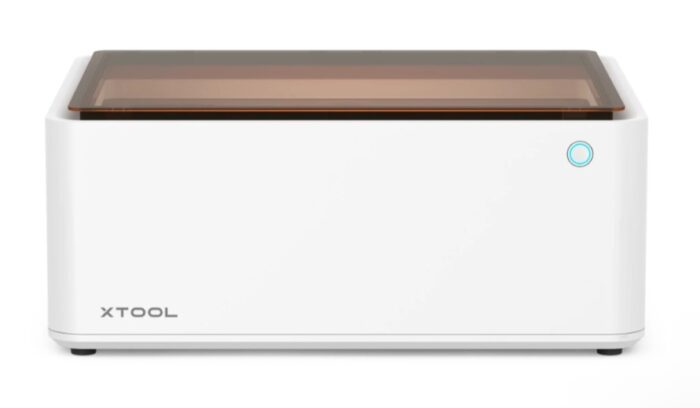
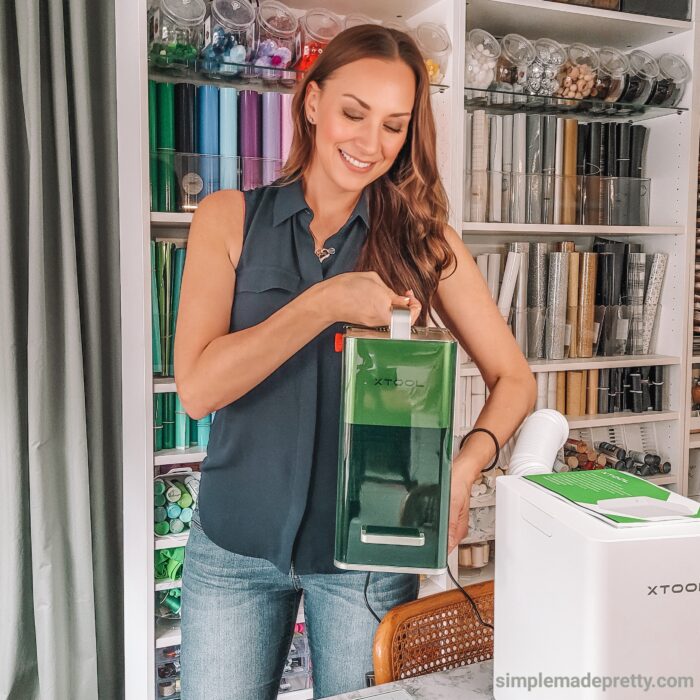
What is the xTool M1 Machine?
The xTool M1 machine is the world’s first machine with both laser and blade-cutting abilities. Some of the features of this machine are the smart camera inside, the 3-in-1 laser cutting, engraving, and blade cutting. It has a safe enclosed design and comes with free design software.
You can cut 500+ Materials with Endless Creation Ideas!
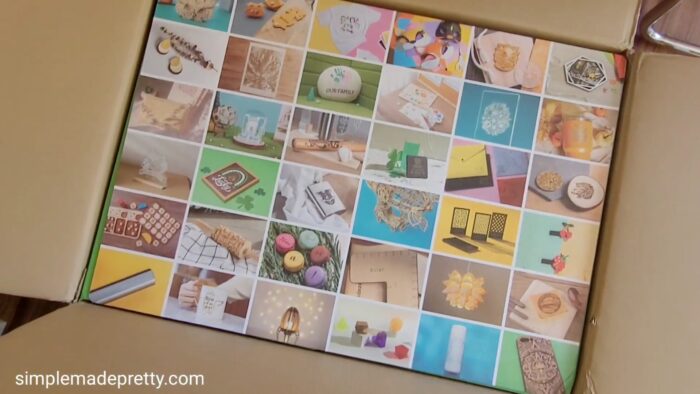
xTool M1 Unboxing
It only takes a few steps to set it up so let’s get started and see how that goes. I share the full unboxing of the M1 machine, although you can find an unboxing video on their website, it’s always better to see what the “real” process looks like.
The box is cumbersome and the machine box takes up the entire shipping box. So I unpacked everything while in the shipping box. It’s protected very well and it’s not too heavy.
The mats were right on top and on the sides were the risers for the rotary tool projects, the rotary Accessory kit, the premium material kit, and the rotary tool.
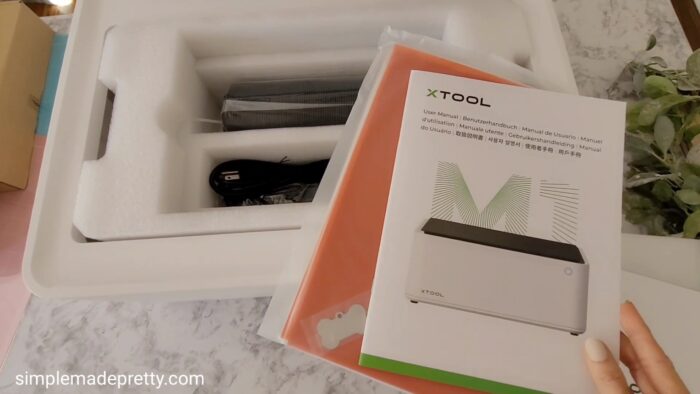
Inside the xTool M1 Machine
The lid cover has a protective film on the top and the underside that you need to remove.
And inside there are more things…
- User manual
- Sample materials
- A dog tag
- White sticker paper
- PU leather
- Basswood
- 5 extra blades
- The power cord
- USB cord
- The exhaust hose and parts to attach the exhaust hose
- Triangular prisms (you use these in the machine under certain material for laser cutting)
- Another pink and blue mat
I don’t want to go into too much detail about the rotary tool and accessories, I plan to post another video and blog post sharing that setup with projects.
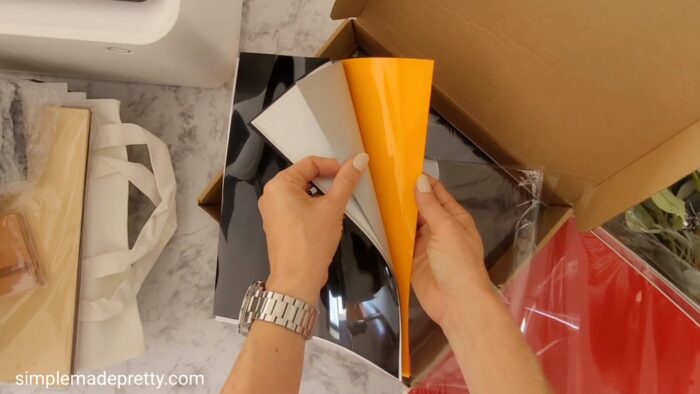
However, I want to share the premium material package because it contains some really cool items and a helpful laminated cheat sheet with the cutting instructions. This came in handy especially if you are not familiar with all the materials the machine can cut.
Premium Material Package for the xTool M1
–>>Get the Premium Material Package here.
Here’s what was included in the Premium Material Package:
- Canvas tote
- Dark wood
- Basswood
- Clear and colorful PVC
- Wood tags
- Wood coasters
- Wood phone stand
- Slate coasters
- Metal card case
- Several charms
- White Sticker paper
- PU Leather in 3 different colors
- Laser marking paper
- Craft removable vinyl in various colors
- Heat transfer vinyl in various colors
Setting Up the xTool M1 Machine
I recommend taking a look over the manual and starting to set up the machine. I wrote an entire post on setting up the xTool M1 machine which you can see here.
I also have the xTool F1 Machine and recommend it for small laser projects like jewelry engraving or ornament personalization.
In case you’re in a hurry…

DIY Laser Cut Wooden Luggage Tags
Supplies
Instructions
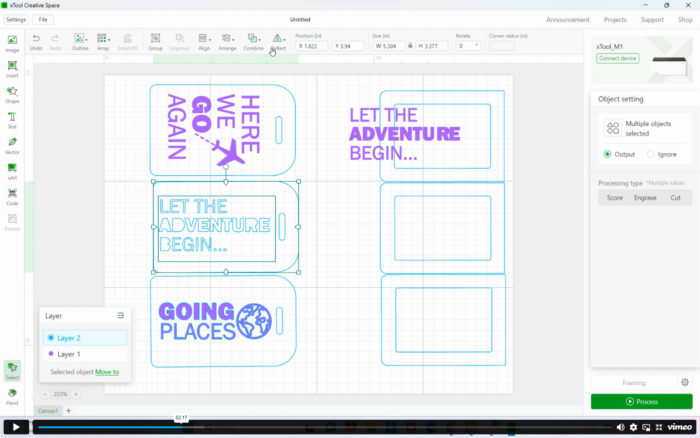
- Upload the SVG file into xTool Creative Space.
- Size the image to fit on the basswood sheet. I sized each of my tags to be 2.5" x 4.15" but then sized it down further when placing it to fit the basswood.
- Next, you need to change the text inside the tag to "engrave" and not cut. I did this by moving the engraved layer out, then placing a rectangle image on the tag with the cut later and "Uniting" it together.
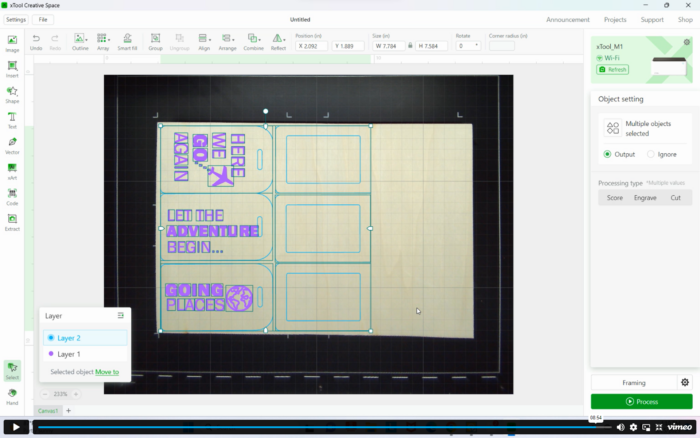
- Then you need to turn the machine on and place the triangular prisms on the metal plate and the basswood on top of the triangular prisms.
- Refresh your machine to see the camera image of the basswood inside the machine and adjust the size of your cut/engraved images. I always highlight the entire image and group to move. You can always use the Undo button if you mess anything up.
- Follow the instructions in Creative Space to start the laser-cutting and engraving process.
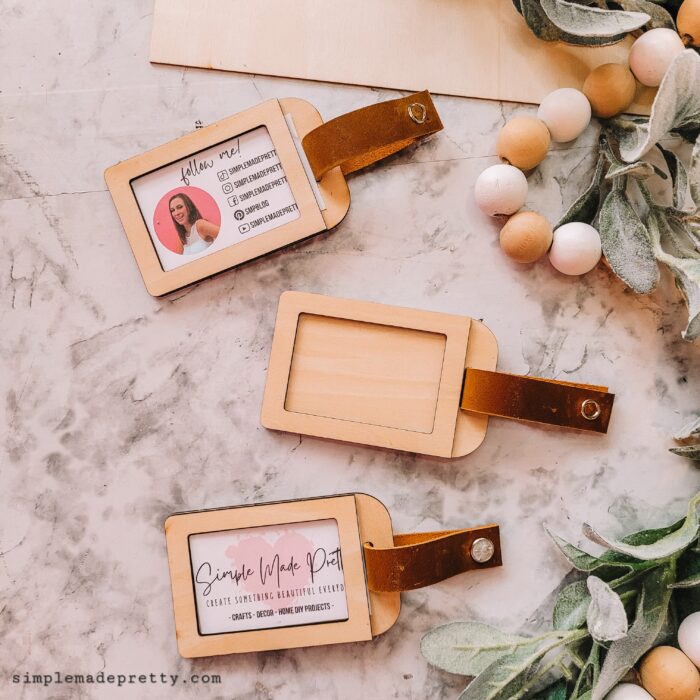
- Once the wood pieces are cut, use Aleene's Fast Grab Tacky Glue on the outer edges of the two pieces. You can skip this step if you only want one layer of luggage tag. I chose to do a double layer to place a business card inside but you can personalize a single tag with contact info as another idea.
- Let the glue dry then attach a ribbon or strap. I used a leather strap with metal snaps to achieve a high-end look. You can easily tie some pretty ribbon or use a plastic zip-tie.
Video
Supplies:
- xTool M1 Machine
- xTool M1 Machine Smoke Purifier
- xTool M1 Machine Air Assist
- Basswood sheets
- Leather Ribbon
- Metal Snaps
- Aleene’s Fast Grab Tacky Glue
Instructions:
- Upload the SVG file into xTool Creative Space.

- Size the image to fit on the basswood sheet. I sized each of my tags to be 2.5″ x 4.15″ but then sized it down further when placing it to fit the basswood.
- Next, you need to change the text inside the tag to “engrave” and not cut. I did this by moving the engraved layer out, then placing a rectangle image on the tag with the cut later and “Uniting” it together.

- Then you need to turn the machine on and place the triangular prisms on the metal plate and the basswood on top of the triangular prisms.
- Refresh your machine to see the camera image of the basswood inside the machine and adjust the size of your cut/engraved images. I always highlight the entire image and group to move. You can always use the Undo button if you mess anything up.
- Follow the instructions in Creative Space to start the laser-cutting and engraving process.
- Once the wood pieces are cut, use Aleene’s Fast Grab Tacky Glue on the outer edges of the two pieces. You can skip this step if you only want one layer of luggage tag. I chose to do a double layer to place a business card inside but you can personalize a single tag with contact info as another idea.
- Let the glue dry then attach a ribbon or strap. I used a leather strap with metal snaps to achieve a high-end look. You can easily tie some pretty ribbon or use a plastic zip-tie.


Cleaning the xTool M1 Machine After Use
The user manual says you should clean debris from the machine after each use to avoid fire hazards, so I’m just using alcohol-free, fragrance-free baby wipes. I use these on my cutting mats to keep them sticky. Then I dried the surface with a paper towel and it’s good as new.
Wrap Up About these DIY Laser Cut Wooden Luggage Tags
I hope you enjoyed this DIY Wooden luggage tag tutorial. The xTool M1 machine has many versatile uses and I love engraving wood with my machine. You can personalize these luggage tags by adding your contact info in your preferred font. You can also try this luggage Tag SVG file on leather and other fabrics using a Cricut machine or Glowforge machine.
>>>GET THE LASER-CUT LUGGAGE TAGS SVG FILE
Don’t forget…
You Might Also Like…
Cricut Craft Room Organization Ideas: Cheap And Space Saving
Psssssttt…Right now I’m offering FREE access to our Digital Resource Library to all of our newsletter subscribers. Your private access includes dozens of free printable crafts, home decor and organization guides. Hurry up and grab your freebies here! (Access instructions are sent after subscribing).
Disclaimer: This post may contain affiliate links or a sponsored post. All opinions are always 100% mine and I don’t partner with any product or company that I don’t use and love. Please see our Full Disclosure for more information.
 18 Free Circus SVG Files – Ring Leader Free Cricut Cut File