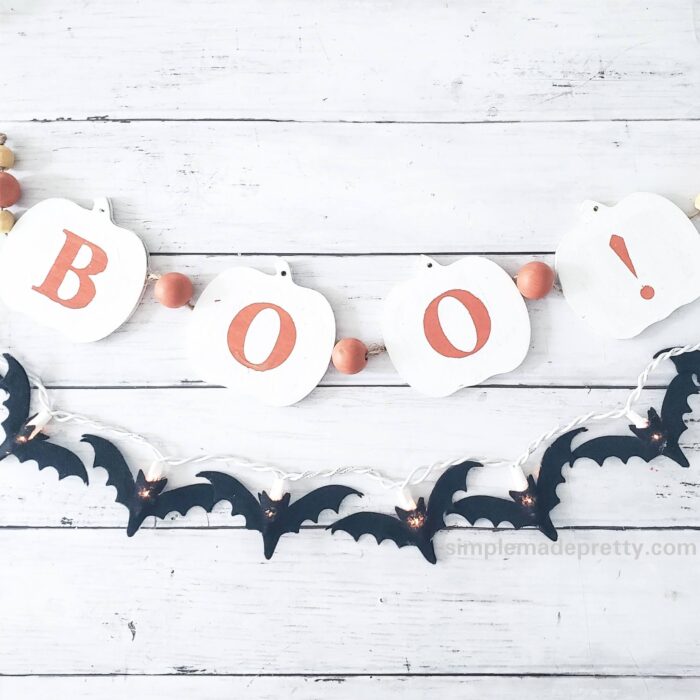
DIY Dollar Tree Halloween Lights
These DIY bat lights are a fun way to add Halloween decor to your home. Hang these Halloween bat lights on a mantle, in a window, around a wreath, on a shelf, bookcase, and more! I love decorating with Halloween bats so I made these cute lights using minimal craft supplies. Keep reading and watch the video to learn how to make these Dollar Tree Cricut DIY Halloween String Lights!
This shop has been compensated by Surebonder. All opinions are mine alone.
If you’re curious (or in a hurry)…
It’s an excellent brand glue gun and yet, you’ll also find that it is one of the cheapest options you’ll find online.
DIY Halloween Indoor Lights
These lights should be used indoors and look great in any room to dress up your Halloween decorations.
I’m using one of my favorite glue guns from Surebonder in this tutorial which is a mini high-temp glue gun with a detailed tip. You can also try the mini cordless glue gun with a detailed tip. The ideal glue gun for this DIY should use a detailed tip so you can control the spread of the hot glue on the small bat wings.
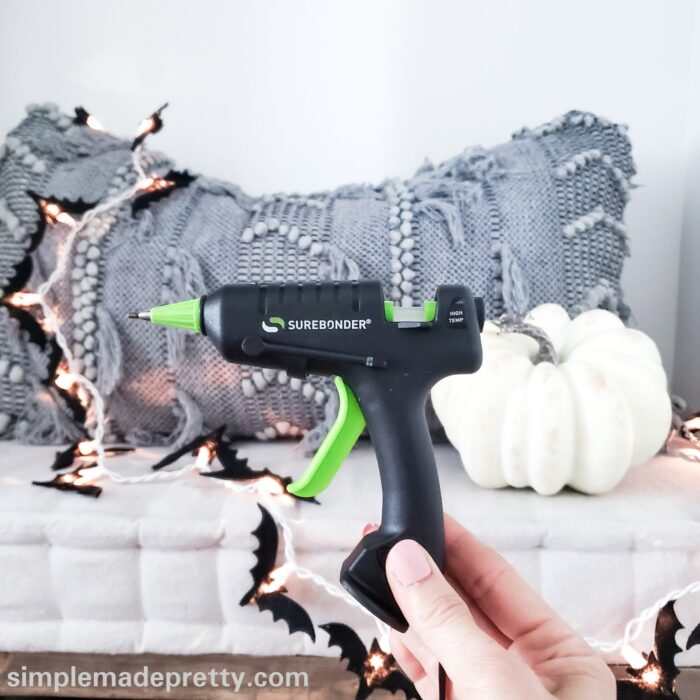
I’m using a clear glue stick from Surebonder with the high-temperature mini glue gun. You don’t want globs of glue showing on these small felt bats and that’s exactly what the Surebonder clear glue and the detailed tip glue gun does for this project. Surebonder also has a fabric glue state that you can use, but the clear sticks work fine.
I used one black felt roll from Dollar Tree and my Cricut Maker machine to cut the bat shapes. If you don’t have a cutting machine, you can download the FREE template below to cut the bats by hand. I’m also including my Make-it-Now link to the design in Cricut Design Space so you can click to cut the bats if you have a Cricut machine.
What is Cricut Access?
You may have seen or heard about Cricut Access from Cricut or another blogger. Cricut Access is a membership that gives you 10% off your Cricut purchases (and various other offers and discounts) and access to thousands of images and fonts in Cricut Design Space.

I have a Cricut Access Membership, which provides me with thousands of free images to come up with some Cricut craft ideas. Be sure to check Cricut Design Space for some free Cricut projects! Some of the free Cricut DIY projects in Cricut Design Space can be used to sell (which makes the membership fee worth it in my opinion!).
–>>Check out this HUGE list with 30 Cricut Supplies From The Dollar Tree!
Making personalized gifts, cards, home decor, farmhouse signs, and more is easy with a Cricut Explore Machine.

Learning how to use your Cricut is really easy and fun once you get the hang of it. If you don’t have a Cricut Access Membership, I highly recommend it. I’ve had a Cricut Access Membership for years and it’s definitely worth the cost for all the benefits!
–>>Check out this HUGE list with 32 EASY Cricut Projects For Beginners!
My favorite online resource to find SVG files to make Cricut craft projects is DesignBundles.net!

–>>Click here to see the latest bundle with the best SVG files online!
Be sure to subscribe to get my emails and updates with more free SVG files to use with your Cricut machine!
Want to see my latest DIY videos in Real-Time? Follow me on Instagram and YouTube!
–>>You can follow me on Instagram here
Halloween Lighting Ideas
I’m including a detailed video below sharing how to make DIY Halloween String Lights.
Let’s get started so you can see how easy and affordable it is to make these fun Halloween String Lights!

DIY Tutorial to Make These Halloween Light Decorations
Learn how to make these fun Halloween string lights and be sure to watch the video for more details!
Supplies:
- High Temp Mini Glue Gun with the Detailed Tip
- Clear Mini Glue Sticks
- Black Felt
- Clear Mini String Lights
- Free Bat Template or Cricut Design Link (get them below)
- Scissors (if cutting by hand)
- Finger Protectors (to prevent glue gun burns on fingertips)

Directions:
- Gather Supplies.
- I used my Cricut Maker machine to cut the bats. Get access to my Make it Now link here.

- I cut 20 Bats to use on a 7-ft white string light strand (I found my in stores during Christmas).
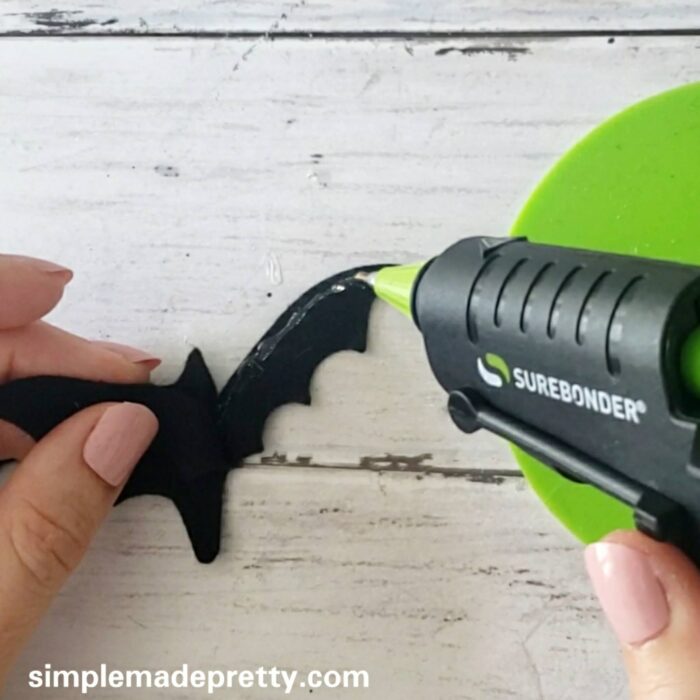
- Place 2 bats together. Open one wing side and add glue. Take your time since this is a very small area to apply the glue. Press the wings together to glue them.
- Open the tails and hot glue them together, leaving enough space for the light to be inserted to the tip of the tail.
- Open the other wing and hot glue that together. Do not hot glue the head.
- Create the opening in the bat head to insert the light bulb.
- Use a small dab of hot glue on the plastic part of the light bulb and press the head of the bat into it (this will help keep the bat attached to the lights).
- Hang and enjoy!


One string of these Halloween lights ended up costing $3.00 each to make so they are really affordable to DIY 🙂

Halloween Lights Craft Tutorial Wrap-Up
I hope you enjoyed learning how to make these spooky string lights for Halloween. I’d love to make similar string lights for other holidays using the same method and supplies (hearts for Valentine’s Day, Shamrocks for St. Patrick’s Day, or Leaves for Fall!). The ideas for DIY string lights using felt and a Surebonder Hot Glue Gun are endless! Don’t forget to watch the video below to see how I made these spooky lights 🙂
If you’d like to see more DIY ideas, be sure to follow me on Instagram and subscribe to my YouTube channel.
–>>You can follow me on Instagram here
Did you make this DIY or a similar one? I would love to see it! Send me a picture on Facebook, Instagram, or email and I’ll share with my followers 🙂
Print the Tutorial and Watch the Video to Make the DIY Halloween Lights

DIY Halloween Bat String Lights
Supplies
- High Temp Mini Glue Gun with the Detailed Tip
- Clear Mini Glue Sticks
- Black Felt
- Clear Mini String Lights
- Free Bat Template or Cricut Design Link (get them in the post)
- Scissors (if cutting by hand)
- Finger Protectors (to prevent glue gun burns on fingertips)
Instructions
- Gather Supplies.
- I used my Cricut Maker machine to cut the bats. Get access to my Make it Now link within the post.
- I cut 20 Bats to use on a 7-ft white string light strand (I found my in stores during Christmas).
- Place 2 bats together. Open one wing side and add glue. Take your time since this is a very small area to apply the glue. Press the wings together to glue them.
- Open the tails and hot glue them together, leaving enough space for the light to be inserted to the tip of the tail.
- Open the other wing and hot glue that together. Do not hot glue the head.
- Create the opening in the bat head to insert the light bulb.
- Use a small dab of hot glue on the plastic part of the light bulb and press the head of the bat into it (this will help keep the bat attached to the lights).
- Hang and enjoy!
Video
Grab the Free Printable Bat Template!
GET THE FREE PRINTABLE BAT TEMPLATE TO CUT BY HAND
Don’t forget!
✅ This is the glue gun I prefer and I use it for the Felt Bats to DIY these Halloween string lights.
A Note About Using High-Temperature Glue Guns
High-temperature glue guns should be used with caution and children should not use high-temperature glue guns.
I highly recommend wearing finger protectors when using glue guns to protect your fingers from burns. Do not use your hands to hold glued items together or you could sustain burns on your hands as well.
A detailed tip on a glue gun makes application easier and in my opinion, might reduce the chance for burns.
Pin this post with Halloween Bats for later…

New to Cricut?
Here are some Cricut Basics!
–>>If you want a Circut Machine but aren’t sure which machine is for you, be sure to read this post, How to Choose Which Cricut Machine is Right for you.
–>>Want more tips on finding inexpensive Cricut supplies? Read this post, How to Save Money on Cricut Craft Supplies.
What Cricut Accessories Do I Need?
Cricut Essentials make putting the pieces together a joy. From tweezers that handle delicate parts to Cricut EasyPress for foolproof iron-on, every Essential makes a great project even greater, every step of the way.
These are the Cricut Tools & Accessories I recommend for the serious crafter:
Cricut Easy Press

I highly recommend purchasing the Cricut Easy Press if you plan to do any iron-on or heat transfer projects. The Cricut Easy Press will make your Cricut DIY’s so much easier!
The Cricut Easy Press comes in 3 different sizes, however, I own the 9 x 9 and it’s the perfect size for most projects.
–>>Get the Cricut Easy Press here!
Cricut Easy Press Mat
If you purchase the Cricut Easy Press, don’t forget to get the coordinating Easy Press Mat, which will protect your surfaces and projects from burning. Alternatively, you can use a folded towel, however, the mat is sleek and easier to store in the craft room 😉
–>>Get the Cricut Easy Press Mat Here!
Cricut Bright Pad

The lightweight, low-profile Cricut BrightPad makes crafting easier while reducing eye strain. It illuminates fine lines for tracing, cut lines for weeding, and more.
–>>Get the Cricut Bright Pad Here!
Cricut Cutting Mats
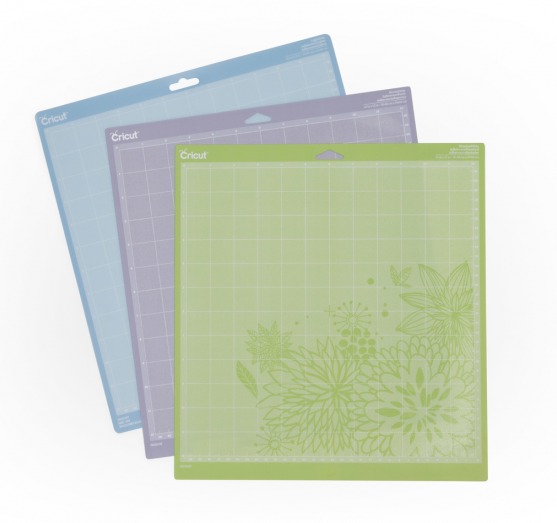
I suggest having a variety of cutting mats that are customized to match the weight of commonly used crafting materials. With three different mats specifically designed to work with different weights of materials, you can ensure success in all your projects.
–>>Get the Cricut Machine Mat Variety Pack Here!
Cricut Tool Set
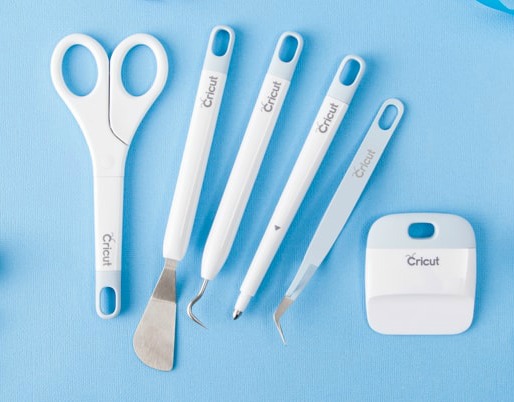
You will thank me later for telling you to just get the Cricut Tool Set instead of buying each tool individually! The tools included in the Cricut toolset are all helpful when using your Cricut machine.
–>>Get the Essential Tool Set Here!
My favorite non-Cricut brand materials
You can find other brand vinyl, iron-on, contact paper, and more outside of Cricut.com. A few of my favorites are:
- Oracal 651 Permanent Vinyl (find it here or at your local craft store)
- Siser HTV
- Dollar Tree clear contact paper (or shelf liner)
- Various fat-quarter fabrics at Walmart
- Felt sheets at local craft stores

Learning how to use your Cricut is really easy and fun once you get the hang of it. If you don’t have a Cricut Access Membership, I highly recommend it. I’ve had a Cricut Access Membership for years and it’s definitely worth the cost for all the benefits!
CRICUT ARTICLES YOU MIGHT ALSO LIKE…
How To Choose a Cricut Machine
I bought my first Cricut machine in 2013… it was called the Cricut mini and was one of the first Cricut machines that didn’t have a keyboard. It was a great machine but as soon as Cricut released the Cricut Explore machine in 2014, I quickly bought it. A year later Cricut released the Cricut Explore Air and I bought that too. Then in 2017, Cricut released the Cricut Maker Machine and of course I bought it too. So you can say I’m pretty experienced with Cricut machines and have in-depth knowledge about using Cricut and various Cricut projects.
–>>If you want a Circut Machine but aren’t sure which machine is for you, be sure to read this post, How to Choose Which Cricut Machine is Right for you.
32 Easy Cricut Projects for Beginners
I love learning about new Cricut projects and Cricut Explore Air 2 Projects, but some Cricut crafts seem more advanced than others. I put together this list with Easy Cricut Projects for Beginners to help others find Cricut tutorials for beginners and free Cricut projects. Most of the projects featured in this post can be made using a Cricut Explore Air and Cricut Explore Air 2, but some of these beginner projects require a Cricut Maker Machine (Cricut beginner projects using fabric).
–>>If you’ve had your Cricut machine for some time but are scared to use it, you should try these 32 Easy Cricut Projects for Beginners.
How To Save Money on Cricut Supplies
I love finding a good deal on Cricut vinyl craft supplies and I tend to stock up on Cricut craft supplies during sales (Cricut.com has the best Black Friday sale!) but Cricut supplies can be expensive! One question I’m frequently asked is where can I buy Cricut supplies? Well, not only will I share where you can buy Cricut supplies, but where to find discount Cricut supplies! My favorite store to find Cricut supplies cheap is the Dollar Store.
–>>Want more tips on finding inexpensive Cricut supplies? Read this post with, 30 Cricut Craft Supplies from the Dollar Tree.
15 Cricut Project Ideas Using Scraps
These 15 Cricut Project Ideas Using Scraps are easy Cricut projects that a Cricut beginner can make! If you have scrap Cricut craft materials and are looking for Cricut projects using Cricut Design Space and a Cricut Explore machine, this post is for you! This post is filled with Cricut project ideas inspiration and fun Cricut projects using vinyl, heat transfer (HTV), cardstock, and more!
Don’t throw away those small pieces of leftover vinyl, iron-on, or cardstock! Save your Cricut scraps to make these fun Cricut Projects Using Scrap materials! Keep reading to find 15 Easy Cricut project ideas to use up those extra bits of Cricut vinyl, Cricut iron-on, and Cricut cardstock.
–>>Read the full post, 15 Cricut Project Ideas Using Scraps here!
Psssssttt… Want more inspiration delivered directly to your inbox? Subscribe to our FREE weekly newsletter! We provide simple ideas for Organizing, Handmade Projects, Crafts, Home Decor, and more! Hurry up and sign up here!
Disclaimer: This post may contain affiliate links or a sponsored post. All opinions are always 100% mine and I don’t partner with any product or company that I don’t use and love. Please see our Full Disclosure for more information.
 Pool Patio Decor Ideas – Abba Patio Umbrella