DIY Glam Makeup Vanity
Repurposing a vintage desk into a glamorous DIY makeup vanity can be a fun and creative project that adds a touch of elegance to your space. To begin, choose a vintage desk that fits your style and space requirements. Look for one with drawers or compartments for storing makeup and accessories. Ensure the dresser is sturdy and made of quality wood that can be sanded down and refinished. Keep reading to see this Vintage Desk Remodel DIY Glam Makeup Vanity!
In case you’re in a hurry…
Primary Bedroom Links
We recently updated our primary bedroom with a makeover! You can find links to everything below! Follow me on the LTK app so you can shop my posts anytime.

- Zinus Platform Bed Frame
- Zinus Green Tea Cooling Mattress
- Beddy’s Bedding
- Zinus Gel Cooling Mattress Topper
- Olive Tree
- Baskets
- White Quilt
- Matchless Candles
- Vizio TV
- Makeup Vanity Mirror
- Cabinet Pulls
- Rug
- Makeup Vanity Chair
- Sconce Lighting
- Bamboo Blinds
- Curtain Rods
What’s New in the Primary Bedroom
I painted the walls Benjamin Moore Balboa Mist (I get Home Depot to color-match paint using the Glidden brand). It’s a light gray and beige color and is perfect in our bedroom since it’s a dark room. I don’t know WHY I painted our room dark green a few years ago! I guess I was trying a moody hue or boho theme and it just wasn’t me AT ALL! Well, live and learn. Now I know what I like and it’ll stay this color for a few years at least 😉
We replaced ALL of the furniture. I was tired of the rattan dressers (which we found on FB marketplace for a steal). Rattan is really hard to keep clean and our bedroom get dusty fast! We sold the dressers and used that money to buy matching dressers from a local thrift store. I updated the dressers using the same paint and hardware as this makeup vanity desk!

Curtain Rods | Bamboo Blinds | Platform Bed
I added curtains. We had curtains in our bedroom 5 years ago and then I wanted a cleaner, minimalist look. My hubby also has a fear of dust collecting on curtains so we went without them for a while. The new curtains are repurposed from our family room.
We replaced the rug. There wasn’t anything wrong with the previous rug I put it in my daughter’s bedroom. I just fell in love with the rug in my Craft Room Makeover so I got the same rug larger for our bedroom.
–>> See the FULL Primary Bedroom Makeover in this post
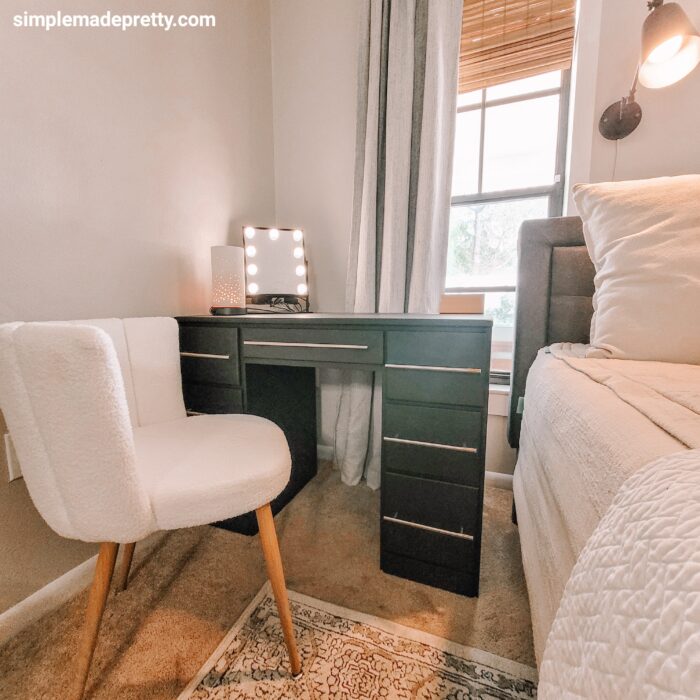
I added a makeup vanity. I had a vanity desk in our bedroom before but I could never get the furniture to quite fit the way I wanted. So I sat down and sketched a room layout with the furniture before I did anything else. Then I created a vision board in Canva with screenshots of the furniture and accessories I planned to use. I found this vanity of FB marketplace for $50. It’s solid wood and was in pretty good condition. It’s difficult to find anything made with solid wood these days and I didn’t want some particle board furniture in our bedroom.

DIY Modern Makeup Vanity
Refinishing a vintage wood dresser into a sophisticated and modern vanity can be a fun and rewarding DIY project that adds a touch of elegance to your space. To begin this transformation, start by selecting a vintage dresser that fits your desired dimensions and style.
- The first step in refinishing your dresser is to remove all hardware such as knobs and handles.
- Then, thoroughly clean the dresser with a mild detergent and water to remove any dirt and grime.
- Once the dresser is clean and dry, begin sanding down the existing finish to create a smooth surface for painting or staining. Use medium-grit sandpaper to remove the old finish, followed by fine-grit sandpaper to achieve a smooth finish.
- After sanding, decide whether you want to paint or stain the dresser. If you choose to paint, select a high-quality paint in a color that complements your space.
- Apply a primer before painting to ensure a smooth and even finish.
- For a stained look, choose a stain that enhances the natural beauty of the wood.
- Apply the stain with a brush or cloth in the direction of the wood grain and allow it to dry completely before applying a sealant.
- Once the paint or stain has dried, reattach the hardware and consider adding new knobs or handles to give your vanity a modern touch.
With a little time and effort, you can transform a vintage wood dresser into a sophisticated and modern piece that adds character to your space.
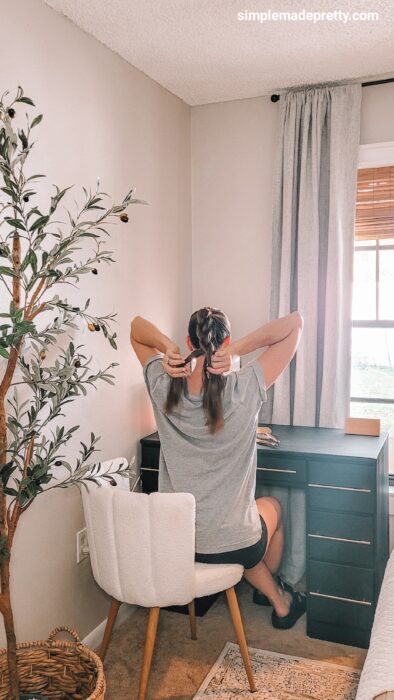
Mirror | Vanity Chair | Rug

Vanity Chair | Drawer Pulls | Olive Tree
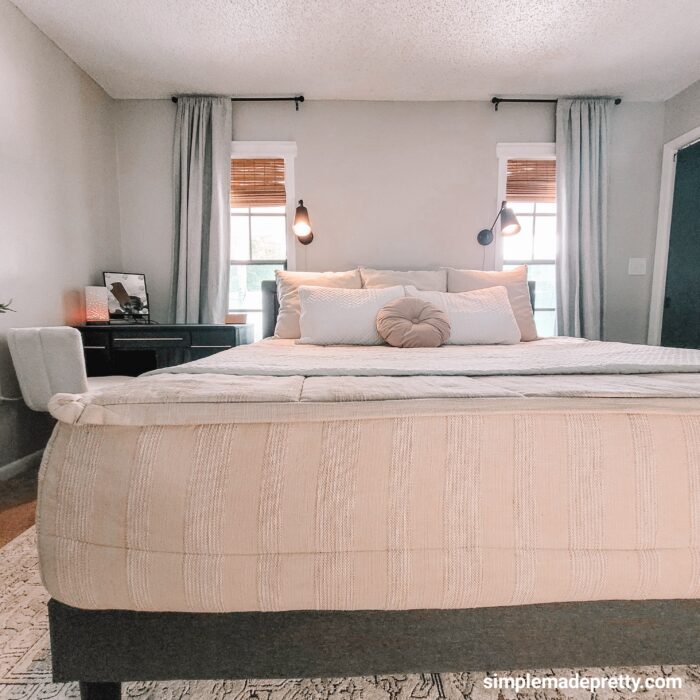
Bed Frame | Green Tea Cooling Mattress | Beddy’s Bedding
Organize Makeup in a Vanity Desk
Organize your makeup products in clear acrylic organizers or decorative trays on top of the desk. Hang a statement mirror above the vanity for a chic finishing touch. With a little creativity and effort, your vintage desk can be transformed into a stunning DIY glam makeup vanity that you’ll love using every day.
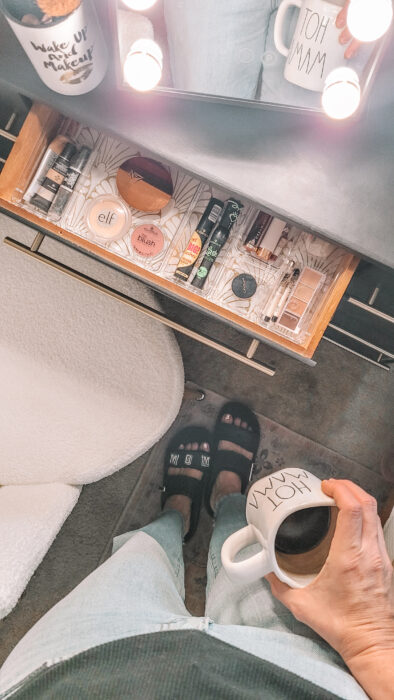
Clear Drawer Organizers | Peel and Stick Wallpaper | Crocs Slippers
Add a Makeup Vanity Mirror to Your Vanity Desk
I found my makeup vanity mirror on Amazon. I wanted a black mirror to match the black vanity desk. There are several vanity mirrors available on Amazon and in your local home goods stores (TJMaxx, etc). I’m happy with this mirror because it has a stand to sit on the desktop, has classic vanity light bulbs, and has several lighting settings to choose from. I hide my power cords behind this mirror as well!

Wrap Up About a DIY Makeup Vanity Desk
Creating a DIY makeup vanity desk can be a fun and rewarding project that allows you to customize a space that fits your style and needs. Ensure that your makeup vanity desk is organized and clutter-free by utilizing storage solutions such as drawers, dividers, and trays to keep your beauty products neatly arranged. Consider adding a mirror and proper lighting to create a well-lit and practical makeup station. Finally, personalize your vanity desk with decorative touches such as a stylish chair, a vase of fresh flowers, or framed inspirational quotes to make it truly your own. Remember, a DIY makeup vanity desk is not just a piece of furniture; it’s a reflection of your creativity and individuality. Enjoy using your personalized space to pamper yourself and unleash your inner beauty each day.
Don’t forget…
Walls: BM Balboa Mist | Trim: Glidden off the shelf White | Doors: BM Gray
ARTICLES YOU MIGHT ALSO LIKE…
Psssssttt…Right now I’m offering FREE access to our Digital Resource Library to all of our newsletter subscribers. Your private access includes dozens of free printable crafts, home decor and organization guides. Hurry up and grab your freebies here! (Access instructions are sent after subscribing).
Disclaimer: This post may contain affiliate links or a sponsored post. All opinions are always 100% mine and I don’t partner with any product or company that I don’t use and love. Please see our Full Disclosure for more information.
 Affordable Primary Bedroom Makeover into a Tranquil Retreat