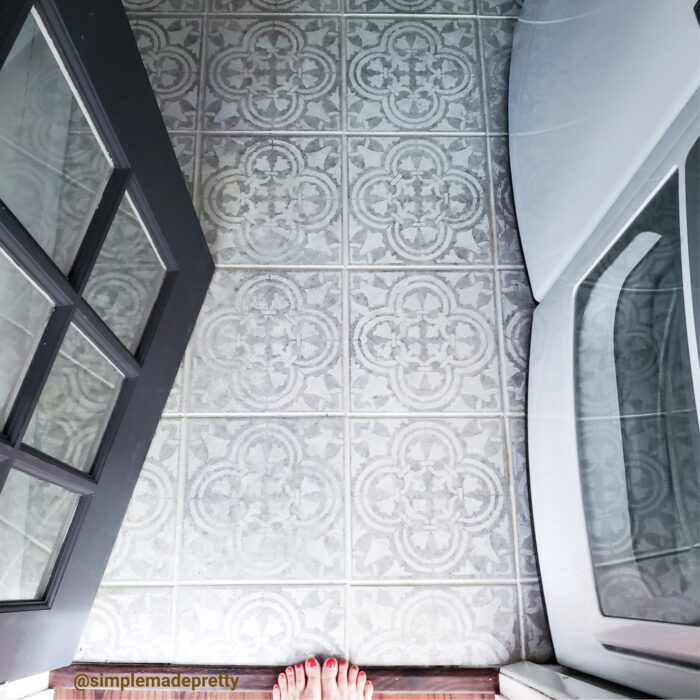
Painting Floor Tiles Before and After
If you love the idea of adding a design or updating your tile or linoleum floors but the idea of re-tiling or replacing linoleum doesn’t appeal to you, then stenciling your floor is probably your best solution. In this tutorial, I share how to stencil tile floors, how do you keep paint from bleeding under stencils, and how to stencil the popular Spanish tile pattern on floors. Keep reading to learn How To Stencil Tile Floors and watch the time-lapse video showing you how I stenciled our Master Bathroom floor.

This shop has been compensated by Cutting Edge Stencils. All opinions are mine alone.
If you’re looking for budget-friendly stencils, keep reading!
What Kind of Paint Do You Use for Stenciling?
It depends on what you want to stencil. Use the type of paint that is appropriate for the surface you are stenciling. The brand of paint that I used for our jewel tile stencil floors was Rustoleum Chalked Paint in Linen and Gray.
Can You Stencil on Floor Tiles?
Yes! It’s so easy to stencil on floor tiles and I show you how in this post. The key to painting floor tile is to seal it properly with water-based polyurethane!
Easy Floor Stencils For Painting
I found the best stencils at Cutting Edge Stencils (I’ve used several of their stencils with amazing results!)
Cutting Edge Stencils
My favorite wall stencils are from Cutting Edge Stencils. I’ve used other stencils from Cutting Edge Stencils for various other projects, including stenciling tile floors 🙂
Can You Paint Over Ceramic Tile?
Yes, the tile in our bathroom floor is ceramic 🙂
How To Stencil Tile
In this tutorial, I share step-by-step instructions to use Cutting Edge Stencils to stencil a tile floor. If you have never stenciled before, I suggest practicing on a small area and deciding what paint colors you’d like to use.
You need to pick a paint color for the background and one for the stencil image. If you need help choosing paint colors, please refer to this detailed post.
Let’s get started with the supplies needed to stencil a tile or linoleum floor…
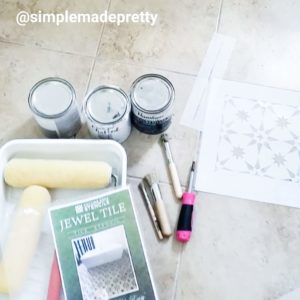
Supplies:
- Stencil (I used this Spanish Tile Stencil in size Large for our master bathroom floor)
- Painter’s Tape
- Stencil brushes
- Paint Brush (for distressing, touching up, etc)
- Paint Roller & Tray
- Paint (I used Linen Chalked Paint for the background & Gray Chalked Paint for the stencil design)
- Polyurethane Water-Based Crystal Clear Gloss
- Rags
Directions:
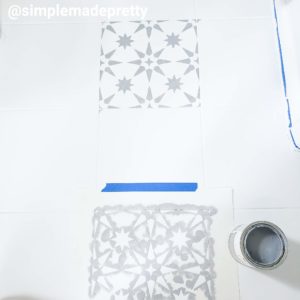
- Gather Supplies. Please watch the video below for more instructions and pictures! My stencil came with a grout line, however, I chose not to use the grout line on our floor. The grout line does make the tile look even more amazing if you choose to use it on your floors 🙂

- Thoroughly clean the floors (vacuum, mop, etc.) and remove all items from the floor.
- Use painter’s tape to protect any surrounding walls, doors, fixtures, etc.
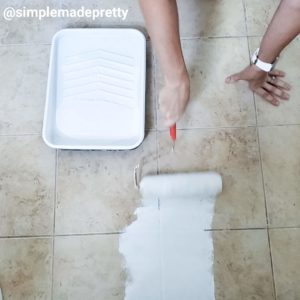
- Use the paint roller and base paint color to cover the entire floor with paint. Apply a 2nd and 3rd coat if necessary with at least 20 minutes of dry time between coats (I used a fan to help speed the dry time).
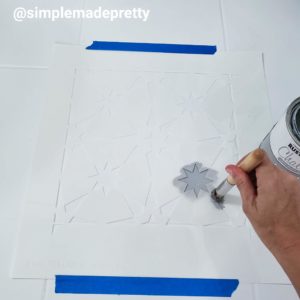
- Use painter’s tape to secure all 2-4 sides of the stencil to the tile. Cutting Edge Stencils has a handy video showing how to DIY a stenciled floor too!
- Use a stencil brush to apply your choice of chalked paint color to the stencil.
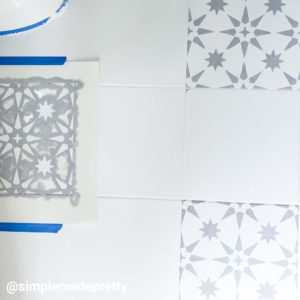
- Once all the spaces are painted inside your stencil, remove the stencil, and align it on another tile on the floor. I did not paint the tiles directly around this first tile so I could let the paint dry since some of the stencil overlaps and you don’t want it touching the wet paint.
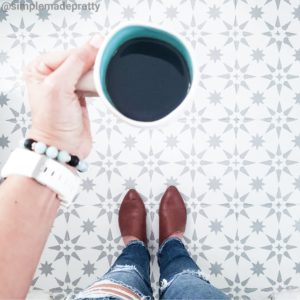
- Repeat this process until the floor is complete.
- The corners and around the toilet were the tricky parts. This is where ordering the 2nd stencil comes in handy because you can cut the stencil to fit the corners. I didn’t have a 2nd stencil so I bent my stencil and manipulated it to fit. I did have to go back and touch up some areas though.
- I also had to touch up other areas with bleeding or spots. These mistakes were mostly because I rushed to complete my floor and I wanted it to look perfect. If you take your time and let each section dry, you will not have as many mistakes as me, lol.
- Let the stencil paint dry for an hour or 2 before applying the poly.
- Use a foam roller to apply at least 3 coats of polyurethane water-based clear coat to your floor. Let each coat dry for 30-60 minutes.
- We let the entire floor dry without walking on it for a full 24 hours. After that, you can easily wipe up the floor to clean it!
I plan to use the Augusta Cutting Edge Stencil on our laundry room floors in size Large for our 12 x 12 tiles.
How To Stencil Tile Floors
Supplies
- Stencil (I used this Spanish Tile stencil for our master bathroom floor)
- Painter's Tape
- Stencil brushes
- Paint Brush (for touching up, getting corners)
- Paint Roller & Tray
- Paint (I used Linen Chalked Paint for the background & Gray Chalked Paint for the stencil design)
- Polyurethane Water-Based Crystal Clear Gloss
Rags
Instructions
- Gather Supplies. Please watch the video below with more instructions and pictures! My stencil came with a grout line, however I choose not to use the grout line on our floor. The grout line does make the tile look even more amazing if you choose to use it on your floors 🙂
- Thoroughly clean the floors (vacuum, mop, etc) and remove all items from the floor.
- Use painters tape to protect any surrounding walls, doors, fixtures, etc.
- Use the paint roller and base paint color to cover the entire floor with paint. Apply a 2nd and 3rd coat if necessary with at least 20 minutes of dry time between coats (I used a fan to help speed the dry time).
- Use painter's tape to secure all 2-4 sides of the stencil to the tile. Cutting Edge Stencils has a handy video showing how to DIY a stenciled floor too!
- Use a stencil brush to apply your choice of chalked paint color in the stencil.
- Once all the spaces are painted inside your stencil, remove the stencil and align on another tile on the floor. I did not paint the tiles directly around this first tile so I could let the paint dry since some of the stencil overlaps and you don't want it touching the wet paint.
- Repeat this process until the floor is complete.
- The corners and around the toilet were the tricky parts. This is where ordering the 2nd stencil comes in handy because you can cut the stencil to fit the corners. I didn't have a 2nd stencil so I bent my stencil and manipulated it to fit. I did have to go back and touch up some areas though.
- I also had to touch up other areas with bleeding or spots. These mistakes were mostly because I rushed to complete my floor and I wanted it to look perfect. If you take your time and let each section dry, you will not have as many mistakes as me, lol.
- Let the stencil paint dry for an hour or 2 before applying the poly.
- Use a foam roller to apply at least 3 coats of polyurethane water-based clear coat to your floor. Let each coat dry for 30-60 minutes.
- We let the entire floor dry without walking on it for a full 24 hours. After that, you can easily wipe up the floor to clean!
Watch the Quick How-To Video to Stencil Tile Floors (this video has Music Only):
I hope you enjoyed this tutorial on how to stencil floors in your home!
Finding the best floor Stencil can be frustrating because there are so many options available. The Stencils at craft stores can be over-priced and you are limited with options. You’ll find the best quality stencils and stencil brushes at Cutting Edge Stencils.
Did you follow this tutorial to stencil your floors or a similar version? I would love to see it! Send me a picture on Facebook, Instagram, or email and I’ll share with my followers 🙂
FACEBOOK: https://www.facebook.com/simplemadeprettyblog/
INSTAGRAM: https://www.instagram.com/simplemadepretty/
PINTEREST: https://www.pinterest.com/SMPblog/
More Home Improvement Articles You Might Also Like…
How to pick the right paint colors
Have you ever had trouble picking the right paint colors for your home? Choosing the right paint colors for your home can be overwhelming. There are so many different “whites” and “grays” these days, how can anyone know they are making the right paint color choice?
That’s why I put together the best tips on How to Choose Interior Paint Colors in this post.
Every home is different… the entryway in our first home was much different than the entryway in our second home, and both of those were very different from the entryway in our third home! So I chose a different paint color for each entryway in all three of our homes. Not to mention, from the time that we bought our first home, to the time that we bought our third home, home paint color trends changed drastically. The colors that I used back then are no longer a trendy color and well, I just didn’t like the brown-ish tan that was in our first home, haha.
So if you need help choosing paint colors for the rest of your home, head on over to this post to see my paint-picking tips and what has worked for me in all three of our homes 🙂 My post with how to choose paint colors for your home is one of my most popular posts and readers have benefited from reading it before heading to the store to buy paint that ends up not working out.
I also have some ideas for choosing paint color combinations for bedrooms (with themes!)
Paint Versus Peel & Stick Wallpaper
Peel and stick wallpaper has become very popular recently since not everyone has access to tools to build their own Shiplap walls (thanks Chip and Joanna) or wants to tile an entire wall with subway tile. I love tiling but if I could slap up some wallpaper and call it a day, that would make me, the hubby, and my wallet happy!
You can find peel and stick wallpaper online at Target, Amazon, Home Depot, and more! I’ve linked my favorite peel and stick wallpaper and the ones I’ve used personally below.
How To Paint Kitchen Cabinets Without Sanding
If you love white farmhouse kitchens and want to paint your kitchen white, then you will love this post teaching you How To Paint Kitchen Cabinets White Without Sanding! I’ll show you how to paint old kitchen cabinets and answer how much does it cost to paint kitchen cabinets (it’s much cheaper than you think!). I also have lots of pictures of painting kitchen cabinets before and after!
You don’t have to worry about how to paint kitchen cabinets without brush strokes because I have a secret in this post that reveals a step-by-step DIY tutorial with how to paint kitchen cabinets like a pro.
–>> Learn how to Paint Kitchen Cabinets without Sanding here!
Cheap Home Hacks that’ll Increase Value
Renovating a home can come with a high price tag if you’re not budgeting and deciding which updates bring the best return on investment. After selling our updated first home in just 4 years, we bought an even bigger house that needed a lot of updating. We sold our second home after 4 years while doing the much-needed work to produce a profit by following the same strategies we did in our first home.
If you enjoy updating your home, want to increase your home value or just want your home to look better, you should check out thee 10 Cheap Home Hacks That’ll Make Your House Look So Much Better.
Tour Our Homes
Get inspired by nature to create your own amazing bedroom color combos! For more tips on how to choose interior home paint colors for your home, check out this post!
Psssssttt…Right now I’m offering FREE access to our Digital Resource Library to all of our newsletter subscribers. Your private access includes dozens of free printable crafts, home decor and organization guides. Hurry up and grab your freebies here! (Access instructions are sent after subscribing).
Disclaimer: This post may contain affiliate links or a sponsored post. All opinions are always 100% mine and I don’t partner with any product or company that I don’t use and love. Please see our Full Disclosure for more information.

 How to Build a Faux Fireplace