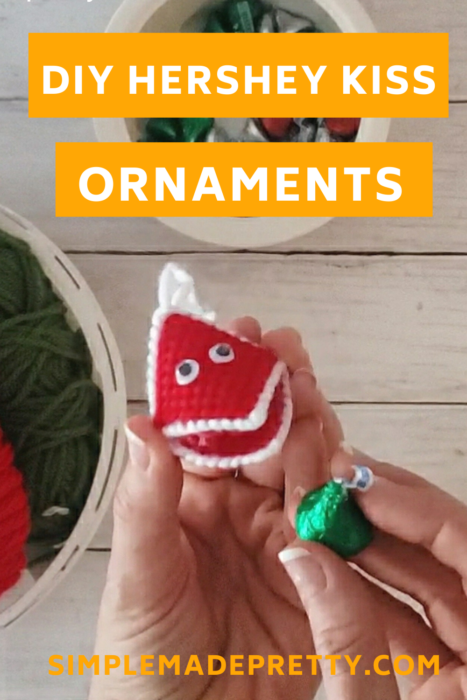
Free Plastic Canvas Christmas Kisses Patterns
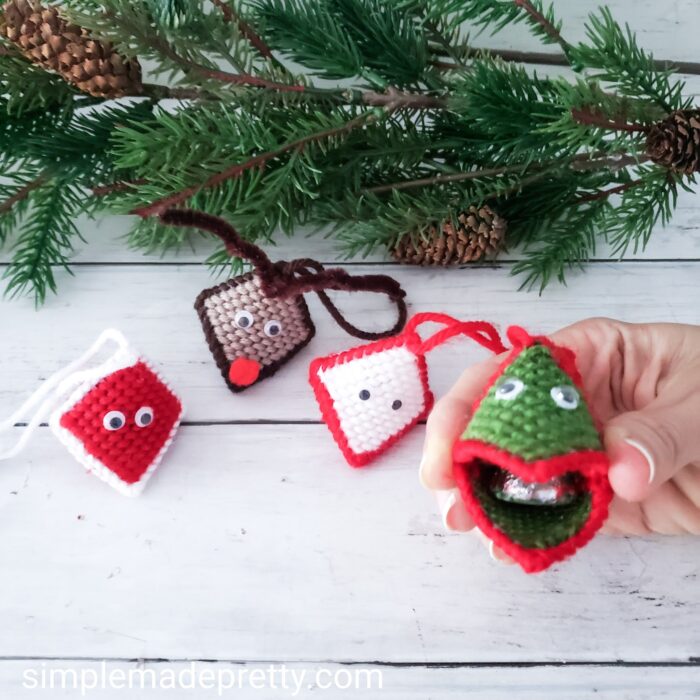
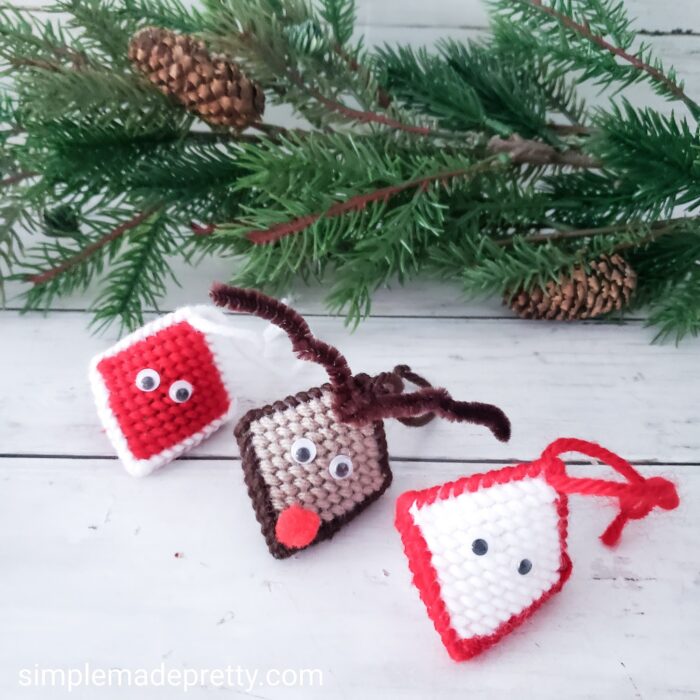
This plastic canvas kiss holder pattern is such an easy Christmas craft that kids can make them too! I learned how to make these free plastic canvas kiss patterns when I was a kid and I decided to teach my kids how to make these Hershey Kiss holder ornaments. This squeeze my cheeks pattern can be simple colors or you can add a pattern to create a reindeer kiss holder or squeeze my cheeks Santa. Keep reading and watch the video to learn how to make these DIY Hershey Kiss Ornaments!
If you’re curious (or in a hurry)…
It’s an excellent size for this project and yet, you’ll also find that it is one of the cheapest options you’ll find online.
Want to see my latest DIY videos in Real-Time? Follow me on Instagram and YouTube!
–>>You can follow me on Instagram here
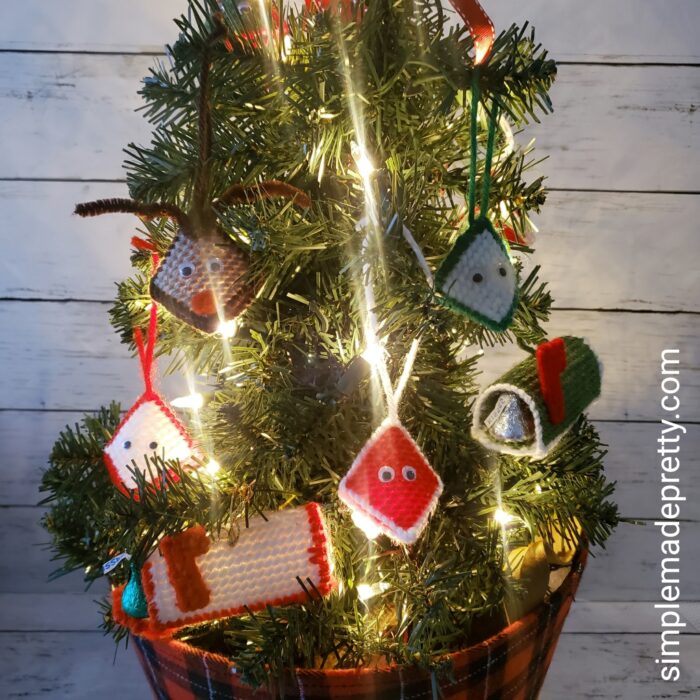
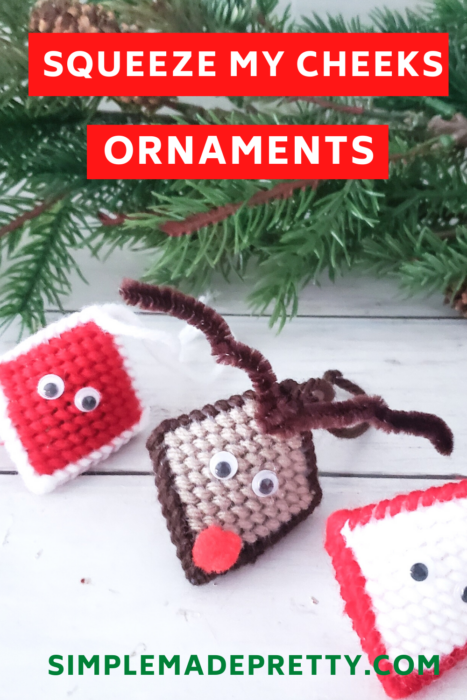
Squeeze my Cheeks Vintage Plastic Canvas Ornaments
I learned how to make these plastic canvas ornaments in the 1990’s when my grandmother taught my brothers and I how to make these kiss ornaments. We loved making these Kiss Ornaments so much that we made a giant Hershey Kiss Squeeze my cheeks ornament (for a giant Hershey Kiss) and other plastic canvas Christmas ornaments. I have the pattern for the mailbox and made a church, a barn, and more!
Nostalgic Christmas Ornaments
We would hang these Kiss My Cheeks Ornaments on our Christmas tree and on Christmas Eve, Santa would leave Hershey Kisses inside each one! It was a fun tradition that we follow now that I have children of my own 🙂
Once you learn how to use yarn to sew the plastic canvas, you can make other plastic canvas crafts like coasters, tissue boxes, and more!
How To Make Hershey Kiss Ornaments
These plastic canvas ornaments are cute gifts to give teachers, neighbors, and friends. It’s an easy craft that kids can do with a large yarn needle and a large square plastic canvas.
Supplies:
- Plastic Canvas
- Yarn in various colors
- Yarn Needle
- Scissors
- Glue
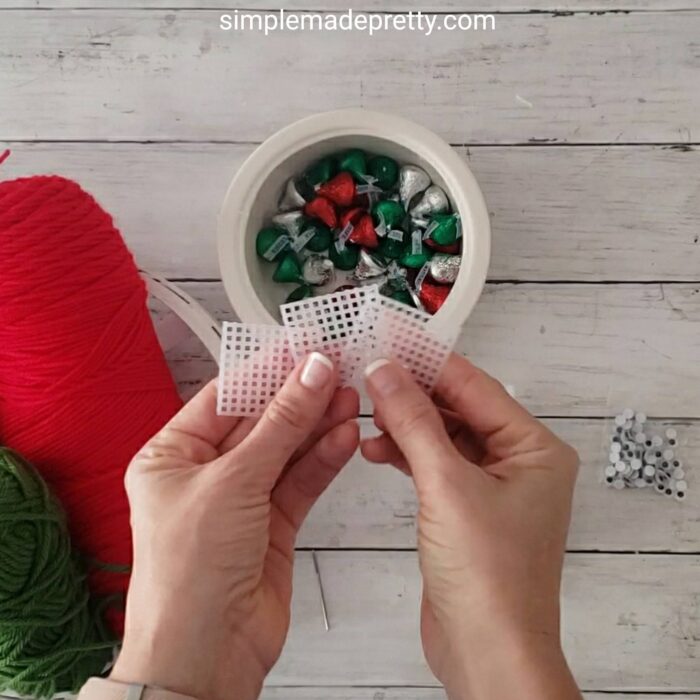
- Wiggly Eyes
Directions:
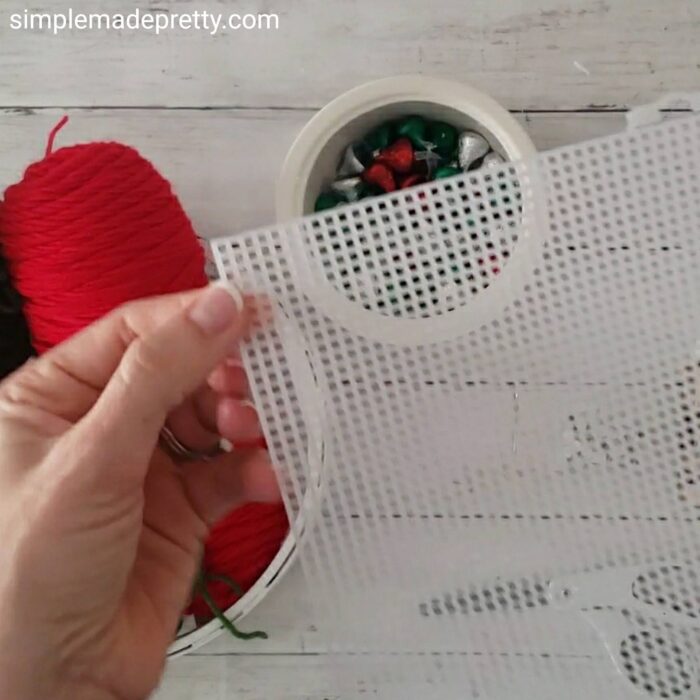
- Gather Supplies. I highly recommend using these Plastic Canvas Sheets.

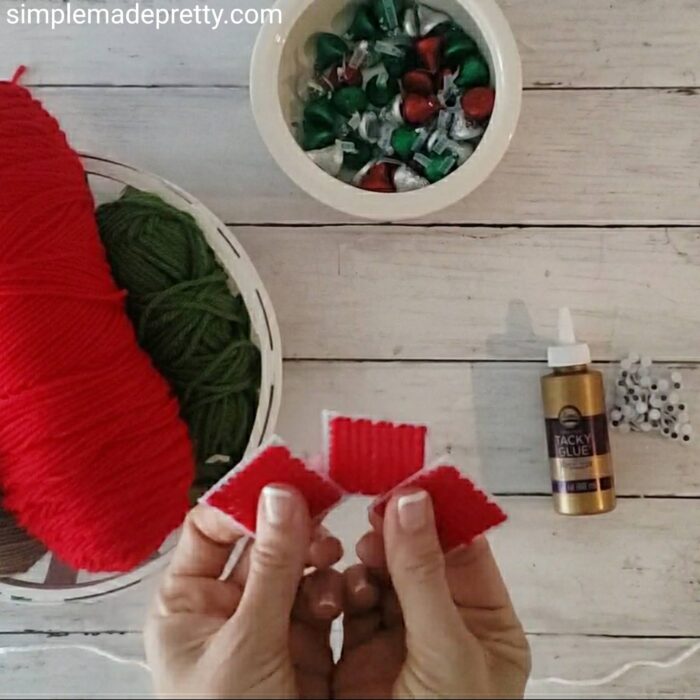
- Cut 3 squares. Count 10 squares on each side to get the correct size.
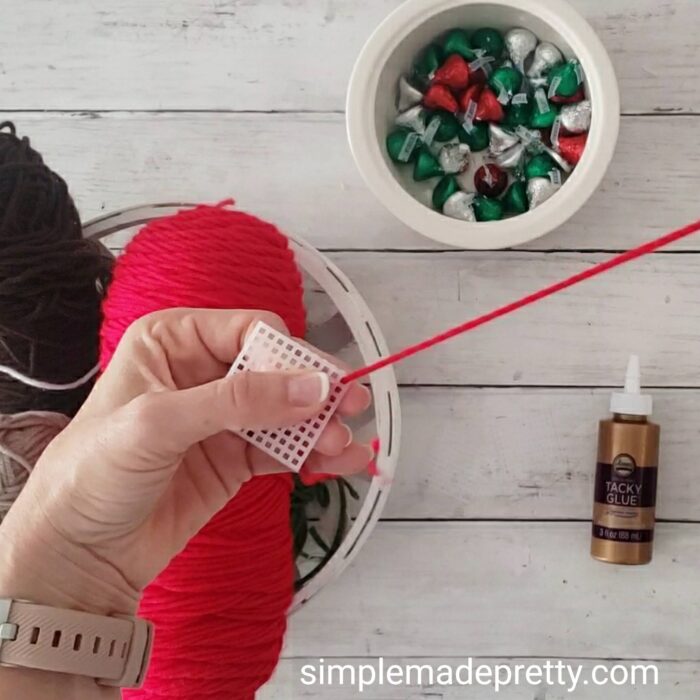
- Thread the yarn onto your needle by smooshing the tip of the yarn with your thumb and index finger into the needle.
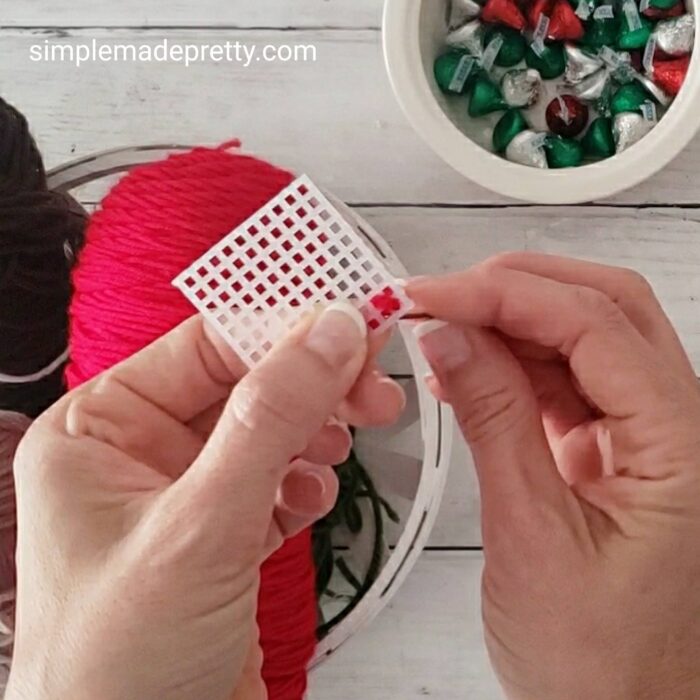
- Start to weave in the upper right corner of one of the squares. Hold the “tail” in the back so you can weave around it to secure it in place.
- Stitch across to the left lower square.
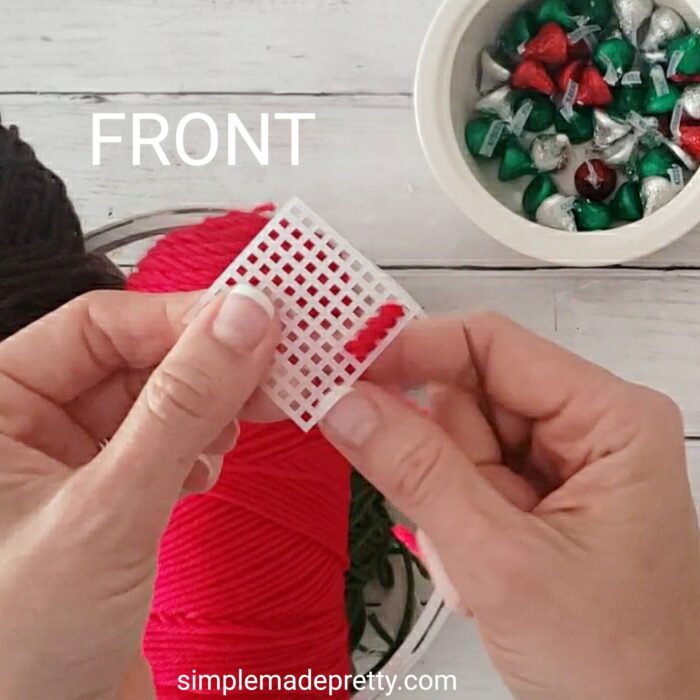
- Continue to stitch down the row.
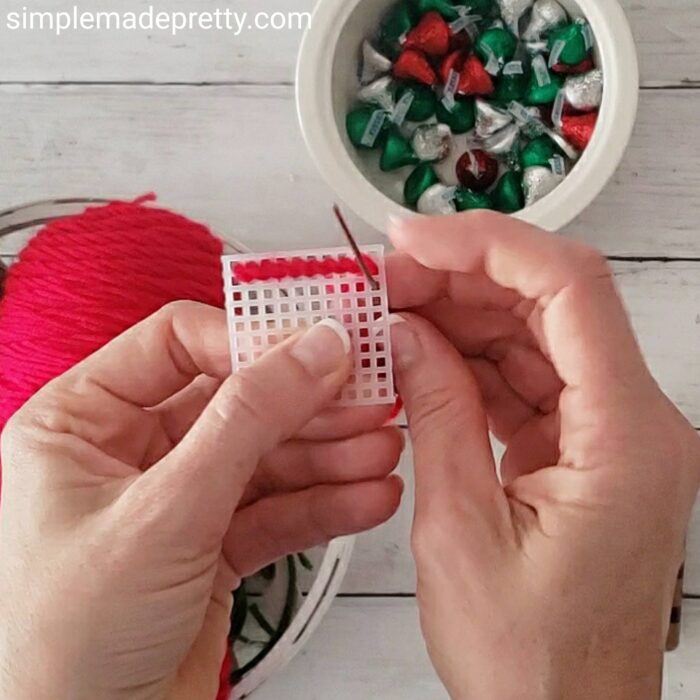
- Notice the back and how I stitched over the tail.
- When you reach the end of the row, continue to the next row as seen in the below picture.
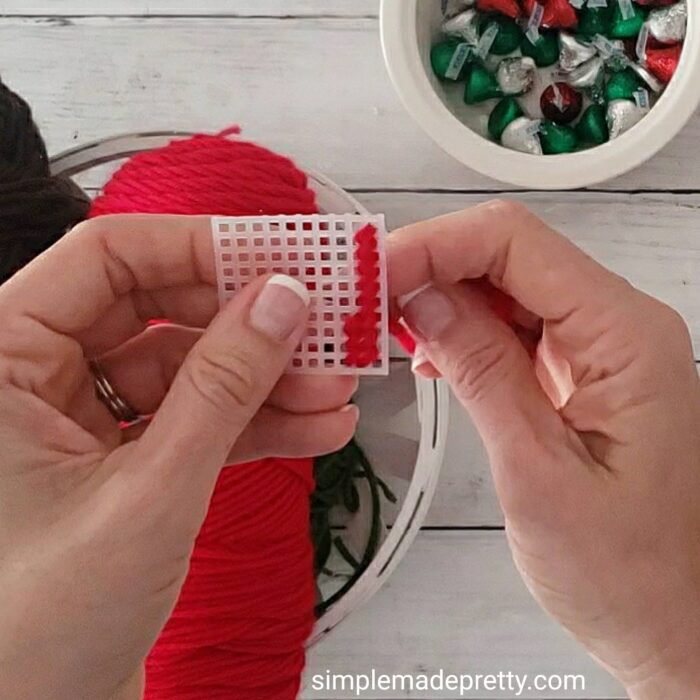
- Continue to stitch across using the same square as the previous row.
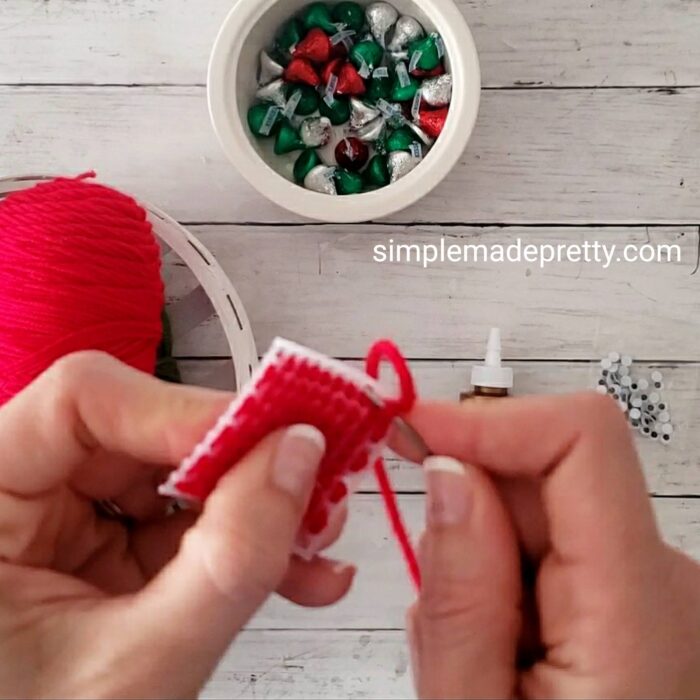
- Once you finish the entire square, finish with a triple stitch in the last holes and stitch through the back to tie and cut off the yarn.
- Complete these steps until you have 3 squares.
- Make the “lips” for the ornament by weaving the outline of 2 corners on 2 squares.
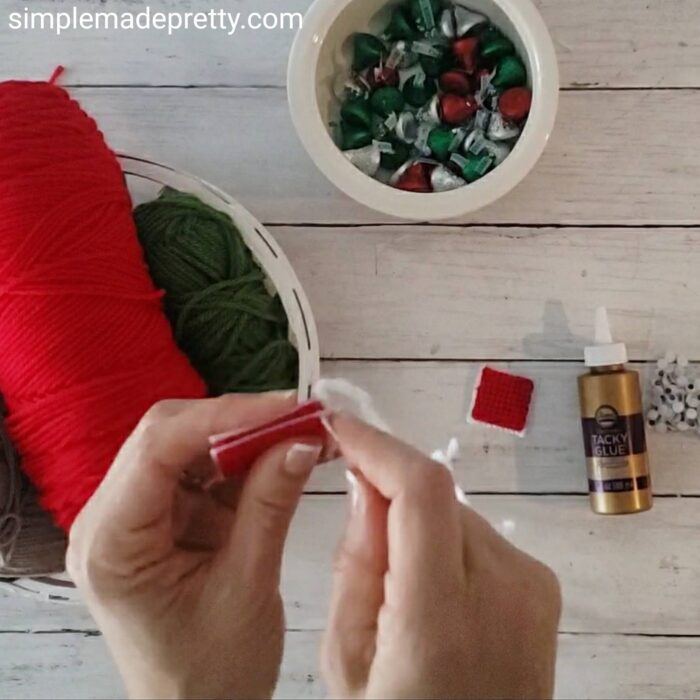
- Put one of the lip squares on the non-lip square, wrong sides together and stitch the other side (leaving the lip side open).
- Do the same with the last square until you have the 3-D ornament.
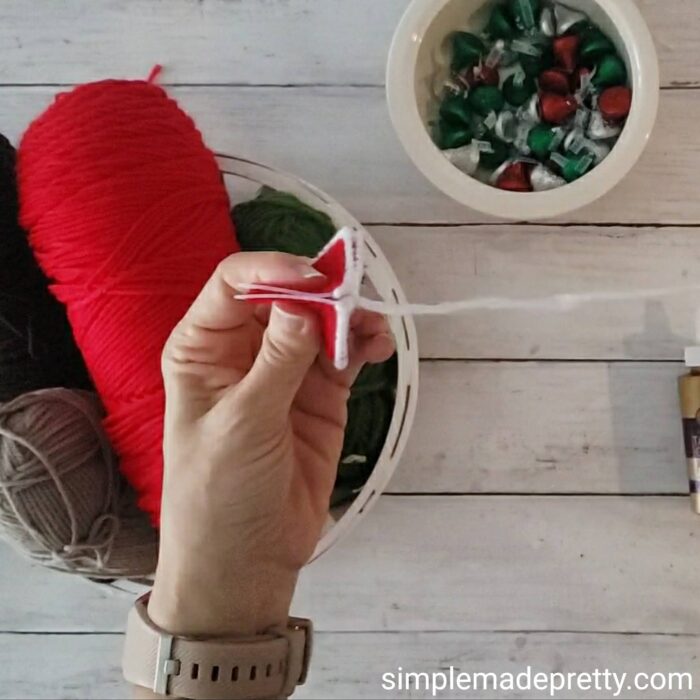
- Finish the stitch inside the corner of the mouth and tie/cut off.
- Use yarn to create a loop at the top to hang as an ornament.
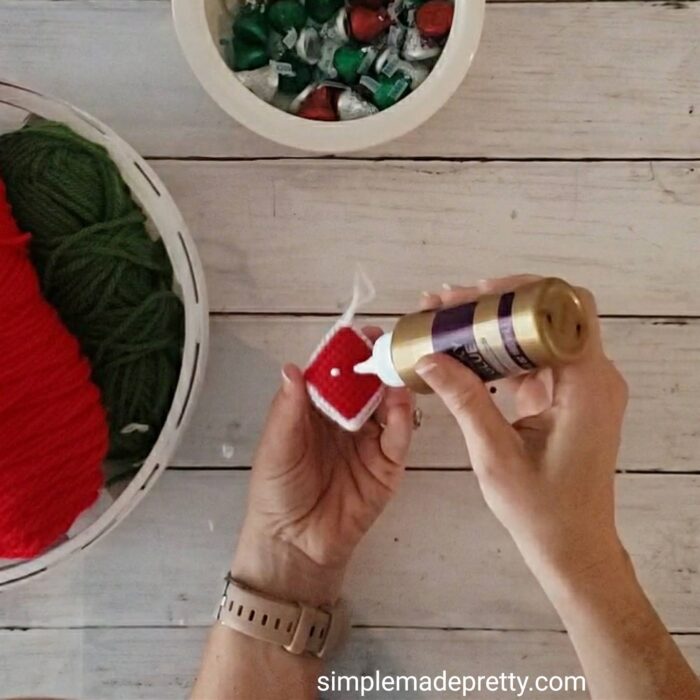
- Use glue to attach wiggly eyes.
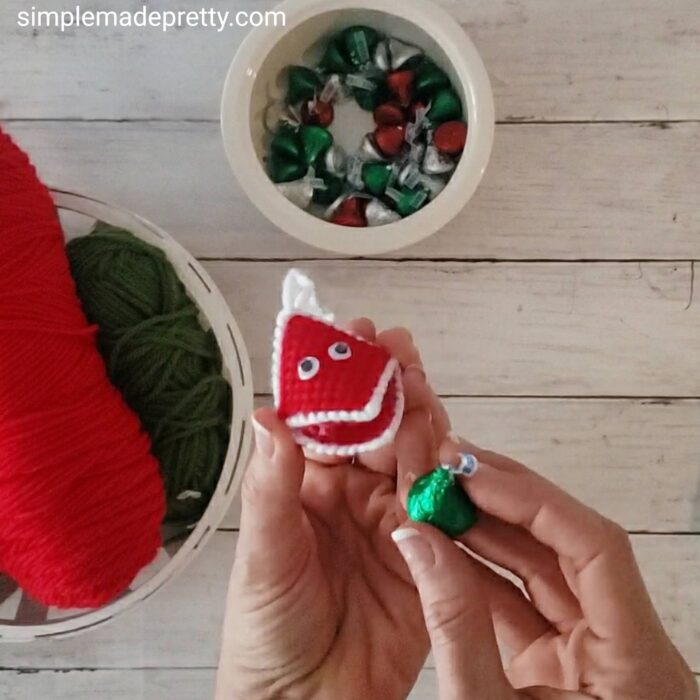
- Add a Hershey Kiss inside and enjoy!


I hope you enjoy making these plastic canvas reindeer kiss holder pattern! If you’d like to see more DIY gnome ideas, be sure to follow me on Instagram and subscribe to my YouTube channel.
–>>You can follow me on Instagram here
Did you make these Plastic Canvas Ornaments or similar ones? I would love to see it! Send me a picture on Facebook, Instagram, or email and I’ll share it with my followers 🙂
Print the instructions and Watch the Video to Make a plastic canvas kisses ornament:

Hershey Kiss Ornaments
Supplies
- Plastic Canvas
- Yarn in various colors
- Yarn Needle
- Scissors
- Glue
- Wiggly Eyes
Instructions
- Gather Supplies. I highly recommend using these Plastic Canvas Sheets.
- Cut 3 squares measuring by counting 10 squares on each side.
- Thread the yarn onto your needle by smooshing the tip of the yarn with your thumb and index finger into the needle.
- Start to weave in the upper right corner of one of the squares. Hold the "tail" in the back so you can weave around it to secure it in place. Stitch across to the left lower square.
- Continue to stitch down the row.
- Notice the back and how I stitched over the tail.
- When you reach the end of the row, continue to the next row as seen in the picture.
- Continue to stitch across using the same square as the previous row. Once you finish the entire square, finish with a triple stitch in the last holes and stitch through the back to tie and cut off the yarn.
- Complete these steps until you have 3 squares. Make the "lips" for the ornament by weaving the outline of 2 corners on 2 squares.
- Put one of the lip squares on the non-lip square, wrong sides together and stitch the other side (leaving the lip side open).
- Do the same with the last square until you have the 3-D ornament. Finish the stitch inside the corner of the mouth and tie/cut off.
- Use yarn to create a loop at the top to hang as an ornament.
- Use glue to attach wiggly eyes.
- Add a Hershey Kiss inside and enjoy!
Video
Don’t forget…
It’s an excellent size for this project and yet, you’ll also find that it is one of the cheapest options you’ll find online.
Want to see more Dollar Tree DIY videos?
–>>Subscribe to my YouTube channel here!
Pin this DIY Hershey Kiss Ornament for later
More Popular Dollar Store DIY Ideas
DIY Burlap Baskets using Plastic Dollar Store Bins
Tidy up your home with some DIY Burlap Baskets using Plastic Dollar Store Bins! These DIY Dollar Store baskets are simple to make using basic supplies from the Dollar Tree but look like they are from Pier One! If you are looking for storage baskets from the Dollar Store but don’t like the plastic baskets, try this burlap fabric DIY project!
Over The Door Organizer Dollar Tree DIY
Learn how to make a cute and functional over-the-door organizer that I made using Dollar Tree supplies. I shared this over the door organizer shown in our pantry on Instagram and YouTube recently and I knew it would be pretty popular (because I was also in love with how it turned out!) so I wanted to share this tutorial on my blog as well. This back of the door storage organizer is made with Dollar Tree supplies. I’m also giving my readers some FREE Printable Pantry labels and Blank Labels in this post!
–>>Keep reading to learn how to make this Over The Door Organizer Dollar Tree DIY!
Dollar Tree Farmhouse Wall-Mounted Mug Rack DIY
DIY these popular farmhouse mug racks made using Dollar Tree supplies! I shared these DIY wall mug racks on Instagram and I knew they would be pretty popular (because I was also in love with how they turned out!) so I wanted to share this tutorial on my blog as well. These mug racks are made with Dollar Tree supplies.
–>>Keep reading to learn how to make this Dollar Tree Farmhouse Wall-Mounted Mug Rack DIY!
DIY Dollar Store Farmhouse Ladder
If you’ve seen those farmhouse ladders used for various home decor ideas, you probably know how much they cost in high-end decor stores. I got lucky and found a large antique ladder at a yard sale but I wanted an extra farmhouse ladder to use as a planter outside so I made my own! The best part about this DIY farmhouse ladder is that it’s made using items for less than a few dollars! This ladder was so easy that I made a mini tea towel ladder (yes, tea towel ladders are a thing!) for just $3!
–>>Keep reading to learn how to make a DIY Farmhouse Ladder For $3!
$1 Tiered Tray DIY
I bet you’ve seen those beautiful farmhouse style tiered trays and you may be wondering how you can DIY a tiered tray using Dollar Store materials. Well, it’s so simple that you might end up addicted to making a 2 tier serving tray that you make a whole bunch for your home!
–>>Learn how to make a tiered tray for just a $1 with this Dollar Tree hack!
Psssssttt…Right now I’m offering FREE access to our Digital Resource Library to all of our newsletter subscribers. Your private access includes dozens of free printable crafts, home decor and organization guides. Hurry up and grab your freebies here! (Access instructions are sent after subscribing).
Disclaimer: This post may contain affiliate links or a sponsored post. All opinions are always 100% mine and I don’t partner with any product or company that I don’t use and love. Please see our Full Disclosure for more information.
 100+ Best Dollar Tree Crafter’s Square Supplies