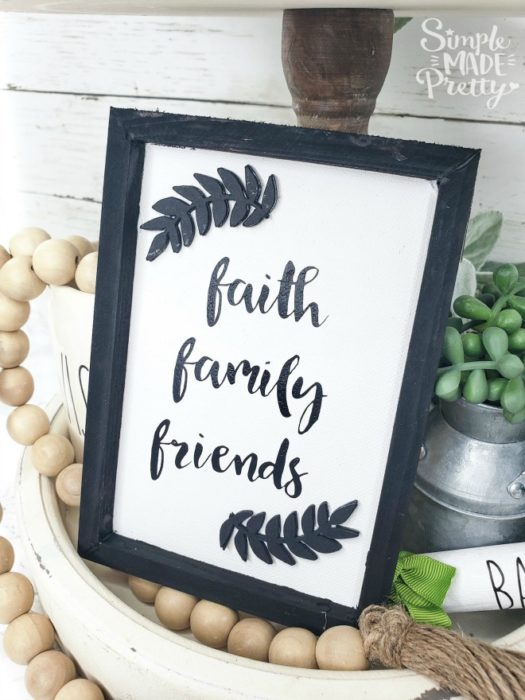
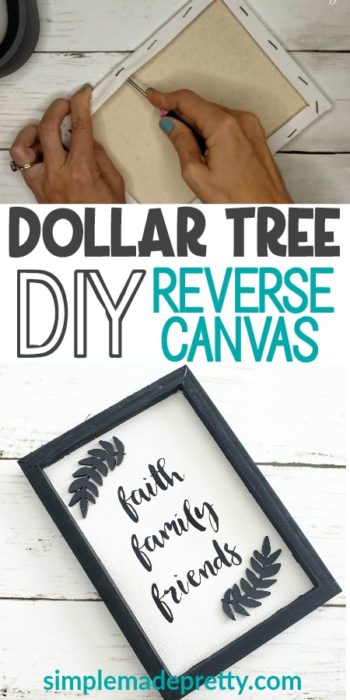
Dollar Tree Reverse Canvas Sign
You can never have too many farmhouse signs if you ask me! If you’ve ever heard the term “reverse canvas,” you may be wondering what is a reverse canvas? You’ll learn how to make a reverse canvas sign with a 3D image that costs less than $1 to make in this post! Keep reading to see how to make a DIY Reverse Canvas Dollar Tree Sign and grab the free SVG file below to make this reverse canvas sign!
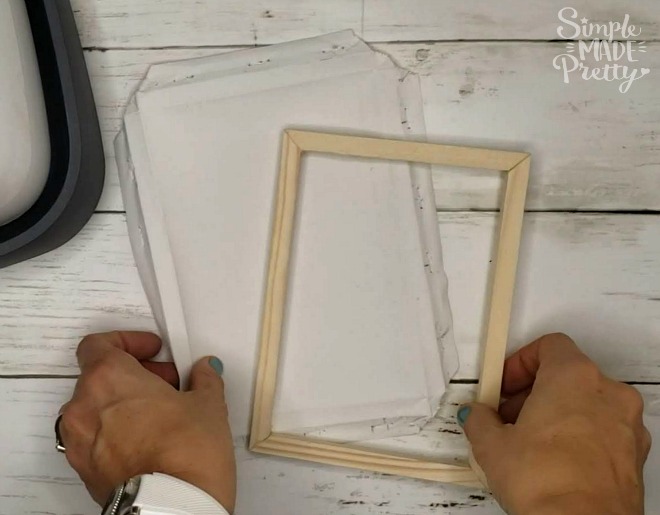
What is Reverse Canvas?
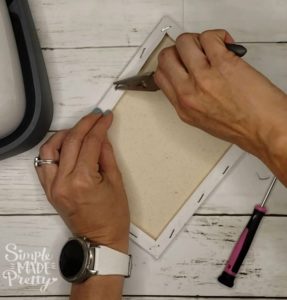
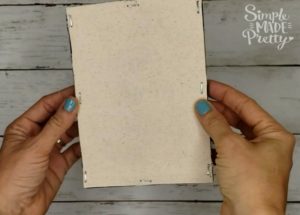
Basically, you are removing the white stretched canvas from the wooden frame that’s on the inside and putting the frame on the outside instead. In order to “reverse” the canvas, you need to remove the staples from the back of the frame.
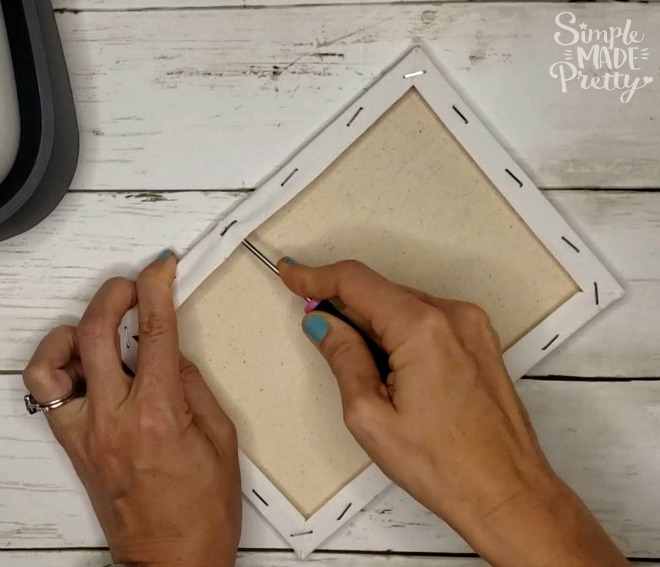
How Do You Remove Reverse Canvas Staples?
The staples on the back on an art canvas are not regular office staples so a staple remover will not work. I use a small flat head screwdriver to remove the staples, being very careful not to put your other hand/fingers in front of the area you are working so you don’t jab yourself with the screwdriver! I’ve found that putting pressure down into the wood frame and UNDER that white canvas will loosen the staple enough that it comes out. If there is one side that is stuck on the frame, I use pliers to pull out the staple. It’s a fairly easy process once you get the hang of it!
I show you how to make a reverse canvas using a Cricut machine. If you don’t have a Cricut machine, you can still make this reverse canvas. Making signs with Cricut is a great beginner Cricut project if you are new to Cricut.
–>>Watch the How-To video below on how to make a reverse canvas using Cricut!
I used stretched canvas from the Dollar Tree. This reverse canvas sign cost less than $1 to make your own by using supplies from dollar stores!
Making this reverse canvas was easy with my Cricut Explore Machine but I’m including instructions in case you don’t have a Cricut machine.
If you’re curious (or in a hurry)…
It’s an excellent Cricut Machine and yet, you’ll also find that it is one of the cheapest options you’ll find online.
It’s available in several colors and gets great reviews. If you can get it for under $300, grab it. That’s one heck of a deal on a Cricut machine! See color choices, check the current price & read reviews here.
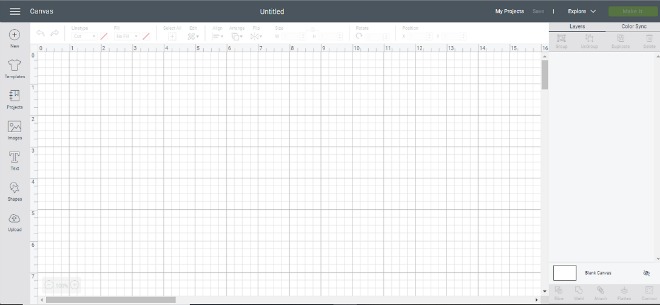
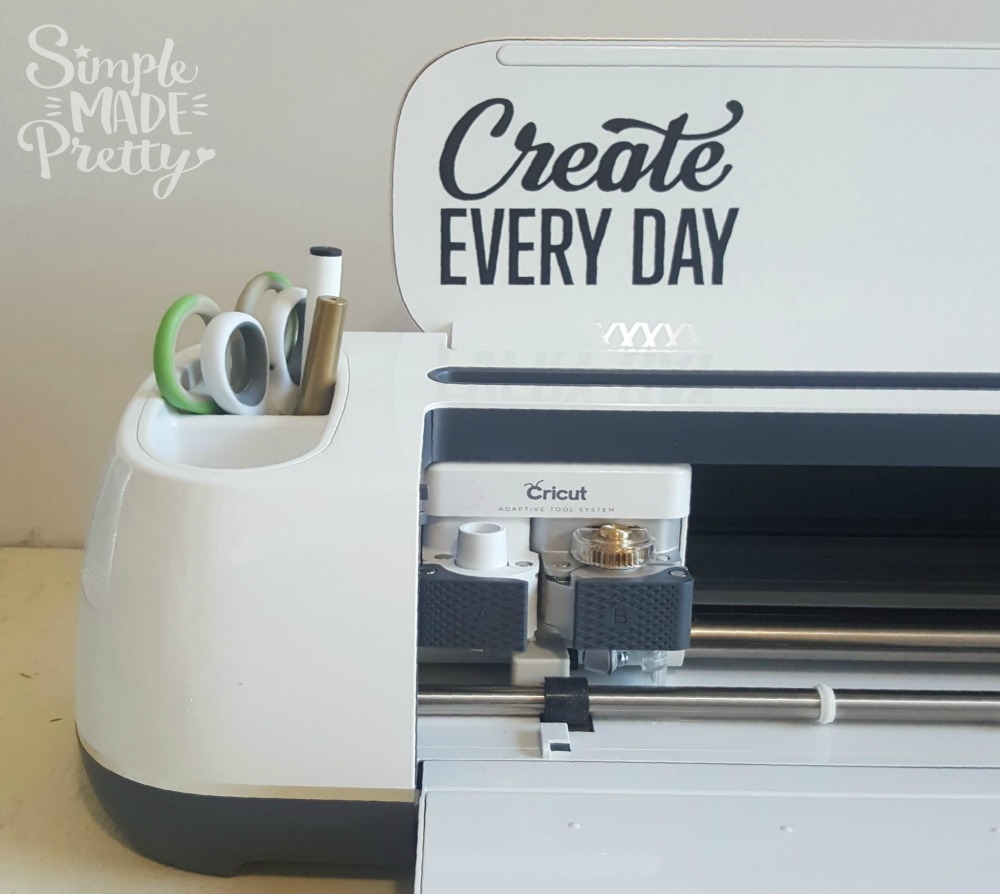
What is Cricut Design Space?
Cricut Design Space is the program you will need to design and cut your Cricut projects. When you set up your Cricut machine, you will need to install Cricut Design Space. All Cricut machines come with Design Space, their free, easy-to-learn design software. It’s cloud-based so you can access your files from any device, any time. Start on your phone, continue on your laptop, and even work offline – all without breaking stride. From there you have the option to arrange a design from scratch or select from thousands of ready-to-make projects. Place your material on a mat, load it in the machine, and press Go. The machine handles the rest.
Design Space features tons of ideas to kickstart your next masterpiece. Browse and play with thousands of images, fonts, and ready-to-make projects. Since Cricut is adding more all the time, you’ll always find something fresh, new, and inspiring.
Do you need a computer to use a Cricut machine?
A computer is recommended, however, you can access Cricut Design Space and a Cricut Explore Air machine through mobile devices (iPad, iPhone, and Android devices). I highly recommend using a computer with Cricut Design Space and a Cricut Machine because you will have the full design options in Design Space and your machine needs to be close by to cut (even if you are using wireless Bluetooth).
What is Cricut Access?
You may have seen or heard about Cricut Access from Cricut or another blogger. Cricut Access is a membership that gives you 10% off your Cricut purchases (and various other offers and discounts) and access to thousands of images and fonts in Cricut Design Space.

I have a Cricut Access Membership, which provides me with thousands of free images to come up with some Cricut craft ideas. Be sure to check Cricut Design Space for some free Cricut projects! Some of the free Cricut DIY projects in Cricut Design Space can be used to sell (which makes the membership fee worth it in my opinion!).
–>>Check out this HUGE list with 30 Cricut Supplies From The Dollar Tree!
Making personalized gifts, cards, home decor, farmhouse signs, and more is easy with a Cricut Explore Machine.

Learning how to use your Cricut is really easy and fun once you get the hang of it. If you don’t have a Cricut Access Membership, I highly recommend it. I’ve had a Cricut Access Membership for years and it’s definitely worth the cost for all the benefits!
–>>Check out this HUGE list with 32 EASY Cricut Projects For Beginners!
My favorite online resource to find SVG files to make Cricut craft projects is DesignBundles.net!

–>>Click here to see the latest bundle with the best SVG files online!
Be sure to subscribe to get my emails and updates with more free SVG files to use with your Cricut machine!
I highly suggest using a Cricut Explore or Silhouette cutting machine to make this project. Just upload the SVG or PNG in the program you use (I use Cricut Design Space), size, cut, and apply! If you don’t have a cutting machine, you can use pre-cut decals and stencils to paint your own text/image on the canvas.
How to Make a Reverse Canvas Sign
This #5minute craft is so fun and can be made in minutes for less than $1!
Supplies:
- 4×6 (or any size) stretched canvas from Dollar Tree
- HTV in black
- Heavy black cardstock
- Free SVG file in my library (get access below)
- Aleene’s Tacky Glue
- Small flat-head screwdriver
- Small pliers
- Black paint
- Staple Gun (optional)
Directions:
- Gather Supplies. I used a 4 x 6 stretched canvas found at Dollar Tree.
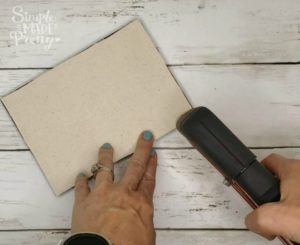
- Remove staples from the back of the canvas (follow my detailed instructions from above).

- Paint or stain the frame and set aside to dry.
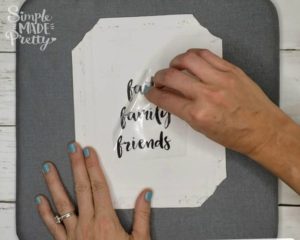
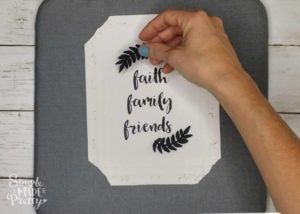
- Apply your image or decal to the canvas (I used my Cricut Easy Press to press the iron-on vinyl into the canvas fabric).
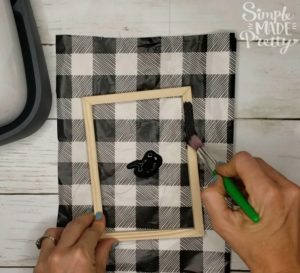
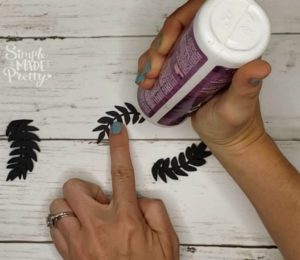
- Glue the layers of leaf cardstock pieces together to make a 3D image.
- Glue the 3D leaves to the canvas.
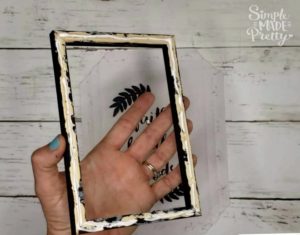
- Glue the dried/painted frame to the front of the canvas.
- Cut the sides of the canvas so it’s flush with the frame.
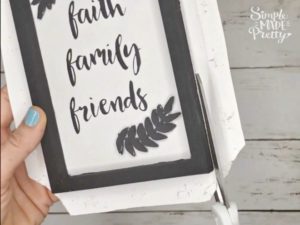
- Use a staple gun to reattach the canvas to the frame. You can skip this step if you don’t have a staple gun but the quality of the finished sign will be better if you staple the frame back.
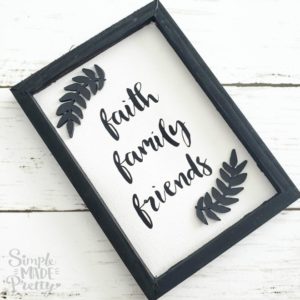
- Enjoy your new Reverse Canvas 3D sign!
I hope you enjoy making this reverse canvas DIY Sign! This DIY Reverse Canvas Dollar Tree Sign is an easy Cricut beginner craft and for those learning how to make a reverse canvas sign. Use your imagination to create other reverse canvas ideas and reverse canvas DIY sign ideas. Reverse canvas quotes and images are limitless using a Cricut to create a reverse canvas sign. I used HTV and heavy cardstock on my reverse canvas sign but you can try other ideas like craft foam, wooden letters, and more!

Watch the How-To Video and Print the Instructions
DIY Reverse Canvas Dollar Tree Sign
Equipment
- Pliers
- Flathead screwdriver
- Cricut Explore Air
- Iron-on or HTV
- Cricut Easy Press
Supplies
- 4x6 (or any size) stretched canvas from Dollar Tree
- Cricut black iron-on
- Heavy black cardstock
- Free SVG file in my library
- Aleene's Tacky Glue
- Small flat head screwdriver Small pliers
- Black paint
- Staple Gun (optional)
Instructions
- Gather Supplies. I used a 4 x 6 stretched canvas found at Dollar Tree.
- Remove staples from the back of the canvas (follow my detailed instructions from above).
- Paint or stain the frame and set aside to dry.
- Apply your image or decal to the canvas (I used my Cricut Easy Press to press the iron-on vinyl into the canvas fabric).
- Glue the layers of leaf cardstock pieces together to make a 3D image.
- Glue the 3D leaves to the canvas.
- Glue the dried/painted frame to the front of the canvas.
- Cut the sides of the canvas so it's flush with the frame.
- Use a staple gun to reattach the canvas to the frame. You can skip this step if you don't have a staple gun but the quality of the finished sign will be better if you staple the frame back.
- Enjoy your new Reverse Canvas 3D sign!
Video
Grab the Free SVG File!
New here?
If you are new to the Simple Made Pretty Community, you’ll need to sign up below to gain access to my private digital resource library where I house all of my free printable crafts, decor, checklist, & more in one convenient place!

Returning?
Welcome back! If you’ve already subscribed to Simple Made Pretty, just check your last email from me with the password to log into the library below (the instructions are sent in every email I send).

New to Cricut?
Here are some Cricut Basics!
–>>If you want a Circut Machine but aren’t sure which machine is for you, be sure to read this post, How to Choose Which Cricut Machine is Right for you.
–>>Want more tips on finding inexpensive Cricut supplies? Read this post, How to Save Money on Cricut Craft Supplies.
What Cricut Accessories Do I Need?
Cricut Essentials make putting the pieces together a joy. From tweezers that handle delicate parts to Cricut EasyPress for foolproof iron-on, every Essential makes a great project even greater, every step of the way.
These are the Cricut Tools & Accessories I recommend for the serious crafter:
Cricut Easy Press

I highly recommend purchasing the Cricut Easy Press if you plan to do any iron-on or heat transfer projects. The Cricut Easy Press will make your Cricut DIY’s so much easier!
The Cricut Easy Press comes in 3 different sizes, however, I own the 9 x 9 and it’s the perfect size for most projects.
–>>Get the Cricut Easy Press here!
Cricut Easy Press Mat
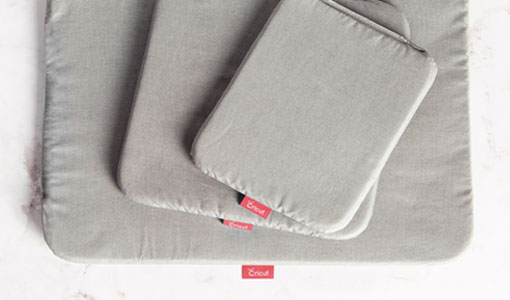
If you purchase the Cricut Easy Press, don’t forget to get the coordinating Easy Press Mat, which will protect your surfaces and projects from burning. Alternatively, you can use a folded towel, however, the mat is sleek and easier to store in the craft room 😉
–>>Get the Cricut Easy Press Mat Here!
Cricut Bright Pad

The lightweight, low-profile Cricut BrightPad makes crafting easier while reducing eye strain. It illuminates fine lines for tracing, cut lines for weeding, and more.
–>>Get the Cricut Bright Pad Here!
Cricut Cutting Mats
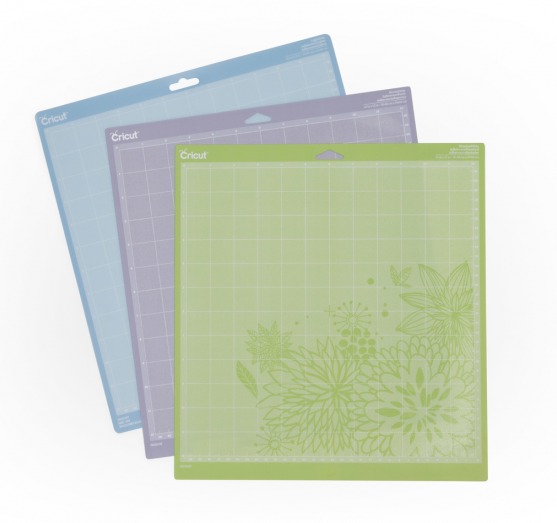
I suggest having a variety of cutting mats that are customized to match the weight of commonly used crafting materials. With three different mats specifically designed to work with different weights of materials, you can ensure success in all your projects.
–>>Get the Cricut Machine Mat Variety Pack Here!
Cricut Tool Set
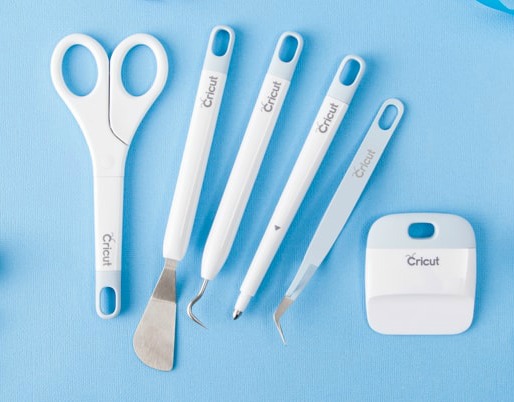
You will thank me later for telling you to just get the Cricut Tool Set instead of buying each tool individually! The tools included in the Cricut toolset are all helpful when using your Cricut machine.
–>>Get the Essential Tool Set Here!
My favorite non-Cricut brand materials
You can find other brand vinyl, iron-on, contact paper, and more outside of Cricut.com. A few of my favorites are:
- Oracal 651 Permanent Vinyl (find it here or at your local craft store)
- Siser HTV
- Dollar Tree clear contact paper (or shelf liner)
- Various fat-quarter fabrics at Walmart
- Felt sheets at local craft stores

Learning how to use your Cricut is really easy and fun once you get the hang of it. If you don’t have a Cricut Access Membership, I highly recommend it. I’ve had a Cricut Access Membership for years and it’s definitely worth the cost for all the benefits!
CRICUT ARTICLES YOU MIGHT ALSO LIKE…
How To Choose a Cricut Machine
I bought my first Cricut machine in 2013… it was called the Cricut mini and was one of the first Cricut machines that didn’t have a keyboard. It was a great machine but as soon as Cricut released the Cricut Explore machine in 2014, I quickly bought it. A year later Cricut released the Cricut Explore Air and I bought that too. Then in 2017, Cricut released the Cricut Maker Machine and of course I bought it too. So you can say I’m pretty experienced with Cricut machines and have in-depth knowledge about using Cricut and various Cricut projects.
–>>If you want a Circut Machine but aren’t sure which machine is for you, be sure to read this post, How to Choose Which Cricut Machine is Right for you.
32 Easy Cricut Projects for Beginners
I love learning about new Cricut projects and Cricut Explore Air 2 Projects, but some Cricut crafts seem more advanced than others. I put together this list with Easy Cricut Projects for Beginners to help others find Cricut tutorials for beginners and free Cricut projects. Most of the projects featured in this post can be made using a Cricut Explore Air and Cricut Explore Air 2, but some of these beginner projects require a Cricut Maker Machine (Cricut beginner projects using fabric).
–>>If you’ve had your Cricut machine for some time but are scared to use it, you should try these 32 Easy Cricut Projects for Beginners.
How To Save Money on Cricut Supplies
I love finding a good deal on Cricut vinyl craft supplies and I tend to stock up on Cricut craft supplies during sales (Cricut.com has the best Black Friday sale!) but Cricut supplies can be expensive! One question I’m frequently asked is where can I buy Cricut supplies? Well, not only will I share where you can buy Cricut supplies, but where to find discount Cricut supplies! My favorite store to find Cricut supplies cheap is the Dollar Store.
–>>Want more tips on finding inexpensive Cricut supplies? Read this post with, 30 Cricut Craft Supplies from the Dollar Tree.
15 Cricut Project Ideas Using Scraps
These 15 Cricut Project Ideas Using Scraps are easy Cricut projects that a Cricut beginner can make! If you have scrap Cricut craft materials and are looking for Cricut projects using Cricut Design Space and a Cricut Explore machine, this post is for you! This post is filled with Cricut project ideas inspiration and fun Cricut projects using vinyl, heat transfer (HTV), cardstock, and more!
Don’t throw away those small pieces of leftover vinyl, iron-on, or cardstock! Save your Cricut scraps to make these fun Cricut Projects Using Scrap materials! Keep reading to find 15 Easy Cricut project ideas to use up those extra bits of Cricut vinyl, Cricut iron-on, and Cricut cardstock.
–>>Read the full post, 15 Cricut Project Ideas Using Scraps here!
Pin this Reverse Canvas Tutorial for later…
Psssssttt…Right now I’m offering FREE access to our Digital Resource Library to all of our newsletter subscribers. Your private access includes dozens of free printable crafts, home decor and organization guides. Hurry up and grab your freebies here! (Access instructions are sent after subscribing).
Disclaimer: This post may contain affiliate links or a sponsored post. All opinions are always 100% mine and I don’t partner with any product or company that I don’t use and love. Please see our Full Disclosure for more information.

 15 Cricut Vinyl Project Ideas Using Scraps
[…] reverse canvas and staples, you can craft an adorable, rustic, handmade farmhouse sign Mom is sure to […]