This DIY Felt Easter Egg and Bunny Sewing Craft is a guest post from Annabelle from Wunderlabel.
Easter is just around the corner and there’s no better way to get ready than to craft some fun decorations for around the house. Today, we are going to go over two simple crafts: a felt Easter egg and a felt Easter bunny. So, without further ado, let’s get to crafting!
Easter Egg Craft
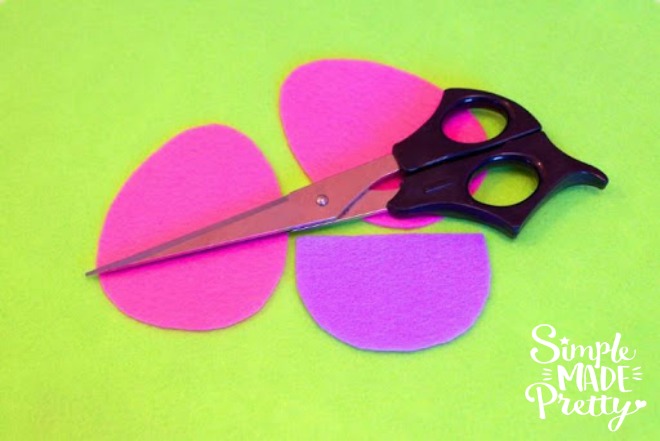
First, let’s take a look at the Easter egg craft. While both of these crafts are rather simple, this one comes with 3 basic steps. To get started, you will need pink felt, purple felt, a ream of white lace ribbon, pink thread, a sewing needle, some stuffing and a pair of scissors.
Step 1: Your Base
The first thing you need to do is to craft the base for your Easter egg. First, cut out two egg shapes from the pink felt and set them aside for future steps. Next, cut out an egg shape from the purple felt and then cut it in half so that you half a purple, bottom half of an egg. Now, you’re ready for step 2!
Step 2: Creating the Front Half of Your Egg
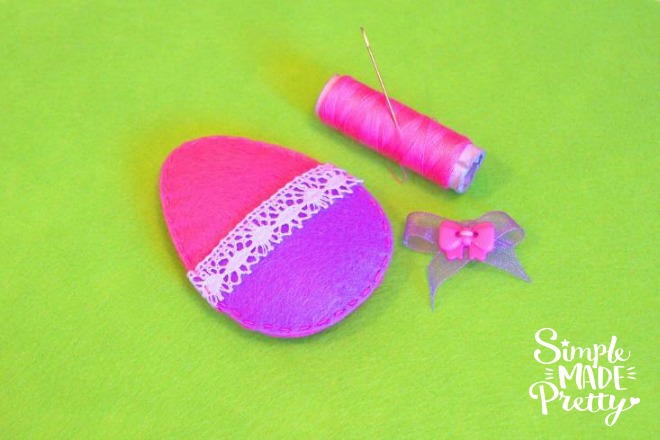
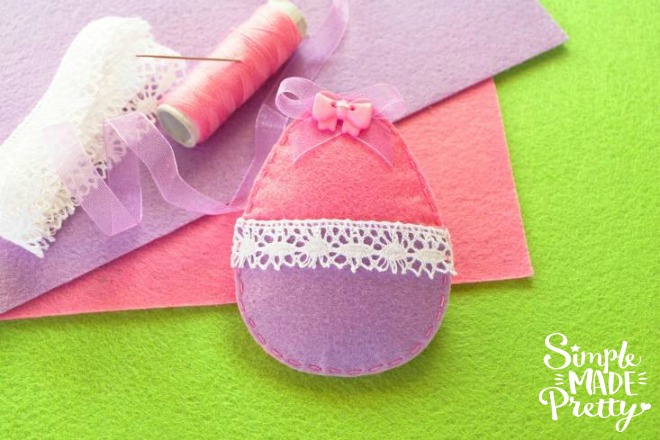
Before you can put your egg together, you need to assemble its front half. For this, you will need one of your pink felt eggs, your purple felt half egg, your lace ribbon, as well as your needle and thread.
Now, take your purple half egg, line it up, and sew it onto the pink felt egg. To cover up the seam, measure out a length of your lace ribbon and carefully attach it to on top of the place where the purple felt starts.
Next, you are going to want to sew your front half onto the other pink felt egg, carefully placing stuffing between the layers. Then, finish your Easter egg off with a small bow at the top and you’re good to go! You have a cute, Easter egg craft to decorate with!
Easter Bunny Craft
Next up we have the Easter bunny craft. This craft has a few more steps than our Easter egg but don’t be intimidated! We are going to go through it step by step so that you can end up with the perfect Easter bunny to decorate your house with.
Step 1: Preparation
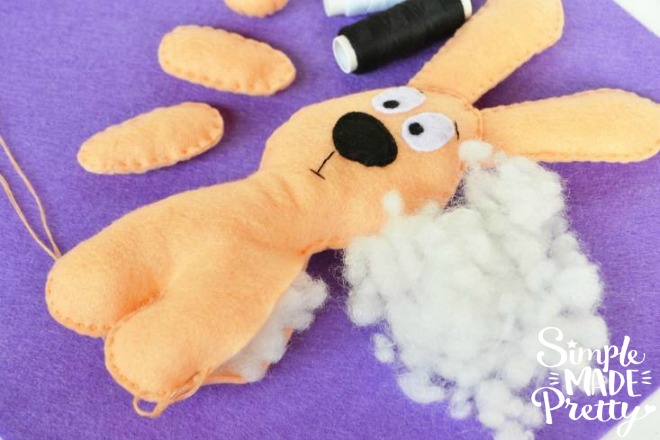
Now, this is the most labor-intensive part of this craft but we’re going to take it step by step so that your bunny gets all the pieces it needs. First, though, you need to gather your materials.
You need beige felt, black felt, white felt, stuffing, a needle and thread, and a pair of scissors.
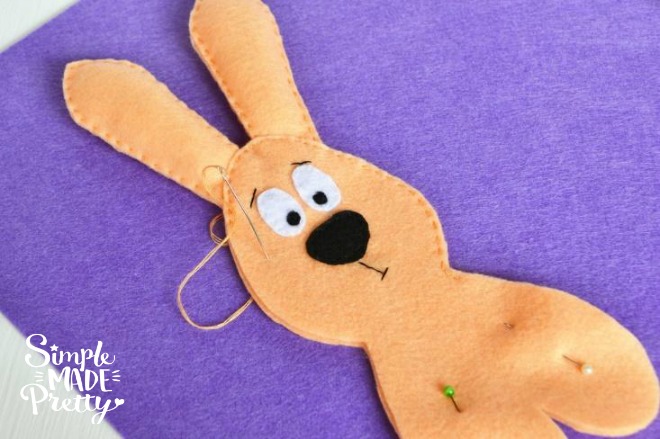
First, you are going to want to take your beige felt and cut a variety of shapes out of it. The two largest should be a pair of bodies for your bunny – this includes the shape of the face, body, and legs. Then you are going to want to cut out four shapes for arms and four shapes for ears.
Out of the white felt, you are going to want to cut out two small ovals. These will serve as the eyes.
With the black felt, you are going to cut out two very small circles to serve as the pupils of the eyes as well as a rounded, triangular shape for the nose.

Step 2: Ears and Face
Next, sew the face of the bunny onto one your body shapes. This will now serve as the front of your bunny. After that, sew and stuff the ears and pin them into place. When you sew the front of the body to the back, you are going to sew the ears into place.
Step 3: Sewing the Body
The next step is to sew the body of the bunny. However, before you finish sewing it shut, you are going to want to add the stuffing so your bunny isn’t just a floppy piece of felt. Once you add the stuffing, you can sew your bunny up all the way.
Step 4: Finishing Touches
Before you can call your bunny finished, you need to sew his arms on. After that, you can sew a bow on his neck and then you have a perfect little Easter bunny to decorate your house.
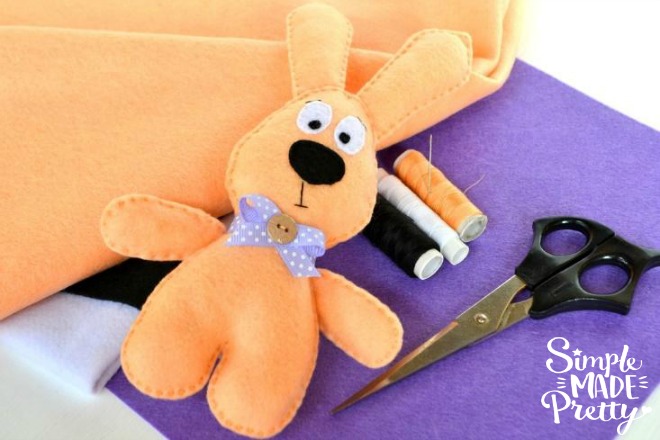
This Easter sewing craft is perfect for beginner sewers or if you are looking for a fun, simple Easter craft activity.
Pin it for later…

Psssssttt…Right now I’m offering FREE access to our Digital Resource Library to all of our newsletter subscribers. Your private access includes dozens of free printable crafts, home decor and organization guides. Hurry up and grab your freebies here! (Access instructions are sent after subscribing).
Disclaimer: This post may contain affiliate links or a sponsored post. All opinions are always 100% mine and I don’t partner with any product or company that I don’t use and love. Please see our Full Disclosure for more information.

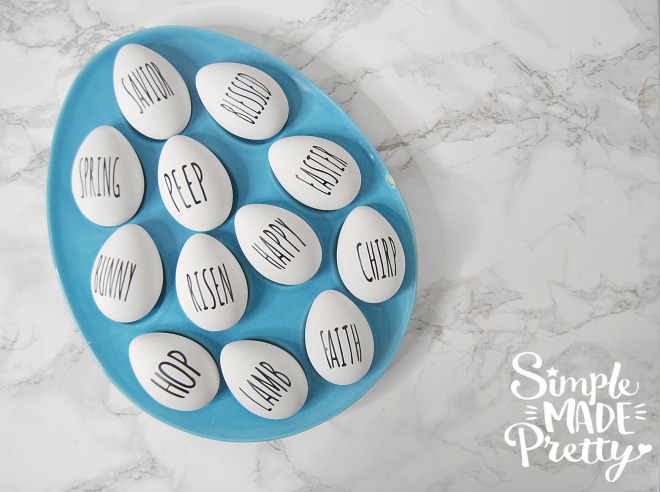 DIY Rae Dunn Inspired Easter Eggs
[…] little felt sewn Easter bunny from Simple Made Pretty is too cute for words. My kids would love finding this in their Easter Baskets. Use materials found […]