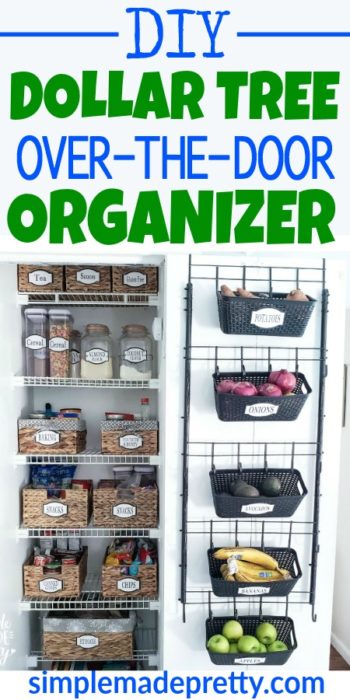
Dollar Tree Over-the-Door Organizer DIY for Pantry Storage
If your pantry or storage space feels cluttered, cramped, or impossible to keep organized, the problem usually isn’t lack of space — it’s unused vertical storage.
That’s exactly why this Dollar Tree over-the-door organizer DIY has stayed in my home for years.
This isn’t one of those “looks good for a photo” projects. It’s a real, functional organizing system I still use in my pantry to store lightweight items, create clear categories, and make better use of space I already had.
Best part?
You can build it using affordable Dollar Tree supplies, no power tools, and no permanent damage — making it perfect for renters, small kitchens, and busy households.
🔽 WATCH: Dollar Tree Over-the-Door Organizer DIY on YOUTUBE 🔽
🎥 Watch the 10-minute video above — then scroll for more freebies, links & resources below!
What is an over-the-door organizer used for?
It provides extra storage by utilizing the back of doors for items like pantry goods, cleaning supplies, or accessories.
Are over-the-door organizers good for small spaces?
Yes. They maximize vertical space and are especially useful in apartments, small kitchens, and closets.
Can you make an organizer with Dollar Tree supplies?
Yes. Many DIY organizers use Dollar Tree baskets, hooks, and storage bins to create affordable storage solutions.
What doors work best for this organizer?
Pantry doors, closet doors, and utility room doors are the most common places to install them.
Why This Dollar Tree Door Organizer Works
This DIY works because it:
- Uses vertical space most homes ignore
- Keeps items visible and easy to grab
- Creates clear storage zones without bulky bins
- Costs far less than store-bought organizers
If you’re organizing a pantry, laundry room, or utility space on a budget, this is one of the simplest systems to maintain long-term.
What You’ll Need (Dollar Tree Supplies)
(Adjust quantities based on your door size)
- Dollar Tree over-the-door hooks
- Lightweight bins or baskets
- Zip ties or hooks (depending on your setup)
💡 Tip: Stick to lightweight pantry items for best results.
Everything you need to make this over the door hanger can be found at Dollar Tree (minus the glue, which can be found at Michael’s or Hobby Lobby). I made one mug rack with $12 in supplies. You can make this over the door organizer with 4 rows of hooks or 5 rows of hooks.
Which size you make will depend on the look you are going for (if you like more space between your mugs to hang large items, etc). You will get more bang for your buck with the rack with 5 rows though (to fit 5 baskets).
In case you’re in a hurry…
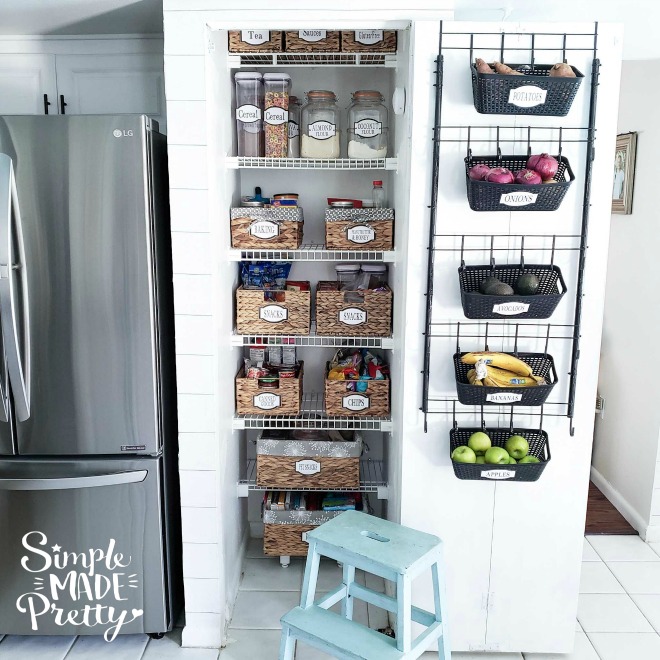
My inspiration to make this over-the-door organizer came from a previous Dollar Tree DIY…this Mug Rack! I wanted more storage options in our tiny pantry so I came up with this over the door storage as a solution.
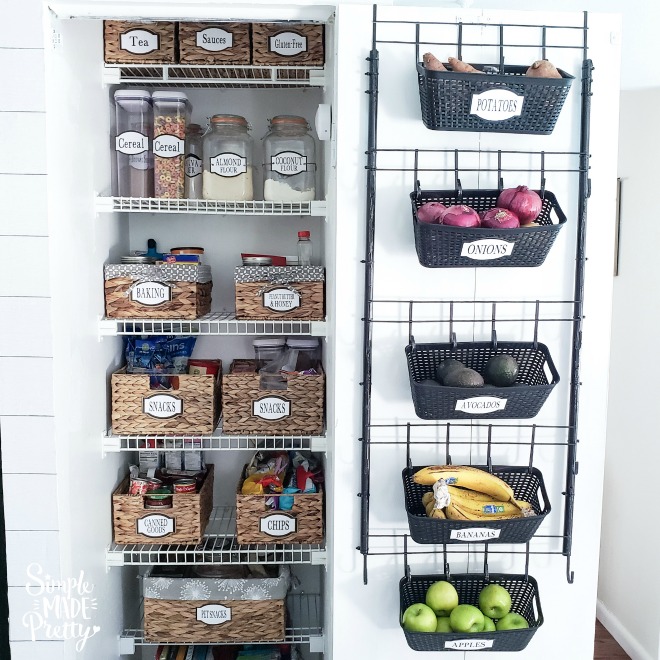
Actually, I made an extra mug rack so I ended up repurposing one of my mug racks into this over the door rack. I added some Dollar Tree baskets and ended up with this awesome home organizer!
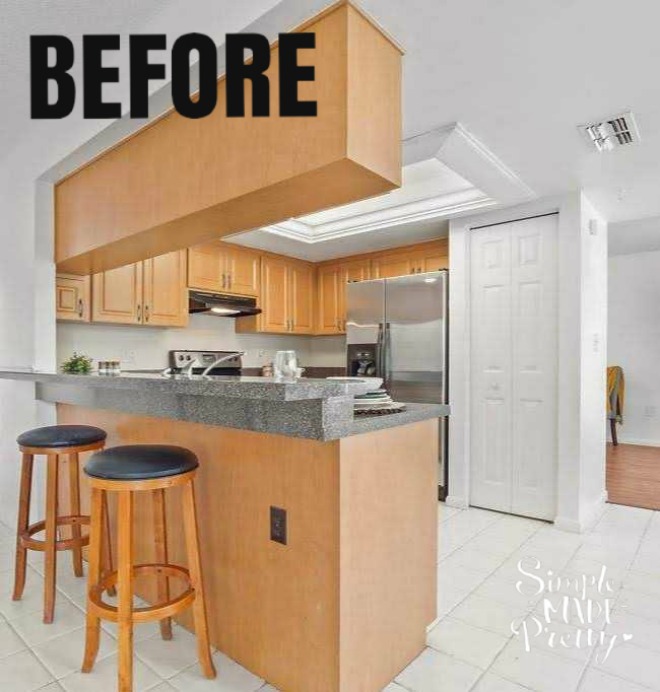
One more thing…before I could make this back of the door organizer, we had to turn our Bifold pantry door into a single door.
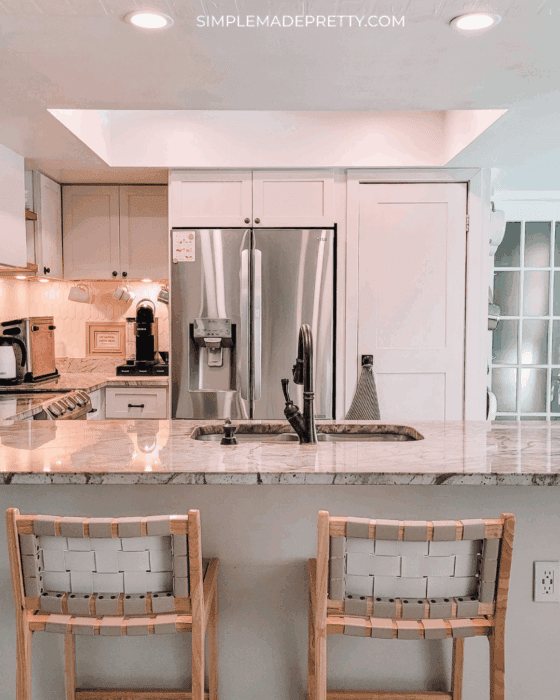
It was really easy to turn a bifold door into a single door! We took things a step further and added plywood to the front so it looks like a barn door. I gotta say, I’m pretty impressed with the results and our kitchen looks 10 times better with this door!
Check out the BEFORE picture of our kitchen and Pantry Door…
Here is the AFTER picture…
Learn how to convert a bifold door into a single door here!
How to Make the Dollar Tree Over-the-Door Organizer
Supplies:
- 2 Mop/Broom handles from Dollar Tree
- 4-5 Over-the-Door Hooks from Dollar Tree
- Black Zip Ties (use white if you are not painting your rack)
- E6000 Glue
- Pliers
- Hammer
- Carbon Mist Metallic Spray Paint (optional)
Directions:
Gather Supplies. 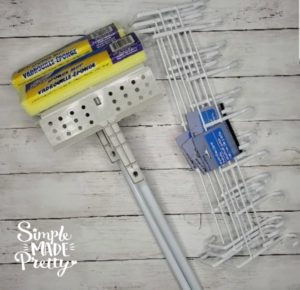
Take apart the mop/broom so you only have the pole left. I chose a mop so I could use the sponge head for cleaning later. 
Use pliers to bend the BOTTOM hooks on the top row of hooks only.  You want the hooks that touch the left and right pole to be flat. Leave the other hooks on the first row alone. Use a hammer to flatten as best as possible.
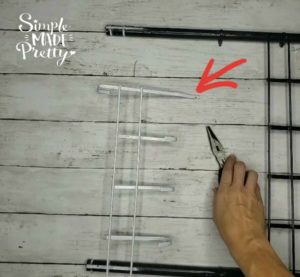
Start gluing and zip tieing one side of the rack first (don’t do both sides otherwise both poles will be rolling all over the place, lol). Glue the TOP ROW pieces that you bent flat to the Back Side of the poles. 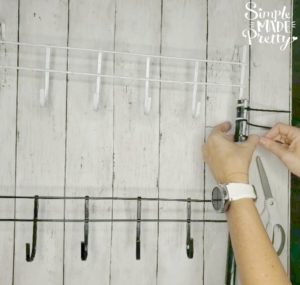
Glue the remaining rows to the front of the poles. Use 2 zip ties to hold in place. 
Repeat the above step until one side is complete, then complete the other side. 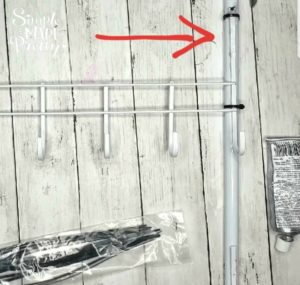
Once the glue and zip ties are applied, you can spray paint (in my opinion it looks better black)! I used carbon mist metallic spray paint. If you decide to leave it white, then I suggest using white or clear zip ties.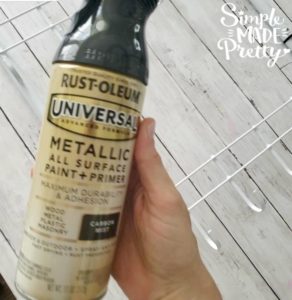
Let the paint dry and hang using the top over the door hooks.
Where I Use This Organizer in My Home
This over-the-door organizer isn’t limited to one room.
I’ve used it for:
- Pantry storage
- Kitchen overflow
- Utility closets
- Craft room supplies
Anywhere you need extra storage without adding furniture, this system works.
👉 Related:
- Dollar Tree pantry organization ideas
- Budget kitchen storage solutions
- Craft room organization systems
How Much Does This DIY Cost?
One of the biggest benefits of this project is affordability.
Most versions of this Dollar Tree organizer cost under $10, depending on how many hooks and bins you use — significantly less than store-bought over-the-door organizers.
Tips for Making This Organizer Last
To keep this system functional long-term:
- Avoid overloading bins
- Stick to lightweight items
- Keep categories simple
- Do a quick reset once a week
Simple systems last longer than complicated ones.
Frequently Asked Questions
Is this Dollar Tree over-the-door organizer sturdy?
Yes — when used for lightweight items. This system is designed for snacks, pantry goods, and small supplies, not heavy cans.
Can I use this organizer in a small kitchen?
Absolutely. This DIY is ideal for small kitchens and pantries where cabinet space is limited.
Will this damage my door?
No. The organizer uses over-the-door hooks and does not require drilling or permanent installation.
Can I customize this organizer?
Yes. You can change basket sizes, spacing, or even use it in non-pantry spaces like closets or craft rooms.
Final Thoughts: Smart Storage Without the Remodel
Small storage solutions can make a big difference in everyday life. This Dollar Tree over-the-door organizer is a simple way to keep pantry items visible, accessible, and neatly arranged without spending a lot of money.
If you enjoy practical DIY ideas that make your home more organized and efficient, explore more Simple Made Pretty tutorials for budget-friendly home solutions.
Print the Instructions and Watch the video to make the Dollar Tree Over the Door Organizer
Over The Door Organizer Dollar Tree DIY
Supplies
- Mop/Broom handles from Dollar Tree
- 4 Over-the-Door Hooks from Dollar Tree
- Black Zip Ties (use white if you are not painting your rack)
- E6000 Glue
- Pliers
- Hammer
- Carbon Mist Metallic Spray Paint (optional)
Instructions
- Gather Supplies.
- Take apart the mop/broom so you only have the pole left. I chose a mop so I could use the sponge head for cleaning later.
- Use pliers to bend the BOTTOM hooks on the top row of hooks only.
- You want the hooks that touch the left and right pole to be flat. Leave the other hooks on the first row alone.
- Use a hammer to flatten as best as possible.
- Start gluing and zip tieing one side of the rack first (don't do both sides otherwise both poles will be rolling all over the place, lol).
- Glue the TOP ROW pieces that you bent flat to the Back Side of the poles.
- Glue the remaining rows to the front of the poles. Use 2 zip ties to hold in place.
- Repeat the above step until one side is complete, then complete the other side.
- Once the glue and zip ties are applied, you can spray paint (in my opinion it looks better black)! I used carbon mist metallic spray paint. If you decide to leave it white, then I suggest using white or clear zip ties.Let the paint dry and hang using the top over the door hooks.
Video
Don’t forget…
I hope you enjoy making this over-the-door organizer using Dollar Tree supplies! Be sure to check out my MUG RACK DIY that uses a similar design!
More Popular Budget-Friendly DIY Ideas…
Here are related articles that you might also like!
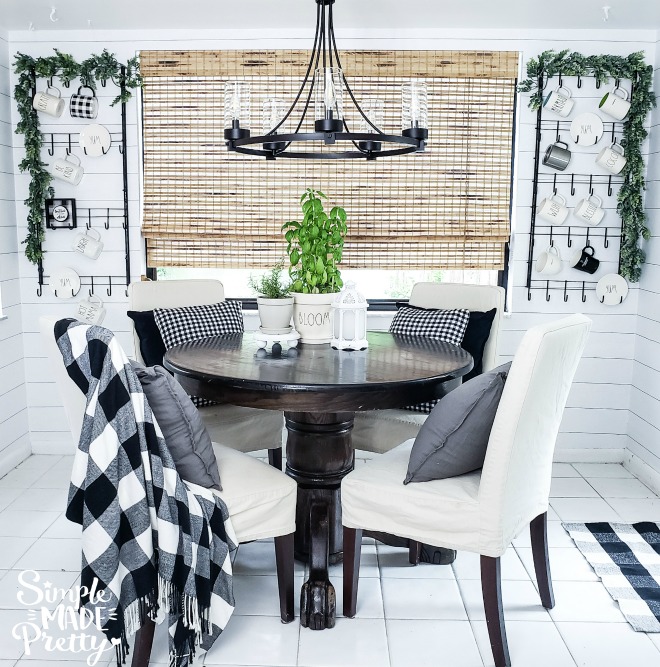
Dollar Tree Farmhouse Wall-Mounted Mug Rack DIY
–>>Keep reading to learn how to make this Dollar Tree Farmhouse Wall-Mounted Mug Rack DIY!
DIY Dollar Store Farmhouse Ladder
–>>Keep reading to learn how to make a DIY Farmhouse Ladder For $3!
$1 Tiered Tray DIY
–>>Learn how to make a tiered tray for just a $1 with this Dollar Tree hack!
Download the Free Printable Labels…

Psssssttt…Right now I’m offering FREE access to our Digital Resource Library to all of our newsletter subscribers. Your private access includes dozens of free printable crafts, home decor and organization guides. Hurry up and grab your freebies here! (Access instructions are sent after subscribing).
Disclaimer: This post may contain affiliate links or a sponsored post. All opinions are always 100% mine and I don’t partner with any product or company that I don’t use and love. Please see our Full Disclosure for more information.
 DIY Stamped Books with Free Printable Covers (Farmhouse Decor)
[…] Dollar Tree Over-the-Door Organizer by Simple Made Pretty […]