If you’re a blogger and have thought about creating a private digital resource library for your readers, but are unsure where to start, this post is for you! I’m sharing easy to follow, step-by-step instructions on How to Create a Private Digital Resource Library in WordPress.
Why create a private digital resource library?
I created a private digital resource library as a simple solution for my subscribers to find all my downloadable files in one place on my blog. If you subscribe to my blog, you know my library is filled with tons of freebies (if you’re not a subscriber, go here to get free access!).
If you offer several printable files or opt-in freebies for your subscribers, an easy solution is to offer a private library rather than setting up and sending PDF files to subscribers.
Grow your subscriber list with a digital resource library
As soon as I set up my private digital library, my subscriber list skyrocketed!
You can see in the image below when I first started my private library in May 2016, I had very little subscribers. Then in December 2016, my list skyrocketed!

Why grow your subscriber list?
Most of the money I’ve made from my blog has been through my email list (which you can read more about in this post) and I have complete control over my list, unlike social media sites that are constantly changing rules and algorithms.
How to Create a Private Digital Resource Library in WordPress
Let’s get started so you can see how easy creating a digital library in WordPress really is!
In your WordPress account, go to Pages and choose Add New.
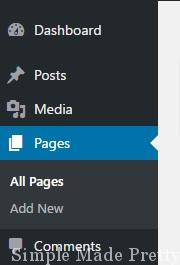
Name your new page and under the Publish section on the right, select Visibility and choose Password Protected.
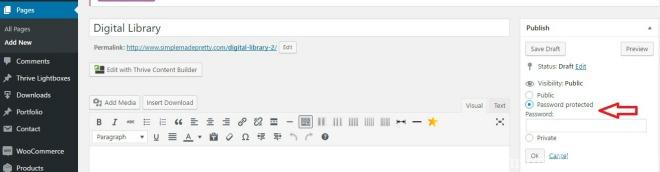
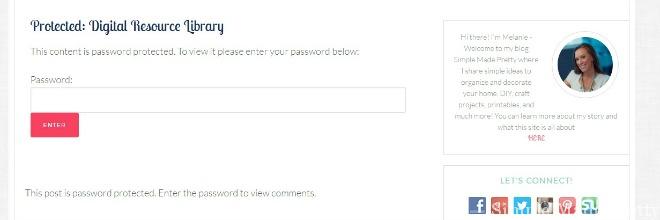
Enter a password and select the OK button underneath it. Add your files to your library and Publish the page. You can add the page to your menu or leave it off, it’s up to you. I provide my subscribers with the link and password once they confirm their subscription. The page will look like the below picture when they click on the link.
How to add digital files to your library
My library currently has a column/row (formula) and I use thumbnail pictures that link back to the original post (for more instruction) and the actual PDF file (to download) displays underneath each photo.

In my opinion, it is helpful to have visual elements so your subscribers know what they are downloading so I suggest adding images above your PDF files on your assigned digital library page. To add a PDF file to the page, you will need the file code once uploaded to your WordPress account. I use a plugin (Download Monitor) which makes it easy to track and analyze which of my printable files are performing best and it supplies the code.
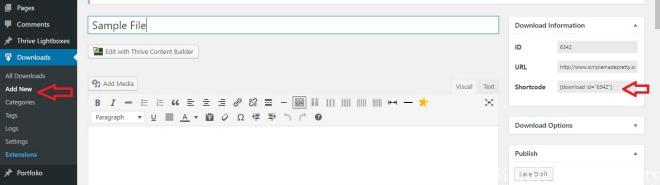
If you are using the Download Monitor plugin, go to Download, Add New, name your file, and take note of the shortcode for the file (download id). FYI, the name that you give the file is what will appear on your site when you insert the code.
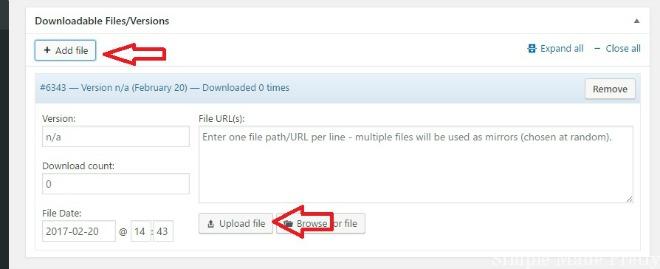
Scroll down until you see the Add File button and click on it. Then click on the Upload File button and upload your PDF. Scroll back up and select Publish and your file will be added to your WP account.
You can insert the shortcode for the PDF file anywhere on your site including your private digital resource library 🙂
Creating a private digital resource library is easy than you think! By following these simple steps you can increase your subscribers while storing all of your digital files in one easy to find space on your website.
You might also like…


Psssssttt…Right now I’m offering my Blogging for Business Time Management Guide for FREE! All you have to do is subscribe HERE and I’ll send you my guide for how to manage your time and create a work-life balance while creating your blog business!
Disclaimer: This post may contain affiliate links or a sponsored post. All opinions are always 100% mine and I don’t partner with any product or company that I don’t use and love. Please see our Full Disclosure for more information.