• Menu
  • Skip to left header navigation
  • Skip to right header navigation
  • Skip to primary navigation
  • Skip to secondary navigation
  • Skip to main content
  • Skip to primary sidebar
  • Skip to footer

Before Header

  • Facebook
  • Instagram
  • Pinterest
  • Twitter
  • YouTube

Simple Made Pretty

Creative DIY Ideas & Home Solutions

  • Home
  • Start Here
    • About
    • Contact
    • Privacy Policy
    • Work With Me
    • How to Blog
  • Free Printables
  • Videos
  • Shop
    • My Amazon Store
    • Etsy
  • Members
  • Home
  • Latest Blog Posts
  • Start Here
    • About
    • Contact
    • Privacy Policy
    • Work With Me
  • Videos
  • Free Printables
    • Digital Resource Library
  • How to Blog
    • Blogging Tips
  • Shop
    • Etsy
  • My Amazon Store
  • Members
  • DIY & Crafts
    • Dollar Store DIY
    • Cricut Crafts
    • xTool Projects
    • Essential Oils
    • Sewing
    • Kid’s Crafts
  • Home Decor
    • Bathroom
    • Bedroom
    • Camper
    • Craft Room/Office
    • Entryway
    • Family Room
    • Kitchen
    • Outdoors
  • Organizing
    • Cleaning
    • Meal Planning
      • Recipes
  • Holidays
    • Christmas
    • Easter
    • Father’s Day
    • Halloween
    • July 4th
    • Mother’s Day
    • Thanksgiving
    • New Year’s
    • Valentine’s Day
    • Fall
    • Spring
    • Summer
    • Winter
  • DIY & Crafts
    • Dollar Store DIY
    • Cricut Crafts
    • xTool Projects
    • Essential Oils
    • Sewing
  • Home Decor
    • Bathroom
    • Bedroom
    • Camper
    • Craft Room/Office
    • Entryway
    • Family Room
    • Kitchen
    • Outdoors
  • Organizing
    • Cleaning
    • Meal Planning
      • Recipes
  • Holidays
    • Christmas
    • Easter
    • Father’s Day
    • Halloween
    • July 4th
    • Mother’s Day
    • New Year’s
    • Thanksgiving
    • Valentine’s Day
    • Fall
    • Spring
    • Summer
    • Winter

How To Make A Farmhouse Wood Sign

January 29 By //  by Simple Made Pretty Editor

This post may contain affiliate links or a sponsored post.

2.7K shares
  • Share
  • Tweet

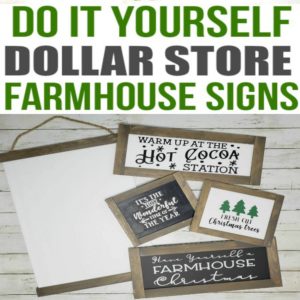
These DIY Farmhouse Signs are so cheap and easy to make, you will find yourself addicted to making them for every room in the house. This is one of the easiest and cheapest methods I use to decorate the walls in our home. I’ve tried canvas from art stores and used scrap wood (like wood pallets) but this method with How To Make A Farmhouse Wood Sign is my favorite and totally transforms the space!

How to make a huge farmhouse sign, DIY farmhouse sign, build wooden farmhouse signs, how to make a farmhouse sign, how to make your own farmhouse signs, farmhouse sign, farmhouse wood sign, farmhouse sign decor, farmhouse kitchen sign, farmhouse sign stencils, farmhouse Christmas sign, How To Make A Farmhouse Wood Sign, farmhouse decor, DIY farmhouse decor, farmhouse decor signs DIY projects, Farmhouse decor signs wall art, kitchen, entryway, front porches #DIYfarmhousesigns

This tutorial explains how to make a huge farmhouse sign and farmhouse sign decor. These DIY farmhouse signs can be used as farmhouse kitchen signs, outdoor signs, farmhouse Christmas signs, and much more! Use your creativity to build wooden farmhouse signs using farmhouse sign stencils and Cricut-made images like I did. I get asked ALL the time how to make farmhouse signs because I love using farmhouse signs in our decor. Keep reading to learn how to make your own farmhouse signs!

How to make a huge farmhouse sign, DIY farmhouse sign, build wooden farmhouse signs


In Case You Are in a Hurry:

✅You can go here to get images to create your own decals with a Cricut or Silhouette machine for your DIY farmhouse signs!

You don’t even need a saw to cut the wood! You could literally make this wooden wall art in your kitchen in less than an hour!

My favorite online resource to find SVG files to make Cricut craft projects is DesignBundles.net!–>>Click here to see the latest bundle with the best SVG files online!

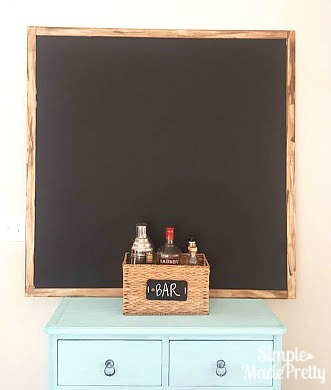
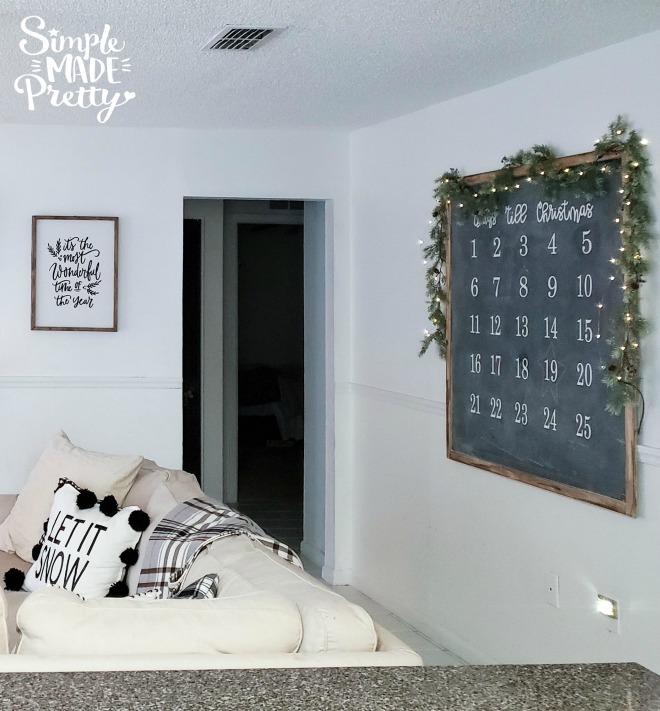
I’ve used this tutorial to make this over-sized farmhouse chalkboard…

Learn how to make this over-sized chalkboard for kids or a farmhouse style home decor!

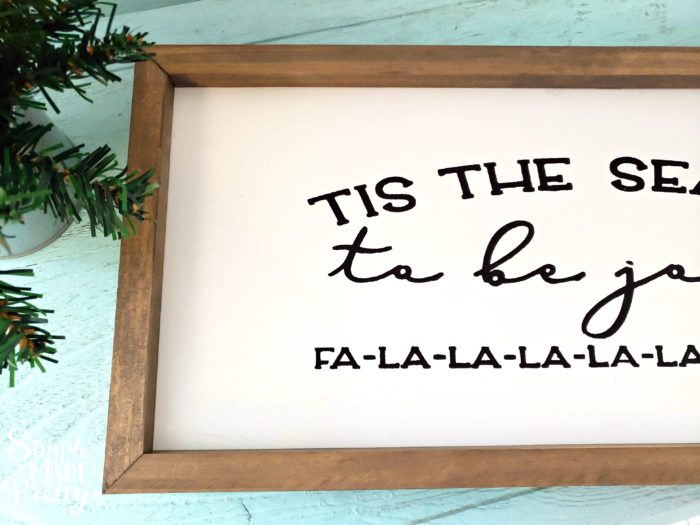
And this farmhouse style quote in our master bedroom…

Learn how to make this DIY farmhouse style wall picture art for less than $12!

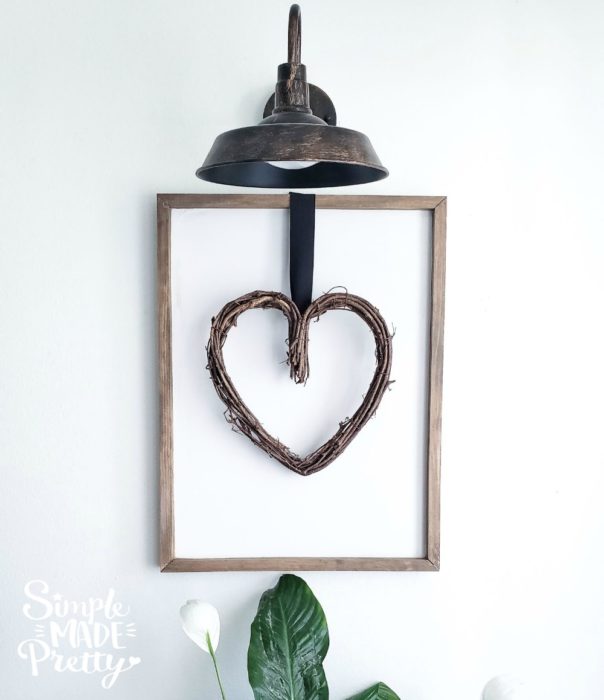
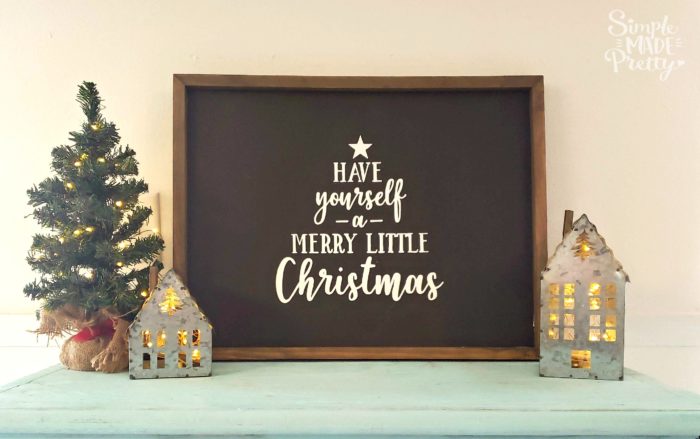
Also these over-sized farmhouse signs for a huge wall…

Learn how to make over-sized DIY artwork to reduce clutter on your walls!

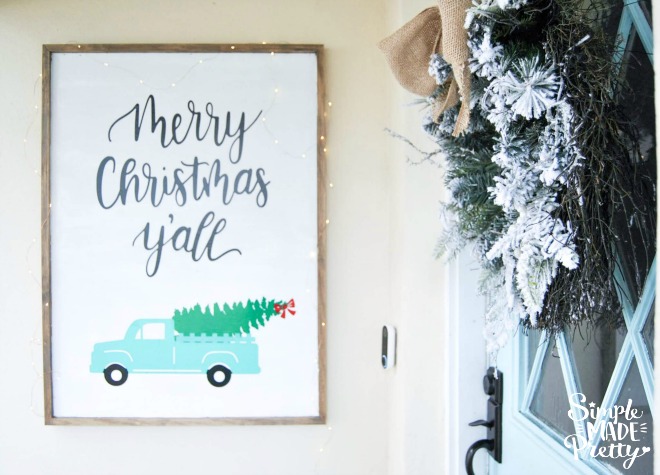
I also used this tutorial to make this huge farmhouse sign above our bed (which is a very popular size sign over on Instagram).

DIY Christmas décor ideas, Dollar Tree Christmas Décor, Farmhouse Christmas Decor, Buffalo Plaid Christmas Decor, Christmas fireplace decor, Christmas farmhouse decor, coastal Christmas decor, modern Christmas decor, buffalo check Christmas decor, turquoise Christmas decor, Christmas decor trends 2019, Dollar store Christmas decorations, Cricut Christmas, farmhouse Christmas Tree #farmhousechristmas #dollarstorechristmas

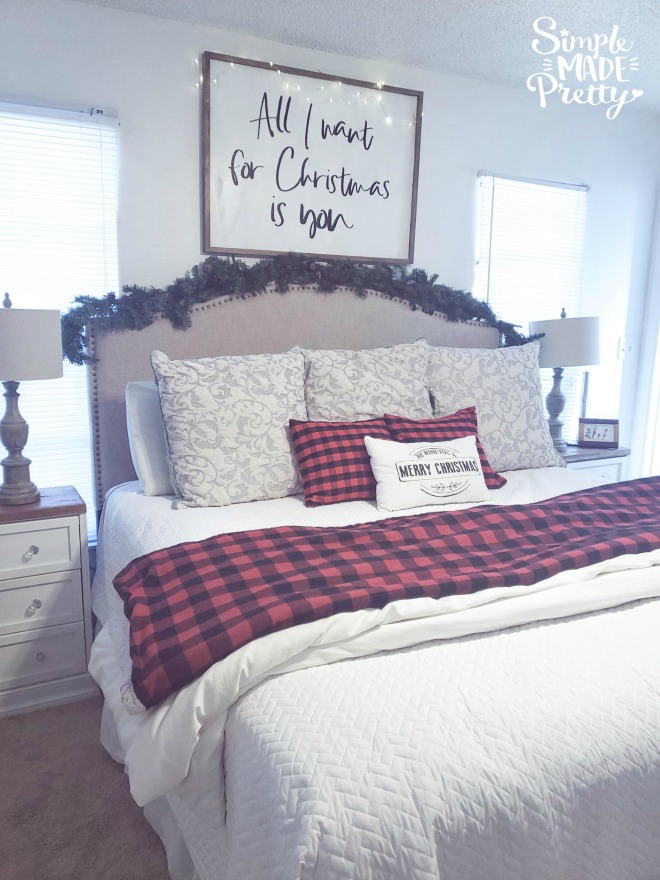
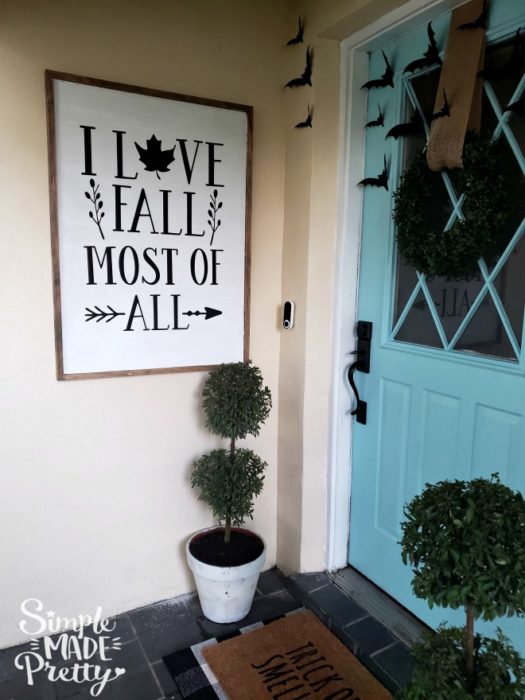
The farmhouse sign above our bed is the same size as this DIY sign by our front door…

Read how to make your own Farmhouse style signs for only $12 in this post! I love Fall most of all Farmhouse sign, DIY farmhouse sign, DIY fall signs, Fall front porch signs

I get asked ALL the time how to make the farmhouse signs in our home so I put together this post with How To Make A Farmhouse Wood Sign!

You might not notice this detail in the picture, but some of these signs have the wood frame glued right to the front. But we have other signs where the frame is attached to the side. My hubby cut a groove in the side of pine in order to attach to the side.

How to make a huge farmhouse sign, DIY farmhouse sign, build wooden farmhouse signs

Double-Duty Hack

–>>I also revealed a HACK in my Instagram stories with how I keep our farmhouse signs to a minimum (so I don’t have a bunch of seasonal signs in storage)…

The trick is to use both sides of the sign! 

I paint both sides of the signs we build! I try to use one side all year long, then the other side I will add a holiday image or leave it blank (to hang seasonal banners, wreaths, or paper-cut images). I simply move the sawtooth picture hanger to the other side (the holes are so small that no one will notice them!).

Here is a 24″ x 18″ sign with a (screen printed) Christmas image…

How to make a huge farmhouse sign, DIY farmhouse sign, build wooden farmhouse signs
Back of the Sign (Christmas)

Here is the same 24″ x 18″ sign painted black (no image) on the other side…

How to make a huge farmhouse sign, DIY farmhouse sign, build wooden farmhouse signs
Front of the sign (Blank)

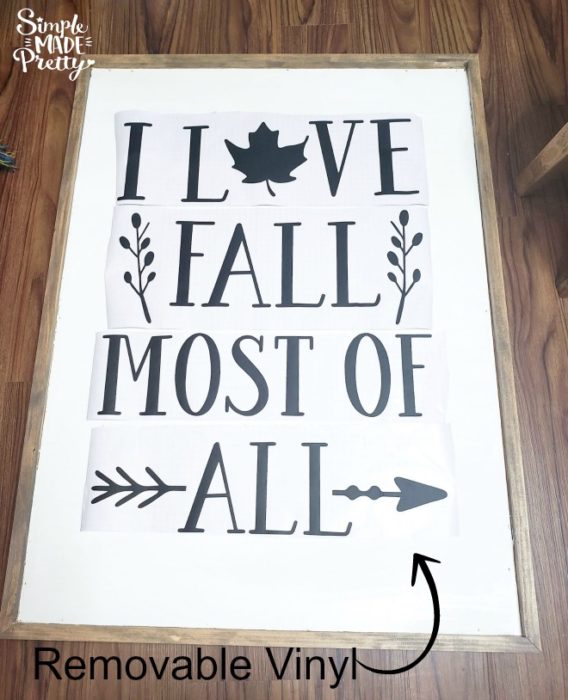
–>>Another HACK to minimize your seasonal signs is to use removable vinyl. I use my Cricut machine and cut my own vinyl images and add to our signs. I use removable vinyl and at the end of the holiday, I will replace it with an image for the next holiday 🙂

Here’s our Over-Sized Farmhouse Chalkboard Sign with Removable Vinyl for Christmas…

DIY Christmas décor ideas, Dollar Tree Christmas Décor, Farmhouse Christmas Decor, Buffalo Plaid Christmas Decor, Christmas fireplace decor, Christmas farmhouse decor, coastal Christmas decor, modern Christmas decor, buffalo check Christmas decor, turquoise Christmas decor, Christmas decor trends 2019, Dollar store Christmas decorations, Cricut Christmas, farmhouse Christmas Tree #farmhousechristmas #dollarstorechristmas
Our Over-Sized Farmhouse Chalkboard Sign with Removable Vinyl for Christmas

And here is the same Over-Sized Farmhouse Chalkboard Sign with Removable Vinyl for Valentine’s Day…

How to make a huge farmhouse sign, DIY farmhouse sign, build wooden farmhouse signs
Our Over-Sized Farmhouse Chalkboard Sign with Removable Vinyl for Valentine’s Day…


I hope these tips help give your signs double-duty so you can enjoy them no matter what time of year it is!

How To Make A Farmhouse Wood Sign

If you have a miter saw and want to cut these yourself, great! Otherwise, bring the measurements to your local Home Depot or Lowes and they will cut the wood for you in the store. Having THEM cut the pieces for you will save you a ton of time!

Supplies:
  • One 4 x 4 light-weight piece of plywood (I found ours at Home Depot for $9.97 in the plywood section)
  • Three – Six 2 x 4 molding pieces (I found ours at Lowes for $2.49 each in the molding section) OR 1-inch pine
  • Gorilla Glue
  • Nails and a Hammer OR a Riobe Airstrike Nailgun
  • Miter Saw (optional otherwise have the store cut for you)
  • Paint (for the plywood) This is my favorite color & texture paint to use
  • Stain or paint (for the frames) This is my favorite stain color to use
  • Paint brushes/rollers
  • Foam brush/rag (for staining the wood frame)
  • 1-4 Sawtooth picture hanger (optional, if you are hanging)

If you aren’t cutting yourself:

Before you ask the store to cut the wood for you, you need to have the measurements.

  • If you plan to make one large 4 x 4 (like my chalkboard or the “Living More, With Less” artwork), you won’t need to cut the plywood but you will need to cut the frames to fit. You will need 4 total pieces of wood molding and ask that 2 pieces be cut to 45 inches.
  • If you plan to make two large 2 x 4 (like my “Never forget my goodnight kiss” artwork), you need to ask to have the plywood cut in half. You will need 6 total pieces of wood molding and ask that 2 pieces be cut to 21 inches.
  • If you plan to make a sign the size of the one above our bed (Christmas) and front door (Christmas), you will need the plywood cut 27.5″ x 38.” I’d recommend cutting the pine yourself for the frame we used on those signs, we cut the wood at an angle and used a miter saw to cut a groove inside (for the plywood to sit inside the frame).
  • Make sure everything fits nicely before you leave the store!

If you are cutting yourself:

I highly recommend you have some basic wood-working skills before attempting this project. My hubby does most of the cutting but I can do it in a pinch… I definitely feel more comfortable letting him do the cutting since he has more experience with the machines and cutting the wood perfectly to make these signs.

Directions:
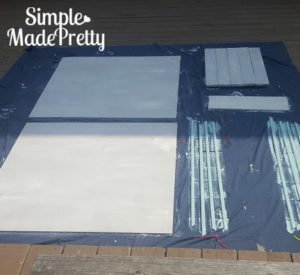
  1. Once you have all the wood cut to size, start painting. Use a roller to paint the plywood to speed things up and create a flat surface for the chalkboard paint. I used a matte white paint for the other designs. I painted the frames teal for the “Living More, With Less” artwork and the other designs I used a wood stain to create a more rustic look. The possibilities are endless! However, to save money, I chose to use paint and stain that we already had. Painting Over sized pictures
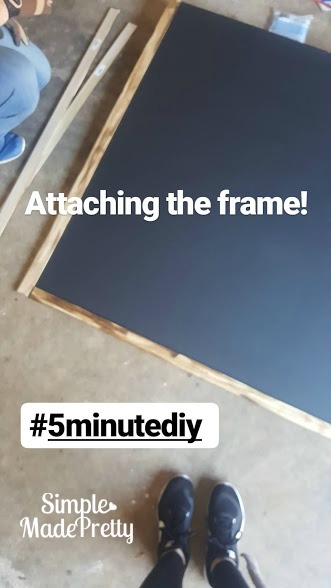
  2. Once the paint is dry, use gorilla glue to adhere the frame to the front edge of the plywood. Make sure to arrange the cut pieces to fit before you start gluing things down. Secure the frame with a few nails all around. 
  3. Attach a sawtooth picture hanger to the back (if you are hanging).
  4. Add vinyl letters or stencil a design on your wall art. How to make a huge farmhouse sign, DIY farmhouse sign, build wooden farmhouse signs
  5. I used a Cricut Explore Air to cut vinyl phrases and quotes. You can find tons of ideas and SVG files for your Farmhouse signs HERE 🙂Cricut Explore vinyl to make a DIY over sized Farmhouse sign

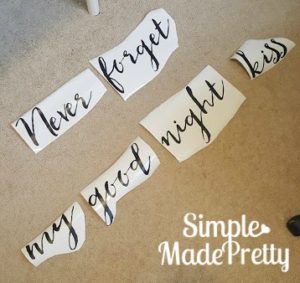
You can find the SVG file to make the “Never forget my goodnight kiss” artwork here. The SVG file can be used with vinyl cutting machines such as a Cricut or Silhouette machines.

If you have any questions about using a Cricut cutting machine, check out my Cricut courses here!

The cost

The total cost to make two HUGE 2 x 4 pieces came out to be $12 each and only took a couple of hours. I’ve seen similar ones selling for $40+ each online. Now you can save some money by doing it yourself!


This DIY Farmhouse Signs tutorial can be used to create many different pieces to decorate your home.  I chose to paint and stain colors to create a rustic, farmhouse style in our home, but you can easily change the look with the paint color and try cutting different size farmhouse signs.

P.S. A majority of my DIY’s are featured in my Instagram stories. You can watch me make more crafts and DIY ideas if you follow me on Instagram and click on my bio pic to see my latest story 🙂 I post tons of videos and pictures in REAL time!


You might also like…

You wouldn't believe these farmhouse signs are made using dollar store items! DIY Farmhouse decor dollar store, DIY Dollar Store Christmas Decor, DIY Dollar Store Crafts, Dollar store DIY decor, DIY Farmhouse sign, DIY farmhouse sign Cricut, DIY farmhouse sign tutorial, Farmhouse style signs, DIY Christmas decorations #dollarstorecrafts #diyfarmhousesigns #dollarstorechristmas


tiered tray DIY dollar stores, tiered trays, 3 tiered serving tray, 2 tier serving tray, tiered tray, tiered tray DIY, how to make a tiered tray DIY, DIY farmhouse tiered tray, tiered tray ideas, tiered tray  spring, hobby lobby tiered tray , fall tiered tray, tiered tray styling, Easter tiered tray, tiered tray fruit, tiered tray centerpiece, tiered tray wedding, tiered tray tea, tiered tray modern, tiered tray rae dunn, rustic tiered tray, tiered tray DIY tutorials, plate stands, cake pans


DIY Reverse Canvas Dollar Tree Sign, reverse canvas sign, reverse canvas ideas, reverse canvas DIY, reverse canvas sign ideas, reverse canvas, reverse canvas tutorial, reverse canvas Cricut, reverse canvas quotes, reverse canvas farmhouse, reverse canvas kitchen, reverse canvas SVG, reverse canvas HTV, reverse canvas love, 3d art, 3d art on canvas, 3d art DIY, black reverse canvas, Cricut canvas projects, Cricut projects, Cricut canvas signs, Cricut canvas ideas,


This gather wood sign was really easy to DIY! I wanted a Gather sign for the dining room and now I have one without spending a ton of money! It creates the perfect rustic farmhouse style decor that I was looking for but couldn't find in a store. She has lots of other DIY craft and decor ideas on her blog!


I love mason jar crafts and farmhouse decor! If you are looking to add farmhouse style to your home then you should check out this article with some awesome mason jar DIY ideas!


Find out how I made these DIY Burlap Baskets using Plastic Dollar Store Bins! DIY, Dollar Tree bins, Dollar store bins, Dollar Store DIY, Do it yourself burlap baskets, burlap baskets


I love these fixer upper ideas for the kitchen, living room, bathroom, etc! I was looking for simple decor and home improvement ideas so we could flip our house for sale to make money fast. These ideas are cheap and easy if you have home improvement projects on a budget.


Choosing interior paint colors for your home can be overwhelming but with these tips & tricks, you can easily pick the perfect colors for your home.


Psssssttt…Right now I’m offering FREE access to our Digital Resource Library to all of our newsletter subscribers.  Your private access includes dozens of free printable crafts, home decor and organization guides.  Hurry up and grab your freebies here!  (Access instructions are sent after subscribing).

Disclaimer: This post may contain affiliate links or a sponsored post. All opinions are always 100% mine and I don’t partner with any product or company that I don’t use and love. Please see our Full Disclosure for more information.

Filed Under: Crafts, Cricut Crafts, Home Decor, Home Projects Cricut Craftfest Cricut Projects

Previous Post: «How to Cut Fabric with Cricut How to Cut Fabric with Cricut Maker
Next Post: Dollar Store Pencil Sharpener Free Printable Valentine Cards Dollar Store Pencil Sharpener Free Printable Valentine Cards, Valentine cards sharpener, free printable valentines, dollar store crafts, dollar store DIY, printables valentines, printable valentines day cards, free valentines printables, free printable valentine, valentine cards for kids, valentine cards DIY, printable Valentine's Day cards for kids, dollar store valentine crafts, dollar store valentines gifts, dollar store Valentine's gift ideas»

Reader Interactions

Trackbacks

  1. How to Choose The Right Interior Paint Colors for Your Home (February 2019) says:
    February 5 at 5:19 pm

    […] –>>I also use Chalked Paint to make my own Farmhouse signs! […]

    Reply

Primary Sidebar

Recent Posts

Dollar Tree DIY Garden Hooks

Dollar Tree DIY Garden Hooks

home office curtain wall

Home Office Decor Refresh

green bedroom decor

Thirteen-Year-Old Girl Bedroom Makeover

Live Life in Full Bloom - Melanie Simple Made Pretty

Live Life in Full Bloom – Free Flower-Themed SVG Files

Footer

-MORE ABOUT MELANIE-

Hi there! I'm Melanie - Welcome to my blog Simple Made Pretty where I share ideas to organize and manage your home, craft projects, printables, and much more! You can learn more about my story and what this site is all about HERE

-COPYRIGHT & PRIVACY POLICY-

All content on this site is copyright © Simple Made Pretty LLC and simplemadepretty.com. Many of my posts contain affiliate links. If you click on an affiliate link and buy something, I may receive a small commission. Read more on my PRIVACY POLICY PAGE.

LOOKING FOR SOMETHING?

  • Facebook
  • Instagram
  • Pinterest
  • Twitter
  • YouTube
  • Blog
  • About
  • Work With Me
  • Privacy Policy
  • Shop

Copyright © 2023 · Mai Lifestyle Pro On Genesis Framework · WordPress

2.7K shares