How To Build a Freestanding Arbor
Adding a DIY arbor to a garden can provide a beautiful focal point, add vertical interest, and create a welcoming entrance. It also offers a place for climbing plants to grow and can provide shade during sunny days. Additionally, it can increase the value of your property. Keep reading to see this Easy and Affordable DIY Garden Arbor.
In case you’re in a hurry…
SHOP OUR SIDE YARD GARDEN

How do you make a simple garden arbor?
Build a simple arbor using pressure-treated wood using a minimal design. Keep your arbor design simple and you can build one in less than an hour!
What is the best wood to build a garden arbor?
We used pressure-treated pine found in any home improvement store. Pressure-treated wood has been treated to withstand elements and you can still paint and stain it for longer life.
Side Yard Garden Arbor Addition
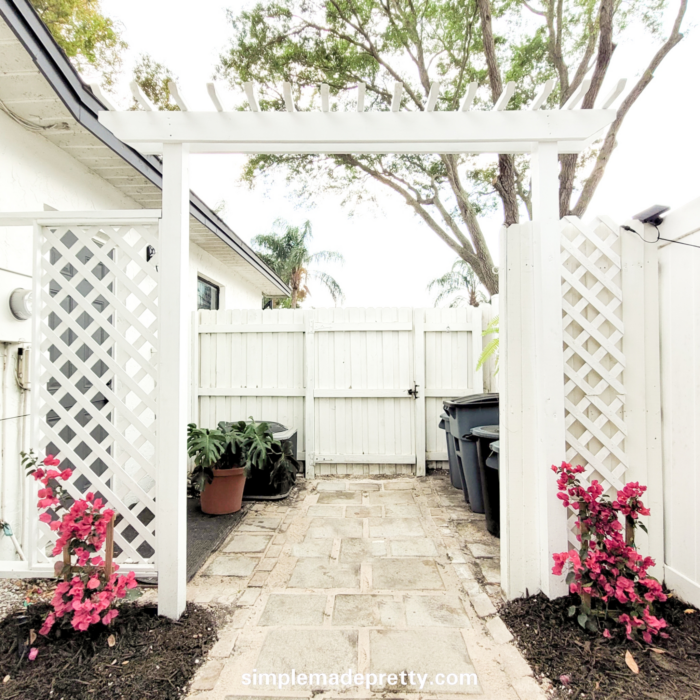
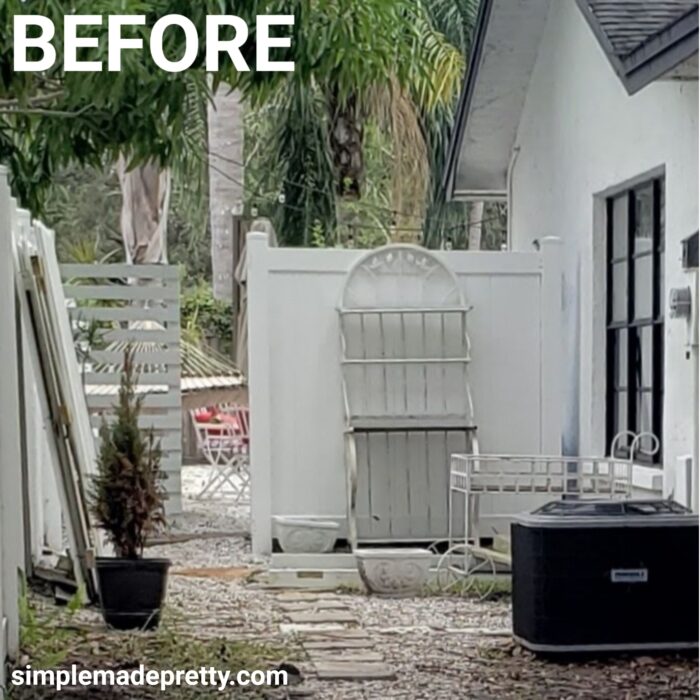
Our sideyard was basically a dumping ground at one point in time. A few years ago, I decided it was time to do something about it and turn it into the garden of my dreams. I started by planning a DIY Paver Walkway, adding some raised garden beds, a flower bed along the fence, and now this DIY Arbor.
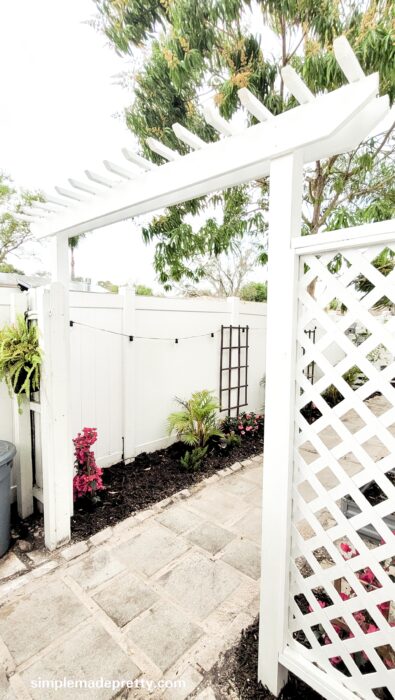
Since the plants and flowers are new, they are still relatively small. I can’t wait for them to grow and take over the garden! The palm trees can get 30 feet tall and the purple/pink bougainvillea grows like a vine. I also planted a tropical climbing flower with a trellis on the fence and some foxtail ferns.

DIY Garden Arbor
I was tempted to buy an arbor on Amazon but then I calculated the cost to build one ourselves and it just made more sense to DIY a garden arbor.
Supplies:
- Power drill
- Table Saw
- Circular Saw
- Post Hole Digger
- Level
- (2) 4 x 4 x 10 Pressure Treated Wood Posts
- (2) Deck Boards (1.25 x 6 x 8)
- (3-4) 2 x 2 x 8 Pressure Treated Wood
- 2.5-inch Deck Screws
- Paint/Wood Stain
Instructions:
- Gather supplies.
- Measure the space and decide how tall and how wide the arbor will be (our opening measures 66″ x 86″).
- Dig the holes so the posts are 2 feet underground. Always call 611 before you dig so you don’t hit any utility lines! We dug right next to our electrical box and we knew exactly where the line was.
- Place the wood posts in the hole, making sure they are level.
- Backfill the hole around the post. You may want to fill it with concrete depending on where you live. We did not need concrete because we attached our arbor to an existing fence and our house.
- Measure and cut the deck board. You can do any design on the ends, we just cut a triangle edge.
- Attach 1 deck board in the front at the top and 1 to the back.
- Cut the 2 x 2 x 8’s to your preferred length (ours are 18 inches and we cut them at a slant).
- Arrange them at the top in your preferred distance (ours is 5 inches in between each piece. We used a 5-inch piece of wood and just placed it in between each slat).
- Attach with deck screws (or a nail gun if you prefer).
- Stain or paint it and enjoy!
We added a lattice wall that connects to our house. We left a gap between the wall and the house because all of our utility boxes are right there and we needed to keep them accessible.
We planted Bougainvillea in front of the arbor and will train it to grow in an arch over the arbor. I can’t wait to watch it grow and see how beautiful it gets! I imagine it will be the perfect place to take pictures 🙂
Garden Arbor DIY Wrap Up
A DIY garden arbor can add a beautiful and functional element to your yard. A garden arbor can enhance the beauty of your garden and provide a focal point for climbing plants. It can also create a shaded area for relaxation and improve the overall value of your property. Building your own arbor over purchasing one will save you money and will look better as it ages.
Side Yard Garden Ideas
Here are some more side-yard garden ideas!
- Create a pathway with stepping stones and plant low-maintenance ground covers or succulents on either side.
- Install trellises or garden screens and grow climbing plants like ivy, roses, or honeysuckle.
- Build raised garden beds and grow vegetables or herbs.
- Create a zen garden with gravel, rocks, and a few carefully placed plants.
- Plant a variety of colorful flowers and shrubs to create a vibrant and inviting space.
Shop Our Garden
Watch the Video for this Garden Arbor
You Might Also Like…
Super Cute, Budget Friendly DIY Painted Rocks To Mark Your Garden
Psssssttt…Right now I’m offering FREE access to our Digital Resource Library to all of our newsletter subscribers. Your private access includes dozens of free printable crafts, home decor and organization guides. Hurry up and grab your freebies here! (Access instructions are sent after subscribing).
Disclaimer: This post may contain affiliate links or a sponsored post. All opinions are always 100% mine and I don’t partner with any product or company that I don’t use and love. Please see our Full Disclosure for more information.
 Dollar Tree Iron-On Material Review