DIY Luggage Tags with Cricut Explore 5 (Budget Travel Craft)
If you love simple travel accessories and budget-friendly crafts, these DIY luggage tags made with the Cricut Explore 5 are such a fun project.
I recently picked up the new Cricut Explore 5, and these luggage tags were one of the first projects I made with it.
They’re made with:
- Dollar Tree faux leather
- Dollar Tree ribbon
- iron-on vinyl
- stencil material
- and a small printable contact info card
The best part? They look like something you’d buy in a boutique travel shop… but they cost just a few dollars to make.
These tags are perfect for:
- family vacations
- cruises
- summer travel
- kids’ luggage
- backpacks and diaper bags
And if you’re a Cricut user, this project is beginner-friendly but still looks polished and modern.

🔽 WATCH ON YOUTUBE 🔽
🎥 Watch the 15-minute video above — then scroll for more freebies, links & resources below!
Step-by-Step Cricut Tutorials
Want help turning these ideas into actual products?
If you’re looking at this list and thinking…
👉 “Okay, but how do I actually make this?”
I’ve got you 💛 Inside my step-by-step Cricut workshops, I walk you through exactly how to create products you can actually sell — from start to finish.

You’ll find tutorials for things like:
- magnets
- candles
- cards
- decals
- wearables
- personalized gifts
- and more
Beginner-friendly Cricut projects you can make and sell
Why I Bought the Cricut Explore 5
One of the main reasons I decided to upgrade to the Cricut Explore 5 was actually the design.
If you’ve been following my craft room updates, you know I recently redid my space with neutral beige decor and a Pottery Barn–inspired aesthetic.
My old Cricut machines worked great, but the new Explore 5 has a much more modern, clean look, and it fits perfectly in my updated craft room.
I know that might sound funny, but when you spend a lot of time crafting, the look of your workspace matters too.
And honestly, I’m loving it so far.
It feels like a fresh start for new projects — starting with these travel tags.

SAVE $25 on Cricut Explore 5
If you’re planning to buy the Cricut Explore 5 + Essentials Bundle, there’s an easy trick to save about $25 instantly. When you add the Explore 5 Essentials Bundle to your cart through my link, also add a Cricut Access subscription ($9.99/month) before checking out. Cricut automatically applies 10% off your entire purchase plus free shipping, which usually saves around $25 or more depending on your bundle. After your order arrives, you can simply set a reminder to cancel Cricut Access within 30 days if you don’t plan to keep the membership. It’s a quick way to lower the cost of your new Cricut while still getting all the tools and materials you need to start crafting right away.

Materials Needed
To make these DIY luggage tags, you’ll need:
Supplies
- Cricut Explore 5
- Dollar Tree faux leather sheets
- iron-on vinyl (HTV)
- Tacky glue
- Clear plastic sheets
- Luggage Tags SVG Bundle
Since I used Dollar Tree materials for these luggage tags, you may also love my roundup of Cricut blanks you can buy at Dollar Tree

Why Dollar Tree Faux Leather Works Great
Dollar Tree faux leather is surprisingly good for Cricut projects.
It’s:
- lightweight
- flexible
- easy to cut
- affordable
However, it can feel a little flimsy, which is why I recommend adding a foam layer inside the tag.
That small detail makes the luggage tag feel much more sturdy.
The Perfect Size for Luggage Tag Inserts
The contact info card inside the tag is typically business card size.
Standard business card size:
3.5 inches × 2 inches
For DIY tags, I usually make mine slightly smaller:
3.25 inches × 1.75 inches
This gives a small margin around the window so the card slides in easily.

How to Make Cricut Luggage Tags
Step 1: Cut the Faux Materials
Using your Cricut Explore 5, cut the luggage tag shape from the faux leather, cut the window using plastic, and cut the iron on quotes.
The SVG includes:
- the tag shape
- window opening
- hole for the ribbon strap
- cute travel quotes


Step 2: Add the Iron-On Vinyl Design
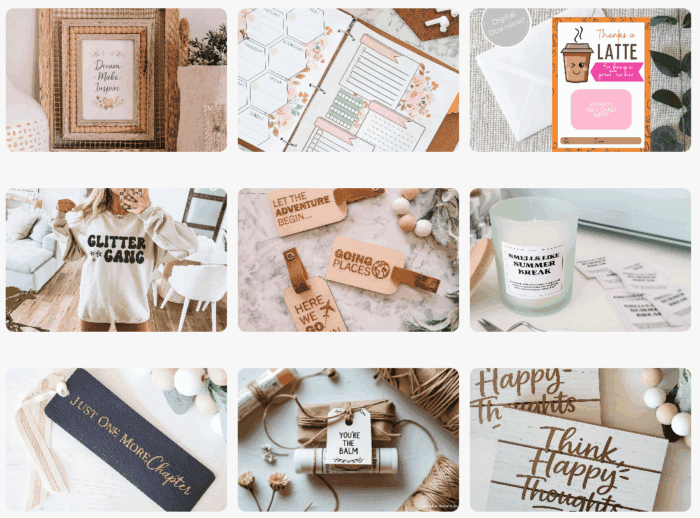
I used simple travel phrases like:
- Let the adventure begin
- Going places
- Here we go again
Apply the iron-on vinyl to the faux leather using a heat press or Cricut EasyPress.


Step 3: Assemble the Tag
Layer the materials like this:
- Faux leather front
- Clear plastic window
- Space for the Contact info card
- Craft foam layer (optional)
- Faux leather backing
Glue the layers together around the edges.


Step 5: Add the Ribbon Strap
Thread Dollar Tree ribbon through the hole to create the luggage strap.
You can also use:
- leather cord
- nylon straps
- luggage loops
If you enjoy beginner-friendly projects like this, don’t miss my most popular DIY projects for more reader favorites.

💰 Could you sell this on Etsy?
This is the exact type of Cricut project that can turn into a product.
👉 If you want help turning ideas like this into your first sale, check this out:
Learn how to sell Cricut crafts
Free Printable Contact Card
The back of the luggage tag includes a small insert card with spaces for:
- name
- address
- phone
These cards are easy to print and trim. DOWNLOAD THEM HERE.
AI-proof content idea:
Add a free printable sheet with 10 luggage tag cards per page.
Printables are valuable because AI search results cannot recreate downloadable assets easily.
Free SVG File for YouTube Members
The luggage tag SVG file is free for my YouTube Members this month only.
After this month:
- Craft & Create Club members will still have access to it anytime inside the SVG vault.
I’ll also link the SVG listing on Etsy if you’d prefer to grab it there.
SVG + Printables Vault Access
Want instant access to my SVG and printables library?
Inside the SVG + Printables Vault, you’ll get access to a growing collection of ready-to-use designs, printable resources, and creative files you can use for crafts, gifts, seasonal projects, and more.
Inside the vault:
- SVG files for Cricut projects
- printables for gifts, holidays, and everyday use
- a growing library you can come back to again and again
Member Library Access
Your go-to vault for SVGs + printables
Browse a growing collection of digital files for Cricut projects, seasonal crafts, printable gifts, and more.
Tips for Making Durable Luggage Tags
Here are a few tips I learned while testing these tags.
Use a Foam Layer
Adding 1–2 mm craft foam inside the tag prevents bending.
Add Eyelets
Install a metal grommet where the ribbon goes through.
This prevents tearing over time.
Waterproof the Window
Use:
- stencil sheet
- thin acrylic
- laminating pouch plastic
- report cover plastic
These materials protect the contact card from rain or spills.
Budget Breakdown
Approximate cost per tag:
| Item | Cost |
|---|---|
| Faux leather | $1.25 |
| Ribbon | free/recycled |
| Vinyl | small scrap |
| Plastic window | free/recycled |
Estimated total per tag:
| Material | Cost | Tags per sheet | Cost per tag |
|---|---|---|---|
| Dollar Tree faux leather | $1.25 | 16 | $0.08 |
Dollar Tree faux leather sheet = $1.25
$1.25 ÷ 16 tags = $0.08 per tag
Even adding:
- ribbon
- vinyl
- foam
- window plastic
These Cricut DIY luggage tags are still likely well under $1 each, which is pretty amazing compared to store-bought tags ($10–$20).

Why I Love Travel Crafts
One thing I’ve learned over the years is that small personalized travel items make trips more fun.
Things like:
- custom luggage tags
- matching family travel accessories
- DIY packing organizers
- They make travel feel more intentional and special.
And I love that Cricut projects allow you to create things that are both practical and beautiful.
And if you’re making handmade travel gifts, check out these Dollar Tree Cricut gifts for more easy ideas.
FAQs
What Cricut machine works best for luggage tags?
Most Cricut machines work well for faux leather, including:
- Cricut Explore 5
- Cricut Explore 3
- Cricut Maker
The Explore 5 is great because it cuts faux leather cleanly and supports a wide variety of materials.
Can Cricut cut faux leather?
Yes. Faux leather cuts well using:
- fine-point blade
- standard grip mat
You may need to use the faux leather setting in Design Space.
What can I use for the luggage tag window?
Good materials include:
- thin acrylic sheets
- laminating pouch plastic
- clear report covers
- packaging plastic
These materials are waterproof and flexible.
What size should luggage tag inserts be?
Standard luggage tag inserts are 3.5 × 2 inches (business card size).
For DIY tags, slightly smaller inserts work better:
3.25 × 1.75 inches
Can you make luggage tags with Cricut stencil material?
Yes.
Stencil material can be used for:
- decorative overlays
- backing layers
- reinforced windows

Final Thoughts
I’m honestly so happy with how these DIY luggage tags turned out.
They’re simple, affordable, and have that clean modern travel look I love.
Plus, it was the perfect first project to try with my new Cricut Explore 5.
Between the modern design of the machine, my updated craft room aesthetic, and projects like this, I’m feeling really inspired to create again.
If you’re planning a trip soon, these tags would make such a cute and useful craft.
Related Posts
- Cricut Blanks You Can Buy at Dollar Tree
- Most Popular DIY Projects from Simple Made Pretty
- Dollar Tree Cricut Gift Ideas
Step-by-Step Cricut Tutorials
Want help turning these ideas into actual products?
If you’re looking at this list and thinking…
👉 “Okay, but how do I actually make this?”
I’ve got you 💛 Inside my step-by-step Cricut workshops, I walk you through exactly how to create products you can actually sell — from start to finish.
You’ll find tutorials for things like:
- magnets
- candles
- cards
- decals
- wearables
- personalized gifts
- and more
Beginner-friendly Cricut projects you can make and sell
Psssssttt…Right now I’m offering FREE access to our Digital Resource Library to all of our newsletter subscribers. Your private access includes dozens of free printable crafts, home decor and organization guides. Hurry up and grab your freebies here! (Access instructions are sent after subscribing).
Disclaimer: This post may contain affiliate links or a sponsored post. All opinions are always 100% mine and I don’t partner with any product or company that I don’t use and love. Please see our Full Disclosure for more information.
 10 Years of Simple Made Pretty: The DIY Projects That Built This Creative Business