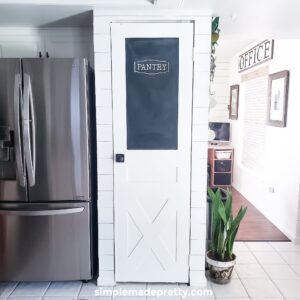
DIY Bifold Doors into Single Doors
I’m frequently asked how we updated our bifold doors into single doors so I put together this tutorial. Our bifold pantry door was the most asked about since we created a DIY faux barn door look. Watch the video below for more tips to turn a bifold closet door into a single door. This update is so easy, you will be wondering why you waited to so long to update to single doors Instead of bifold doors.
Print
Pin
Yield: 1 Door
Cost: $20
Supplies
- Crowbar
- Screwdriver or drill
- Razor Blade
- Door hinges
- Metal Plates
- Screws
- Magnetic Door Catch
- Metal Anchors (optional)
Instructions
- Gather supplies.
- Remove any molding outside the door. Our closet door had shoe molding around the outer inside frame and we used a razor blade, then crowbar and hammer to remove the molding.
- Push down the top roller guide to remove the door from the track. Then remove the roller guide from the door using either a screwdriver or a crowbar.
- We attached the metal plates to the inside fold while the door was still hanging from the track (which was easier than removing the entire door and trying to find a level surface to work on).
- Attach a metal plate to the top, bottom, and middle to connect to the bi-folds together.
- Remove the door from the top track and bottom pivot. You can remove the track and the hardware at the bottom if you choose to, however, we left ours in place in case we wanted to change it back to a bi-fold door later on.
- Attach the hinges to the side of the door.
- Before reinstalling the door, check to make sure you don’t have any floorboards sticking out that would cause an issue for your door to open/close. Cut the floorboards so they are flush with the wall if needed.
- Attach the door with hinges to the inside of the door frame. You may need assistance to hold the door in place while you do this.
- Attach the magnetic latch to the inside of the upper corner of the door frame.
- Attach the connecting magnetic piece to the top of the door and make sure it’s in position to work properly.
- That’s it! You should have a working single door now!
Video
Did you make this project?Mention @simplemadepretty or tag #simplemadepretty!