Supplies
- Cricut Link to my Project (or design it yourself following the instructions)
- Cricut Machine (Cricut Explore Air 2, Cricut Joy, or Cricut Maker Machine)
- Heavy Cardstock (I used True Brushed Paper)
- Standard Grip Cutting Mat
- Cricut Weeding Tool
- Cricut Scraper
- Glue/Glue Dots/Tape
- Glass Vase (optional)
- Battery Operated Candles
Instructions
Design or Access my Paper Lantern project in Cricut Design Space. Don't forget, if you have a Cricut Access Membership, you get access to thousands of images to use to design your lantern!
- If you are designing your own lantern, start with a rectangle shape sized at 11.5" x 7.25"
- Select the desired color for your lantern.
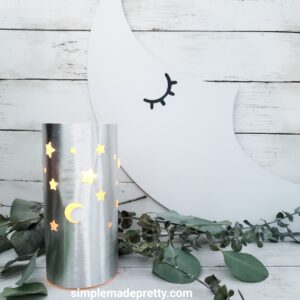
- Select shapes and other images to create your lantern design.I chose Stars (#MB34FDOB ), a Moon (#M10DBDE22 ), and a circle shape.
- Place the images over the rectangle until you achieve your desired look. Keep in mind that you should leave 1/2" on each side where the lantern will be glued together.
- Select all the images except the rectangle and choose to WELD the images together. This will change the individual images into one image that you can slice through the rectangle shape.
- Use the SLICE feature to slice the shapes through the rectangle.
Cut the design using a Cricut Machine.
- Set your machine to cut Cardstock.
- Insert a Deep Cut Blade for the best cut through thick cardstock.
- Place the cardstock on the standard green cutting mat and load it into your machine. I used True Brushed Paper which is very thick and has a metallic appearance.
- Press the start button to begin cutting the project.
- Remove the cardstock from the cutting mat to reveal your completed masterpiece. I used a weeding tool to remove some of the delicate images since the True Brushed paper is very thick.
- Use a Cricut Scraping tool if needed to remove the cardstock from the mat.
- Wrap the cardstock around the glass vase.
- Use a clear-drying glue, glue dots, or clear tape to attach the sides together and press firmly until the glue is dry.
- Place a candle or light inside your vase to use the lantern.
Video
Did you make this project?Mention @simplemadepretty or tag #simplemadepretty!